图像处理
Convolutional Neural Network
引言
本模块介绍卷积神经网络相关层/激活函数/网络的结构和概念
过拟合和欠拟合
过拟合(overfitting)和欠拟合(underfitting)都是分类训练过程中经常遇到的现象,理清它们之间的区别和含义,有助于得到更好的分类器
过拟合
参考:
过拟合(over fitting)现象常出现在分类器训练过程中,指的是分类器对训练集数据能够得到很好的结果,但是在测试集(或者其他数据)上不能够很好的分类,分类器泛化能力差
出现原因:
- 训练集数据不够大
- 训练集数据存在噪音
- 模型过于复杂导致不仅能够拟合数据还能够拟合噪音
解决方法:
- 给予足够多的数据
- 提高训练集质量
- 选用合适的模型,限制模型的拟合能力
针对卷积神经网络,限制网络复杂度的方法包括
- 减少网络层数
- 减小神经元个数
- 激活函数
线性和非线性
文章Network In Network提到传统的卷积神经网络更多的是使用线性模型(卷积操作)对数据进行抽象,所以针对非线性数据没有很好的拟合效果
理清有关线性和非线性的相关内容
什么是线性函数/非线性函数
参考:
在初级数学与解析几何中,线性函数(linear function)指仅包含单个变量的一阶多项式
$$y=ax+b$$
非线性函数(nonlinear function)指其他类型函数(不是一条直线),包括指数函数、幂函数、对数函数和二阶及以上多项式函数等等
$$ Y_{i}=f(X_{1},X_{2},…,X_{m};a_{1},a_{2},…,a_{n})+\mu $$
其中函数f是非线性函数,$\mu$是扰动项,变量x和参数a的个数不一定一致
在高等数学和线性代数中,线性函数指的是线性映射(linear mapping),指通过加法和数量乘法运算,能够实现向量空间V到向量空间W的映射;非线性函数指的是不满足线性条件的变换
什么是线性/非线性
参考:线性与非线性
线性和非线性是用来描述不同因素相互作用的特性
如果不同因素的组合作用仅是各个因素的简单叠加,那么这种作用是线性的
如果某些因素的变化会带来无法衡量的结果,那么这中作用就是非线性的
所以区分线性和非线性的关键在于其叠加性是否有效
什么是线性模型/非线性模型
参考:
如果独立变量仅被单个参数影响,那么该模型是线性的;否则就是非线性的
- 线性模型同样有可能包含多个独立变量,只要每个独立变量仅被单个参数(矩阵)影响即可
- 线性模型的决策边界是超平面的,比如在二维平面上,用一条直线就可以区分两个子集
卷积神经网络
卷积神经网络一般包括卷积操作、激活操作、池化操作、正则化操作等等
其中卷积操作就是将输入层数据和卷积核进行点积操作,是线性操作
而激活操作、池化操作和正则化操作都是非线性操作
新发展的卷积神经网络结构和函数都是关于增加非线性操作的,比如随机失火,全局平均池化,Inception结构等等,其目的就是提高网络对于非线性数据的抽象能力,从而增强泛化能力
AlexNet
网络结构
AlexNet由5个卷积层和3个全连接层组成,卷积层和全连接层都使用ReLU作为激活函数
前两个卷积层后跟随一个overlapping pool(重叠池化)层和一个局部归一化层,第三、第四和第五个卷积层直接连接
在前两个全连接层中使用局部激活函数
在文章ImageNet Classification with Deep Convolutional Neural Networks中,AlexNet使用双GPU进行训练,其结构如下所示:

在每个GPU中执行每层一半的卷积层滤波器,全连接层同样连接全部的前一层神经元
单GPU训练的AlexNet模型如下:

INPUT:227x227大小3通道彩色图像1-CONV:卷积核大小11x11,深度3,步长4,滤波器个数96POOL:滤波器大小3x3,步长22-CONV:卷积核大小5x5,深度96,零填充2,滤波器个数256POOL:滤波器大小3x3,步长23-CONV:卷积核大小3x3,深度256,零填充1,滤波器个数3844-CONV:卷积核大小3x3,深度384,零填充1,滤波器个数3845-CONV:卷积核大小3x3,深度384,零填充1,滤波器个数384POOL:滤波器大小3x3,步长21-FC:40962-FC:40963-OUTPUT:1000
224还是227
在原文中作者输入图像大小为224x224,不过经过推算不符合网络计算,应该使用227x227作为输入图像大小
神经元和参数个数
参考:
How to calculate the number of parameters of AlexNet?
整个网络约有6千万个参数和65万个神经元,计算如下:
输入层大小227x227x3,输入维数是15,4587
第一层卷积层卷积核大小为11x11x3,步长4,滤波器个数96,所以参数个数是(11x11x3)x96+96=3,4944,输出大小为55x55x96=29,0400
池化层滤波器大小为3x3,步长2,所以输出大小为27x27x96
第二层卷积层卷积核大小为5x5x96,零填充2,滤波器个数256,所以参数个数是(5x5x96)x256+256=61,4656,输出大小为27x27x256=18,6624
池化层滤波器大小为3x3,步长2,所以输出大小为13x13x256
第三层卷积层卷积核大小为3x3x256,零填充1,滤波器个数是384个,所以参数个数是(3x3x256)x384+384=88,5120,输出大小为13x13x384=6,4896
第四层卷积层卷积核大小为3x3x384,零填充1,滤波器个数是384个,所以参数个数是(3x3x384)x384+384=132,7488,输出大小为13x13x384=6,4896
第五层卷积层卷积核大小为3x3x384,零填充1,滤波器个数是256,所以参数个数是(3x3x384)x256+256=88,4992,输出大小为13x13x256=4,3264
池化层滤波器大小为3x3,步长2,所以输出大小为6x6x256
第一层全连接层大小为4096,所以参数个数是(6x6x256)x4096+4096=3775,2832,输出大小为4096
第二层全连接层大小为4096,所以参数个数是4096x4096+4096=1678,1312,输出大小为4096
输出层大小为1000,所以参数个数是4096x1000+1000=409,7000
神经元总个数是15,4587+29,0400+18,6624+6,4896+6,4896+4,3264+4096+4096+1000=81,3859(不包括输入层就是65,9272)
参数总个数是3,4944+61,4656+88,5120+132,7488+88,4992+3775,2832+1678,1312+409,7000=6237,8344
特性
主要有五点:
- 使用
ReLU作为激活函数提高泛化能力 - 使用局部响应归一化(
LRN)方法增加泛化能力 - 使用
Overlapping Pool作为池化层提高泛化能力 - 使用
Dropout减少过拟合 - 通过数据扩充(
data augmentation)减少过拟合
ReLU
之前标准的激活函数是tanh()和sigmoid()函数,文章中使用ReLU(Rectified Linear Units,修正线性单元)作为神经元激活函数
使用4层卷积神经网络训练CIFAR-10数据集,比较达到25%训练误差率的时间,使用ReLU能够比tanh快6倍

LRN
参考:深度学习: 局部响应归一化 (Local Response Normalization,LRN)
数学实现如下:

经过ReLU激活后的卷积图,第i层上的位置为(x,y)的神经元值a,需要除以其相邻n个层相同位置的神经元值之和。常量k,n,$\alpha$,$\beta$都是超参数,需要通过验证集设定,当前设定为k=2,n=5,$\alpha$=10^-4,$beta$=0.75
其目的是实现神经元的侧抑制(lateral inhibition),在不同层之间进行竞争,使响应值大的神经元变得更大,并抑制其他较小的神经元
LRN(Local Response Normalization,局部响应归一化)能够提高泛化能力:在ImageNet 1000类分类任务中,LRN减少了1.4% top-1和1.2% top5的错误率;在cifar-10数据集测试中,一个4层神经网络能达到13%测试误差率(没有LRN)和11%测试误差率(有LRN)
Overlapping Pool
传统的池化层步长和滤波器大小相同(s=z=2),所以滤波器操作不会重叠
alexnet使用重叠池化(Overlapping Pool)操作,步长小于滤波器大小(s=2,x=3,s<z),这在1000类分类任务上能够实现0.4% top-1和0.3% top-5的提高
Dropout
集合不同网络模型进行预测能够很好的减少测试误差,但是对于大网络而言需要耗费很多时间进行训练。随机失活(dropout)操作对中间隐含层进行操作,以0.5的概率判断该神经元是否失效,即这个神经元不进行前向操作,也不进行反向更新
有两点优势:
- 每次进行训练都是在不同的网络架构上,与此同时这些不同的网络架构共享同一套权重
- 减少神经元复杂的共适应性(
co-adaptation),神经元不能依赖于某个特定的神经元
在测试阶段,对所有神经元的输出都乘以0.5,以获取指数多个dropout网络产生的预测分布的几何平均值
在alexnet模型中,对前两个全连接层进行dropout操作。如果没有dropout,整个网络会严重过拟合,并且训练过程达到收敛的时间大致增加了一倍
数据扩充
文章中提高了两种方式
- 提取数据集
- 预训练数据集
首先获取256x256大小的数据集,在从中随机获取227x227大小的训练图像,同时通过水平映像(horizontal reflection)等操作来扩大数据集
其次是改变训练数据的通道强度,对于每个RGB图像像素$I_{xy}=[I_{xy}^{B},I_{xy}^{G},I_{xy}^{B}]^{T}$,添加如下值:

其中$p_{i}$是第i个特征向量(eigenvector),$\lambda_{i}$是RGB像素值3x3协方差矩阵(covariance matrix)的特征值,$\alpha_{i}$是符合零均值(mean zero)和0.1标准方差(standard deviation)的服从高斯分布的随机变量,特定训练图像上的每个像素使用的$\alpha_{i}$都不相同,再次训练时需要重新设置$\alpha_{i}$
使用PCA改变图像强度的理论基础是自然图像的一个重要特性:物体同一性不随照明强度和颜色的变化而变化
这种方法减少了至少1% top-1误差率
Android
[Ubuntu 16.04]Android Studio安装
系统配置
参考:Linux
Android Studio要求Linux系统最低配置如下
- GNOME or KDE desktop. Tested on Ubuntu® 14.04 LTS, Trusty Tahr (64-bit distribution capable of running 32-bit applications)
- 64-bit distribution capable of running 32-bit applications
- GNU C Library (glibc) 2.19 or later
- 3 GB RAM minimum, 8 GB RAM recommended; plus 1 GB for the Android Emulator
- 2 GB of available disk space minimum, 4 GB Recommended (500 MB for IDE + 1.5 GB for Android SDK and emulator system image)
- 1280 x 800 minimum screen resolution
需不需要安装JDK
参考:
Do I need Java JDK for using Android Studio?
安装Android Studio之前需不需要安装JDK
在AS官网的安装页面没有关于JDK的提示并且AS在内部集成了JDK
A copy of the latest OpenJDK comes bundled with Android Studio 2.2 and higher, and this is the JDK version we recommend you use for your Android projects. To use the bundled JDK, proceed as follows:
下载
下载地址:Android Studio
安装
参考:Linux
先安装依赖包
$ sudo apt-get install libc6:i386 libncurses5:i386 libstdc++6:i386 lib32z1 libbz2-1.0:i386
下载得到.zip文件
- 解压生成
android-studio文件夹 - 进入
android-sutdio/bin目录 - 执行
studio.sh文件:./studio.sh - 按照提示设置
代理设置
问题描述:Unable to access Android SDK add-on list
我设置了SSR,所以选择Setup Proxy->Manual proxy configuration
选择SOCKS,Host name输入127.0.0.1,Port number输入1080

也可以参考Unable to access Android SDK add-on list关闭代理设置
[Ubuntu 16.04]制作启动器
使用工具gnome-desktop-item-edit创建桌面启动器
$ gnome-desktop-item-edit --create-new ~/Desktop/

输入名字,指定启动脚本studio.sh,点击图标指定图片,还可以输入备注

这样在桌面就生成了启动器,点击即可启动Android Studio
搜索栏设置
将生成的启动器as.desktop放置到~/.local/share/applications,即可在搜索栏中找到
[Ubuntu 16.04]gradle同步失败
问题一
下载https://services.gradle.org/distributions/gradle-4.10.1-all.zip失败
解决
gradle下载失败,所以重新下载并解压到指定路径下
查看当前未下载完全的gradle-4.10.1-all.zip
$ locate gradle-4.10.1-all.zip
/home/zj/.gradle/wrapper/dists/gradle-4.10.1-all/455itskqi2qtf0v2sja68alqd/gradle-4.10.1-all.zip
/home/zj/.gradle/wrapper/dists/gradle-4.10.1-all/455itskqi2qtf0v2sja68alqd/gradle-4.10.1-all.zip.lck
/home/zj/.gradle/wrapper/dists/gradle-4.10.1-all/455itskqi2qtf0v2sja68alqd/gradle-4.10.1-all.zip.ok
进入455itskqi2qtf0v2sja68alqd文件夹,删除所有文件
$ ls
gradle-4.10.1 gradle-4.10.1-all.zip gradle-4.10.1-all.zip.lck gradle-4.10.1-all.zip.ok
$ rm -rf *
下载gradle-4.10.1-all.zip
$ wget https://services.gradle.org/distributions/gradle-4.10.1-all.zip
放置到~/.gradle/wrapper/dists/gradle-4.10.1-all/455itskqi2qtf0v2sja68alqd/路径下并解压
重新构建工程即可

问题二
org.gradle.api.resources.ResourceException: Could not get resource 'https://dl.google.com/dl/android/maven2/com/android/tools/build/gradle/3.3.1/gradle-3.3.1.pom'
参考:gradle/3.1.0/gradle-3.1.0.pom
进入AS系统设置->Build,Execution,Deployment->Gradle->Android Studio,启动Enable embedded Maven repository

问题三
ERROR: Unable to resolve dependency for ':app@debug/compileClasspath': Could not resolve com.android.support:appcompat-v7:28.0.0.
Affected Modules: app
找了很久,终于找到一个参考:android studio 3.1.4 踩神坑(mac版本)(Unable to resolve dependency for ‘:xxx compileClasspath)
我是设置了全局代理,全局gradle.properties在~/.gradle路径下,注释掉代理
#systemProp.https.proxyPort=1080
#systemProp.http.proxyHost=127.0.0.1
#systemProp.https.proxyHost=127.0.0.1
#systemProp.http.proxyPort=1080
重新构建即可
问题五
Annotation processors must be explicitly declared now. The following dependencies on the compile classpath are found to contain annotation processor. Please add them to the annotationProcessor configuration.
- butterknife-compiler-10.1.0.jar (com.jakewharton:butterknife-compiler:10.1.0)
Alternatively, set android.defaultConfig.javaCompileOptions.annotationProcessorOptions.includeCompileClasspath = true to continue with previous behavior. Note that this option is deprecated and will be removed in the future.
See https://developer.android.com/r/tools/annotation-processor-error-message.html for more details.
参考:添加依赖报错:Annotation processors must be explicitly declared now.
问题六
Process 'command '/home/zj/Android/Sdk/ndk-bundle/ndk-build'' finished with non-zero exit value 2
参考:Android Studio failed build NDK project non-zero exit value
设置sourceSets.main.jni.srcDirs = []为空
ndk
NDK开发概述
Android NDK(Native Development Kit)是一个工具包,利用C/C++编译成的库来辅助Android开发
之前通过ndk-build生成Android本地库,目前新增支持通过CMake进行本地库的构建
之前Android提供的资料对于NDK开发一直不太完善,目前新增的内容更多是关于CMake开发
ndk-build编译失败
问题一
/home/zj/Android/Sdk/ndk-bundle/build/ndk-build
Android NDK: android-8 is unsupported. Using minimum supported version android-16.
Android NDK: WARNING: APP_PLATFORM android-16 is higher than android:minSdkVersion 1 in /home/zj/Documents/PICC/android/numberocr/src/main/AndroidManifest.xml. NDK binaries will *not* be compatible with devices older than android-16. See https://android.googlesource.com/platform/ndk/+/master/docs/user/common_problems.md for more information.
Android NDK: ERROR:/home/zj/Documents/PICC/android/numberocr/src/main/jni/Android.mk:opencv_contrib: LOCAL_SRC_FILES points to a missing file
Android NDK: Check that /home/zj/Android/OpenCV-android-sdk/sdk/native/jni/../libs/arm64-v8a/libopencv_contrib.a exists or that its path is correct
/home/zj/Android/Sdk/ndk-bundle/build/core/prebuilt-library.mk:45: *** Android NDK: Aborting . Stop.
查找arm64-v8a/libopencv_contrib.a是否存在,设置Application.mk编译平台为
APP_ABI := armeabi-v7a
问题二
/home/zj/Android/Sdk/ndk-bundle/build/ndk-build
Android NDK: android-8 is unsupported. Using minimum supported version android-16.
Android NDK: WARNING: APP_PLATFORM android-16 is higher than android:minSdkVersion 1 in /home/zj/Documents/PICC/android/numberocr/src/main/AndroidManifest.xml. NDK binaries will *not* be compatible with devices older than android-16. See https://android.googlesource.com/platform/ndk/+/master/docs/user/common_problems.md for more information.
Android NDK: WARNING:/home/zj/Documents/PICC/android/numberocr/src/main/jni/Android.mk:IDNumberOCR: non-system libraries in linker flags: -latomic
Android NDK: This is likely to result in incorrect builds. Try using LOCAL_STATIC_LIBRARIES
Android NDK: or LOCAL_SHARED_LIBRARIES instead to list the library dependencies of the
Android NDK: current module
/home/zj/Documents/PICC/android/numberocr/src/main/obj/local/armeabi-v7a/objs/IDNumberOCR/main.o.d:1: *** target pattern contains no `%'. Stop.
参考:android ndk-build 时出现target pattern contain no % 的解决方法
删除obj文件夹(这个文件夹伴随着libs一起生成)里的.o文件,重新ndk-build即可
问题三
7:14: fatal error: 'array' file not found
参考:解决ndk-build : fatal error: ‘iostream’ file not found
新建Application.mk,添加
APP_STL := c++_static
问题三
/home/zj/Documents/PICC/android/faceocr/src/main/jni/main.cpp:11:8: error: expected unqualified-id
extern "C" {
^
1 error generated.
make: *** [/home/zj/Documents/PICC/android/faceocr/src/main/obj/local/arm64-v8a/objs/FaceOCR/main.o] Error 1
参考:expected unqualified-id before ….的问题
在其他头文件的类定义中需要再默认添加分号
问题四
undefined reference to `cv::CascadeClassifier::detectMultiScale
参考:OpenCV - undefined reference to ‘cv::CascadeClassifier::detectMultiScale() after NDK update
设置Application.mk中的C++标准库
APP_STL := gnustl_static
最新的NDK不再支持gnustl,所以下载之前版本的NDK进行编译
# 最新
Latest Stable Version (r19b)
# 之前版本
Android NDK, Revision 16b (December 2017)
[Ubuntu 16.04]android studio配置javah和ndk-build
参考:android ndk 入门 - 一个简单的ndk工程
在Android Studio上配置javah和ndk-build,实现简单的ndk工程
配置NDK包
首先下载NDK包,点击菜单栏Tools->SDM Manager,选择SDK Tools,下载NDK
下载完成后可以查看local.properties,里面有下载的路径
ndk.dir=/home/zj/Android/Sdk/ndk-bundle
也可以手动下载,然后再local.properties上添加路径
设置javah
命令javah用于生成JNI类型的头文件,已内置在android studio安装包中
$ $ locate javah
/home/zj/software/as/android-studio/jre/bin/javah
点击菜单栏File->Settings->Tools->External Tools,点击右侧的加号图标
添加Name、Description,指定Program、Arguments、Working directory
Program: /home/zj/software/as/android-studio/jre/bin/javahArgument: -v -jni -d $ModuleFileDir$/src/main/jni $FileClass$Working directory: $SourcepathEntry$
参数-v表示详细输出
参数-jni表示生成JNI类型的头文件
参数-d表示输出目录
宏定义ModuleFileDir表示模块路径
宏定义FileClass表示类名
宏定义SourcepathEntry表示元素路径

设置完成后,编写测试Java类HelloJni.java,加载本地库helloJNI,声明本地函数stringFromJNI
public class HelloJni {
static {
System.loadLibrary("helloJNI");
}
public static native String stringFromJNI();
}
鼠标点击HelloJni.java,右键->External Tool->javah
/home/zj/software/as/android-studio/jre/bin/javah -v -jni -d /home/zj/AndroidStudioProjects/MyApplication/app/src/main/jni com.example.myapplication.HelloJNI
[Creating file RegularFileObject[/home/zj/AndroidStudioProjects/MyApplication/app/src/main/jni/com_example_myapplication_HelloJNI.h]]
就可以在src/main/jni/路径下生成头文件com_example_myapplication_HelloJNI.h
/* DO NOT EDIT THIS FILE - it is machine generated */
#include <jni.h>
/* Header for class com_example_myapplication_HelloJNI */
#ifndef _Included_com_example_myapplication_HelloJNI
#define _Included_com_example_myapplication_HelloJNI
#ifdef __cplusplus
extern "C" {
#endif
/*
* Class: com_example_myapplication_HelloJNI
* Method: stringFromJNI
* Signature: ()Ljava/lang/String;
*/
JNIEXPORT jstring JNICALL Java_com_example_myapplication_HelloJNI_stringFromJNI
(JNIEnv *, jclass);
#ifdef __cplusplus
}
#endif
#endif
编译出错
之前配置好后都可以成功运行,但是今天点击.java文件,右键->External Tool->javah失败
/home/zj/software/java/jdk1.8.0_201/bin/javah -v -jni -d /home/zj/Documents/PICC/android/faceocr/src/main/jni com.zj.faceocr.FaceOCR
Error: Could not find class file for 'com.zj.faceocr.FaceOCR'.
母鸡,在网上找了一个参考:Javah tool error: Could not find class file for hellojni
在包文件根目录下进行javah操作才能够成功
$ javah -v -jni -d /home/zj/Documents/PICC/android/faceocr/src/main/jni com.zj.faceocr.FaceOCR
[Creating file RegularFileObject[/home/zj/Documents/PICC/android/faceocr/src/main/jni/com_zj_faceocr_FaceOCR.h]]
参考:android studio external tool 自定义工具(Javah命令)
增加参数-classpath
-classpath . -v -jni -d $ModuleFileDir$/src/main/jni $FileClass$
配置ndk-build
nkd-build命令在刚才配置的ndk-bundle包中
$ locate ndk-build
/home/zj/Android/Sdk/ndk-bundle/ndk-build
其配置方式和javah一样,点击菜单栏File->Settings->Tools->External Tools,点击右侧的加号图标
添加Name、Description,指定Program、Working directory(ndk-build不需要参数)
Program: /home/zj/Android/Sdk/ndk-bundle/build/ndk-buildWorking directory: $ModuleFileDir$/src/main/jni
宏定义ModuleFileDir表示模块路径

在jni包中新建文件main.cpp
#include <string.h>
#include <jni.h>
#include "com_example_myapplication_HelloJNI.h"
extern "C" {
JNIEXPORT jstring JNICALL Java_com_example_myapplication_HelloJNI_stringFromJNI
(JNIEnv *env, jclass cls)
{
return env->NewStringUTF("Hello from JNI !");
}
}
声明了刚才生成的头文件,同时实现了声明的函数
新建配置文件Android.mk,最简单的配置如下,参考:Android.mk
# 指示源文件在开发树中的位置,宏定义my-dir表示当前路径
LOCAL_PATH := ${call my-dir}
# 清除之前声明的变量值
include $(CLEAR_VARS)
# 模块名,不包含空格
LOCAL_MODULE := helloJNI
# 待编译的源文件
LOCAL_SRC_FILES := main.cpp
# 收集之前定义的本地变量,用于生成共享库
include $(BUILD_SHARED_LIBRARY)
鼠标点击jni文件夹,右键->External Tools->ndk-build,生成的库在src/main/libs包内(libs和jni在同一路径下)
/home/zj/Android/Sdk/ndk-bundle/build/ndk-build
Android NDK: APP_PLATFORM not set. Defaulting to minimum supported version android-16.
Android NDK: WARNING: APP_PLATFORM android-16 is higher than android:minSdkVersion 1 in /home/zj/AndroidStudioProjects/MyApplication/app/src/main/AndroidManifest.xml. NDK binaries will *not* be compatible with devices older than android-16. See https://android.googlesource.com/platform/ndk/+/master/docs/user/common_problems.md for more information.
[arm64-v8a] Compile++ : helloJNI <= main.cpp
[arm64-v8a] StaticLibrary : libstdc++.a
[arm64-v8a] SharedLibrary : libhelloJNI.so
[arm64-v8a] Install : libhelloJNI.so => libs/arm64-v8a/libhelloJNI.so
[armeabi-v7a] Compile++ thumb: helloJNI <= main.cpp
[armeabi-v7a] StaticLibrary : libstdc++.a
[armeabi-v7a] SharedLibrary : libhelloJNI.so
[armeabi-v7a] Install : libhelloJNI.so => libs/armeabi-v7a/libhelloJNI.so
[x86] Compile++ : helloJNI <= main.cpp
[x86] StaticLibrary : libstdc++.a
[x86] SharedLibrary : libhelloJNI.so
[x86] Install : libhelloJNI.so => libs/x86/libhelloJNI.so
[x86_64] Compile++ : helloJNI <= main.cpp
[x86_64] StaticLibrary : libstdc++.a
[x86_64] SharedLibrary : libhelloJNI.so
[x86_64] Install : libhelloJNI.so => libs/x86_64/libhelloJNI.so
构建
还需要在模块build.gradle上配置库路径,添加
android {
...
...
sourceSets {
main() {
jniLibs.srcDirs = ['src/main/libs']
jni.srcDirs = []
}
}
}
这样就可以调用本地函数stringFromJNI了,返回一个字符串
HelloJni.stringFromJNI();
[Ubuntu 16.04]android studio配置javah和ndk-build
首先下载OpenCV Android sdk库
编辑Android.mk
LOCAL_PATH := $(call my-dir)
include $(CLEAR_VARS)
ifdef OPENCV_ANDROID_SDK
ifneq ("","$(wildcard $(OPENCV_ANDROID_SDK)/OpenCV.mk)")
include ${OPENCV_ANDROID_SDK}/OpenCV.mk
else
include ${OPENCV_ANDROID_SDK}/sdk/native/jni/OpenCV.mk
endif
else
include /home/zj/Android/OpenCV-android-sdk/sdk/native/jni/OpenCV.mk
endif
LOCAL_SRC_FILES := main.cpp ocrutil.cpp ocr.cpp
LOCAL_C_INCLUDES += $(LOCAL_PATH)
LOCAL_LDLIBS += -llog -ldl
LOCAL_MODULE := IDNumberOCR
include $(BUILD_SHARED_LIBRARY)
编辑Application.mk
APP_STL := c++_static
APP_CPPFLAGS := -frtti -fexceptions
APP_ABI := arm64-v8a armeabi-v7a
APP_PLATFORM := android-8
dlopen failed: library “libopencv_java3.so” not found
问题描述
2019-02-28 20:11:25.855 17090-17090/com.zj.picc E/AndroidRuntime: FATAL EXCEPTION: main
Process: com.zj.picc, PID: 17090
java.lang.UnsatisfiedLinkError: dlopen failed: library "libopencv_java3.so" not found
方法一
参考:Unable to link native library in OpenCV Android sample
我用的opencv-android-sdk版本是3.4.2,搜索是否包含libopencv_java3.so
$ locate libopencv_java3.so
/home/zj/Android/OpenCV-android-sdk/sdk/native/libs/arm64-v8a/libopencv_java3.so
/home/zj/Android/OpenCV-android-sdk/sdk/native/libs/armeabi/libopencv_java3.so
/home/zj/Android/OpenCV-android-sdk/sdk/native/libs/armeabi-v7a/libopencv_java3.so
/home/zj/Android/OpenCV-android-sdk/sdk/native/libs/mips/libopencv_java3.so
/home/zj/Android/OpenCV-android-sdk/sdk/native/libs/mips64/libopencv_java3.so
/home/zj/Android/OpenCV-android-sdk/sdk/native/libs/x86/libopencv_java3.so
/home/zj/Android/OpenCV-android-sdk/sdk/native/libs/x86_64/libopencv_java3.so
将对应版本(arm64-v8a、armeabi-v7a)的libopencv_java3.so文件复制到libs文件夹下,同时修改加载静态库代码
static {
System.loadLibrary("opencv_java3");
System.loadLibrary("NumberOCR");
}
OpenCV
OpenCV概述
OpenCV(Open Source Computer Vision Library,开源计算机视觉库),是一个基于BSD协议的计算机视觉库
OpenCV支持多语言开发,包括C++,Python和Java
OpenCV支持多平台开发,包括Windows,Linux,Max OS,Ios和Android
官网地址:OpenCV
[Ubuntu 16.04][Anaconda3][Python3.6]OpenCV-3.4.2源码安装
版本设置
下载源码
$ git clone https://github.com/opencv/opencv.git
切换到3.4.2版本
# 新建分支,命名为3.4.2
$ git checkout -b 3.4.2
# 查询tag,3.4.2版本的提交号
$ git show 3.4.2
warning: refname '3.4.2' is ambiguous.
tag 3.4.2
Tagger: Alexander Alekhin <alexander.alekhin@intel.com>
Date: Wed Jul 4 14:06:58 2018 +0300
OpenCV 3.4.2
commit 9e1b1e5389237c2b9f6c7b9d7715d9836c0a5de1
Merge: d69a327 a0baae8
Author: Alexander Alekhin <alexander.alekhin@intel.com>
Date: Wed Jul 4 14:05:47 2018 +0300
OpenCV 3.4.2
# 切换到该版本
$ git reset --hard 9e1b1e5389237c2b9f6c7b9d7715d9836c0a5de1
# 当前代码就是opencv-3.4.2源码
$ git log
commit 9e1b1e5389237c2b9f6c7b9d7715d9836c0a5de1
Merge: d69a327 a0baae8
Author: Alexander Alekhin <alexander.alekhin@intel.com>
Date: Wed Jul 4 14:05:47 2018 +0300
OpenCV 3.4.2
安装依赖
参考:
Install OpenCV-Python in Ubuntu
[compiler] sudo apt-get install build-essential gcc g++
[required] sudo apt-get install cmake git libgtk2.0-dev pkg-config libavcodec-dev libavformat-dev libswscale-dev gtk2-devel libv4l-devel ffmpeg-devel gstreamer-plugins-base-devel
[optional] sudo apt-get install python-dev python-numpy libtbb2 libtbb-dev libjpeg-dev libpng-dev libtiff-dev libjasper-dev libdc1394-22-dev openexr-devel libwebp-devel
编译生成动态库
# 进入opencv源码路径,新建用于存储配置文件的build文件夹和用于存储库文件的install文件夹
$ cd opencv
$ mkdir build
$ mkdir install
# 进入build文件夹,利用cmake生成makefile
$ cd build
$ cmake -D CMAKE_BUILD_TYPE=DEBUG \
-D CMAKE_INSTALL_PREFIX=../install \
-D BUILD_DOCS=ON \
-D BUILD_EXAMPLES=ON \
-D INSTALL_PYTHON_EXAMPLES=ON \
-D OPENCV_PYTHON3_VERSION=ON \
-D PYTHON3_EXECUTABLE=<anaconda_work_dir>/envs/<environment>/bin/python \
-D PYTHON3_LIBRARY=<anaconda_work_dir>/envs/<environment>/lib/python3.6m.so \
-D PYTHON3_INCLUDE_DIR=<anaconda_work_dir>/envs/<environment>/include/python3.6m \
-D PYTHON3_NUMPY_INCLUDE_DIRS=<anaconda_work_dir>/envs/<environment>/lib/python3.6/site-packages/numpy/core/include
-D Pylint_DIR=<anaconda_work_dir>/envs/<environment>/bin/pylint
..
# 实现如下
$ cmake -D CMAKE_BUILD_TYPE=DEBUG -D CMAKE_INSTALL_PREFIX=../install -D BUILD_DOCS=ON -D BUILD_EXAMPLES=ON -D INSTALL_PYTHON_EXAMPLES=ON -D PYTHON3_EXECUTABLE=/home/zj/software/anaconda/anaconda3/envs/py37/bin/python -D PYTHON3_LIBRARY=/home/zj/software/anaconda/anaconda3/envs/py37/lib/libpython3.7m.so -D PYTHON3_INCLUDE_DIR=/home/zj/software/anaconda/anaconda3/envs/py37/include/python3.7m -D PYTHON3_NUMPY_INCLUDE_DIRS=/home/zj/software/anaconda/anaconda3/envs/py37/lib/python3.7/site-packages/numpy/core/include -D Pylint_DIR=/home/zj/software/anaconda/anaconda3/envs/py37/bin/pylint ..
-- The CXX compiler identification is GNU 5.4.0
-- The C compiler identification is GNU 5.4.0
-- Check for working CXX compiler: /usr/bin/c++
-- Check for working CXX compiler: /usr/bin/c++ -- works
...
...
-- Found PythonInterp: /usr/bin/python2.7 (found suitable version "2.7.12", minimum required is "2.7")
-- Found PythonLibs: /usr/lib/x86_64-linux-gnu/libpython2.7.so (found suitable exact version "2.7.12")
-- Found PythonInterp: /home/zj/software/anaconda/anaconda3/envs/py37/bin/python (found suitable version "3.7.2", minimum required is "3.2")
-- Found PythonLibs: /home/zj/software/anaconda/anaconda3/envs/py37/lib/libpython3.7m.so (found suitable exact version "3.7.2")
...
...
-- Check if the system is big endian - little endian
-- Found ZLIB: /home/zj/software/anaconda/anaconda3/envs/py37/lib/libz.so (found suitable version "1.2.11", minimum required is "1.2.3")
-- Found JPEG: /home/zj/software/anaconda/anaconda3/envs/py37/lib/libjpeg.so
-- Found TIFF: /usr/lib/x86_64-linux-gnu/libtiff.so (found version "4.0.6")
...
...
-- Found Jasper: /usr/lib/x86_64-linux-gnu/libjasper.so (found version "1.900.1")
-- Found ZLIB: /home/zj/software/anaconda/anaconda3/envs/py37/lib/libz.so (found version "1.2.11")
-- Found PNG: /home/zj/software/anaconda/anaconda3/envs/py37/lib/libpng.so (found version "1.6.36")
-- Looking for /home/zj/software/anaconda/anaconda3/envs/py37/include/libpng/png.h
-- Looking for /home/zj/software/anaconda/anaconda3/envs/py37/include/libpng/png.h - not found
...
...
-- Found Pylint: /home/zj/software/anaconda/anaconda3/envs/py37/bin/pylint
...
...
-- OpenCV Python: during development append to PYTHONPATH: /home/zj/opencv/opencv/build/python_loader
...
...
-- Pylint: registered 163 targets. Build 'check_pylint' target to run checks ("cmake --build . --target check_pylint" or "make check_pylint")
--
-- General configuration for OpenCV 3.4.5-dev =====================================
-- Version control: 3.4.5-195-g0e70363
--
-- Platform:
-- Timestamp: 2019-02-23T03:25:09Z
-- Host: Linux 4.15.0-43-generic x86_64
-- CMake: 3.5.1
-- CMake generator: Unix Makefiles
-- CMake build tool: /usr/bin/make
-- Configuration: DEBUG
--
-- CPU/HW features:
-- Baseline: SSE SSE2 SSE3
-- requested: SSE3
-- Dispatched code generation: SSE4_1 SSE4_2 FP16 AVX AVX2 AVX512_SKX
-- requested: SSE4_1 SSE4_2 AVX FP16 AVX2 AVX512_SKX
-- SSE4_1 (6 files): + SSSE3 SSE4_1
-- SSE4_2 (2 files): + SSSE3 SSE4_1 POPCNT SSE4_2
-- FP16 (1 files): + SSSE3 SSE4_1 POPCNT SSE4_2 FP16 AVX
-- AVX (6 files): + SSSE3 SSE4_1 POPCNT SSE4_2 AVX
-- AVX2 (18 files): + SSSE3 SSE4_1 POPCNT SSE4_2 FP16 FMA3 AVX AVX2
-- AVX512_SKX (2 files): + SSSE3 SSE4_1 POPCNT SSE4_2 FP16 FMA3 AVX AVX2 AVX_512F AVX512_SKX
--
-- C/C++:
-- Built as dynamic libs?: YES
-- C++ Compiler: /usr/bin/c++ (ver 5.4.0)
-- C++ flags (Release): -fsigned-char -W -Wall -Werror=return-type -Werror=non-virtual-dtor -Werror=address -Werror=sequence-point -Wformat -Werror=format-security -Wmissing-declarations -Wundef -Winit-self -Wpointer-arith -Wshadow -Wsign-promo -Wuninitialized -Winit-self -Wno-narrowing -Wno-delete-non-virtual-dtor -Wno-comment -fdiagnostics-show-option -Wno-long-long -pthread -fomit-frame-pointer -ffunction-sections -fdata-sections -msse -msse2 -msse3 -fvisibility=hidden -fvisibility-inlines-hidden -O3 -DNDEBUG -DNDEBUG
-- C++ flags (Debug): -fsigned-char -W -Wall -Werror=return-type -Werror=non-virtual-dtor -Werror=address -Werror=sequence-point -Wformat -Werror=format-security -Wmissing-declarations -Wundef -Winit-self -Wpointer-arith -Wshadow -Wsign-promo -Wuninitialized -Winit-self -Wno-narrowing -Wno-delete-non-virtual-dtor -Wno-comment -fdiagnostics-show-option -Wno-long-long -pthread -fomit-frame-pointer -ffunction-sections -fdata-sections -msse -msse2 -msse3 -fvisibility=hidden -fvisibility-inlines-hidden -g -O0 -DDEBUG -D_DEBUG
-- C Compiler: /usr/bin/cc
-- C flags (Release): -fsigned-char -W -Wall -Werror=return-type -Werror=non-virtual-dtor -Werror=address -Werror=sequence-point -Wformat -Werror=format-security -Wmissing-declarations -Wmissing-prototypes -Wstrict-prototypes -Wundef -Winit-self -Wpointer-arith -Wshadow -Wuninitialized -Winit-self -Wno-narrowing -Wno-comment -fdiagnostics-show-option -Wno-long-long -pthread -fomit-frame-pointer -ffunction-sections -fdata-sections -msse -msse2 -msse3 -fvisibility=hidden -O3 -DNDEBUG -DNDEBUG
-- C flags (Debug): -fsigned-char -W -Wall -Werror=return-type -Werror=non-virtual-dtor -Werror=address -Werror=sequence-point -Wformat -Werror=format-security -Wmissing-declarations -Wmissing-prototypes -Wstrict-prototypes -Wundef -Winit-self -Wpointer-arith -Wshadow -Wuninitialized -Winit-self -Wno-narrowing -Wno-comment -fdiagnostics-show-option -Wno-long-long -pthread -fomit-frame-pointer -ffunction-sections -fdata-sections -msse -msse2 -msse3 -fvisibility=hidden -g -O0 -DDEBUG -D_DEBUG
-- Linker flags (Release):
-- Linker flags (Debug):
-- ccache: NO
-- Precompiled headers: YES
-- Extra dependencies: dl m pthread rt
-- 3rdparty dependencies:
--
-- OpenCV modules:
-- To be built: calib3d core dnn features2d flann highgui imgcodecs imgproc java_bindings_generator ml objdetect photo python2 python3 python_bindings_generator shape stitching superres ts video videoio videostab
-- Disabled: world
-- Disabled by dependency: -
-- Unavailable: cudaarithm cudabgsegm cudacodec cudafeatures2d cudafilters cudaimgproc cudalegacy cudaobjdetect cudaoptflow cudastereo cudawarping cudev java js viz
-- Applications: tests perf_tests examples apps
-- Documentation: NO
-- Non-free algorithms: NO
--
-- GUI:
-- GTK+: YES (ver 3.18.9)
-- GThread : YES (ver 2.48.2)
-- GtkGlExt: NO
-- VTK support: NO
--
-- Media I/O:
-- ZLib: /home/zj/software/anaconda/anaconda3/envs/py37/lib/libz.so (ver 1.2.11)
-- JPEG: /home/zj/software/anaconda/anaconda3/envs/py37/lib/libjpeg.so (ver 90)
-- WEBP: build (ver encoder: 0x020e)
-- PNG: /home/zj/software/anaconda/anaconda3/envs/py37/lib/libpng.so (ver 1.6.36)
-- TIFF: /usr/lib/x86_64-linux-gnu/libtiff.so (ver 42 / 4.0.6)
-- JPEG 2000: /usr/lib/x86_64-linux-gnu/libjasper.so (ver 1.900.1)
-- OpenEXR: build (ver 1.7.1)
-- HDR: YES
-- SUNRASTER: YES
-- PXM: YES
--
-- Video I/O:
-- DC1394: YES (ver 2.2.4)
-- FFMPEG: YES
-- avcodec: YES (ver 56.60.100)
-- avformat: YES (ver 56.40.101)
-- avutil: YES (ver 54.31.100)
-- swscale: YES (ver 3.1.101)
-- avresample: NO
-- GStreamer: NO
-- libv4l/libv4l2: NO
-- v4l/v4l2: linux/videodev2.h
--
-- Parallel framework: pthreads
--
-- Trace: YES (with Intel ITT)
--
-- Other third-party libraries:
-- Intel IPP: 2019.0.0 Gold [2019.0.0]
-- at: /home/zj/opencv/opencv/build/3rdparty/ippicv/ippicv_lnx/icv
-- Intel IPP IW: sources (2019.0.0)
-- at: /home/zj/opencv/opencv/build/3rdparty/ippicv/ippicv_lnx/iw
-- Lapack: NO
-- Eigen: NO
-- Custom HAL: NO
-- Protobuf: build (3.5.1)
--
-- OpenCL: YES (no extra features)
-- Include path: /home/zj/opencv/opencv/3rdparty/include/opencl/1.2
-- Link libraries: Dynamic load
--
-- Python 2:
-- Interpreter: /usr/bin/python2.7 (ver 2.7.12)
-- Libraries: /usr/lib/x86_64-linux-gnu/libpython2.7.so (ver 2.7.12)
-- numpy: /usr/lib/python2.7/dist-packages/numpy/core/include (ver 1.11.0)
-- install path: lib/python2.7/dist-packages/cv2/python-2.7
--
-- Python 3:
-- Interpreter: /home/zj/software/anaconda/anaconda3/envs/py37/bin/python (ver 3.7.2)
-- Libraries: /home/zj/software/anaconda/anaconda3/envs/py37/lib/libpython3.7m.so (ver 3.7.2)
-- numpy: /home/zj/software/anaconda/anaconda3/envs/py37/lib/python3.7/site-packages/numpy/core/include (ver 1.15.4)
-- install path: lib/python3.7/site-packages/cv2/python-3.7
--
-- Python (for build): /usr/bin/python2.7
-- Pylint: /home/zj/software/anaconda/anaconda3/envs/py37/bin/pylint (ver: 3.7.2, checks: 163)
--
-- Java:
-- ant: NO
-- JNI: NO
-- Java wrappers: NO
-- Java tests: NO
--
-- Install to: /home/zj/opencv/opencv/install
-- -----------------------------------------------------------------
--
-- Configuring done
-- Generating done
-- Build files have been written to: /home/zj/opencv/opencv/build
# 编译
$ make -j8
$ sudo make install
最终生成的动态库在install文件夹内
C++库配置
配置环境变量PKG_CONFIG_PATH
# opencv3.4
$ export PKG_CONFIG_PATH=/home/zj/opencv/install/lib/pkgconfig
是否能查询到头文件和库文件
$ pkg-config --libs opencv
-L/home/zj/opencv/opencv/install/lib -lopencv_ml -lopencv_shape -lopencv_objdetect -lopencv_stitching -lopencv_superres -lopencv_dnn -lopencv_videostab -lopencv_video -lopencv_photo -lopencv_calib3d -lopencv_features2d -lopencv_highgui -lopencv_flann -lopencv_videoio -lopencv_imgcodecs -lopencv_imgproc -lopencv_core
$ pkg-config --cflags opencv
-I/home/zj/opencv/opencv/install/include/opencv -I/home/zj/opencv/opencv/install/include
python库配置
编译好后的python库放置在install/lib中
/home/zj/opencv/install/lib/python3.7/site-packages/
将库里的文件放置在anaconda相应路径下
/home/zj/software/anaconda/anaconda3/lib/python3.7/site-packages/
这样就可以执行python程序了
[Ubuntu 16.04][Anaconda3][Python3.6]OpenCV_Contrib-3.4.2源码安装
如果要同时编译opencv_contrib模块,那么在opencv同一路径下下载opencv_contrib源码(注意:要在同一版本下编译)
$ cd ~/<my_working_directory>
$ git clone https://github.com/opencv/opencv.git
$ git clone https://github.com/opencv/opencv_contrib.git
$ cd opencv_contrib
# 切换到3.4.2
$ git checkout -b 3.4.2
$ git show 3.4.2
warning: refname '3.4.2' is ambiguous.
tag 3.4.2
Tagger: Alexander Alekhin <alexander.alekhin@intel.com>
Date: Mon Jul 2 18:34:56 2018 +0300
OpenCV 3.4.2
commit d4e02869454998c9af5af1a5c3392cdc0c31dd22
Merge: 02b991a edd4514
Author: Alexander Alekhin <alexander.a.alekhin@gmail.com>
Date: Mon Jul 2 10:57:26 2018 +0000
Merge pull request #1679 from SongChiYoung:master
$ git reset --hard d4e02869454998c9af5af1a5c3392cdc0c31dd22
在编译opencv源码时添加参数OPENCV_EXTRA_MODULES_PATH,指向opencv_contrib/modules即可
$ cmake -D CMAKE_BUILD_TYPE=DEBUG -D CMAKE_INSTALL_PREFIX=../install -D BUILD_DOCS=ON -D BUILD_EXAMPLES=ON -D INSTALL_PYTHON_EXAMPLES=ON -D PYTHON3_EXECUTABLE=/home/zj/software/anaconda/anaconda3/envs/py36/bin/python -D PYTHON3_LIBRARY=/home/zj/software/anaconda/anaconda3/envs/py36/lib/libpython3.6m.so -D PYTHON3_INCLUDE_DIR=/home/zj/software/anaconda/anaconda3/envs/py36/include/python3.6m -D PYTHON3_NUMPY_INCLUDE_DIRS=/home/zj/software/anaconda/anaconda3/envs/py36/lib/python3.6/site-packages/numpy/core/include -D Pylint_DIR=/home/zj/software/anaconda/anaconda3/envs/py36/bin/pylint -D OPENCV_EXTRA_MODULES_PATH=/home/zj/opencv/opencv_contrib/modules ..
...
...
-- General configuration for OpenCV 3.4.2 =====================================
-- Version control: 3.4.2
--
-- Extra modules:
-- Location (extra): /home/zj/opencv/opencv_contrib/modules
-- Version control (extra): 3.4.2
--
-- Platform:
-- Timestamp: 2019-02-26T11:20:33Z
-- Host: Linux 4.15.0-43-generic x86_64
-- CMake: 3.5.1
-- CMake generator: Unix Makefiles
-- CMake build tool: /usr/bin/make
-- Configuration: DEBUG
--
...
...
-- OpenCV modules:
-- To be built: aruco bgsegm bioinspired calib3d ccalib core datasets dnn dnn_objdetect dpm face features2d flann freetype fuzzy hfs highgui img_hash imgcodecs imgproc java_bindings_generator line_descriptor ml objdetect optflow phase_unwrapping photo plot python2 python3 python_bindings_generator reg rgbd saliency shape stereo stitching structured_light superres surface_matching text tracking ts video videoio videostab xfeatures2d ximgproc xobjdetect xphoto
-- Disabled: js world
-- Disabled by dependency: -
-- Unavailable: cnn_3dobj cudaarithm cudabgsegm cudacodec cudafeatures2d cudafilters cudaimgproc cudalegacy cudaobjdetect cudaoptflow cudastereo cudawarping cudev cvv hdf java matlab ovis sfm viz
-- Applications: tests perf_tests examples apps
-- Documentation: NO
-- Non-free algorithms: NO
--
-- GUI:
-- GTK+: YES (ver 3.18.9)
-- GThread : YES (ver 2.48.2)
-- GtkGlExt: NO
-- VTK support: NO
--
-- Media I/O:
-- ZLib: /home/zj/software/anaconda/anaconda3/envs/py36/lib/libz.so (ver 1.2.11)
-- JPEG: /usr/lib/x86_64-linux-gnu/libjpeg.so (ver 80)
-- WEBP: build (ver encoder: 0x020e)
-- PNG: /usr/lib/x86_64-linux-gnu/libpng.so (ver 1.2.54)
-- TIFF: /usr/lib/x86_64-linux-gnu/libtiff.so (ver 42 / 4.0.6)
-- JPEG 2000: /usr/lib/x86_64-linux-gnu/libjasper.so (ver 1.900.1)
-- OpenEXR: build (ver 1.7.1)
-- HDR: YES
-- SUNRASTER: YES
-- PXM: YES
--
-- Video I/O:
-- DC1394: YES (ver 2.2.4)
-- FFMPEG: YES
-- avcodec: YES (ver 56.60.100)
-- avformat: YES (ver 56.40.101)
-- avutil: YES (ver 54.31.100)
-- swscale: YES (ver 3.1.101)
-- avresample: NO
-- GStreamer: NO
-- libv4l/libv4l2: NO
-- v4l/v4l2: linux/videodev2.h
-- gPhoto2: NO
--
-- Parallel framework: pthreads
--
-- Trace: YES (with Intel ITT)
--
-- Other third-party libraries:
-- Intel IPP: 2017.0.3 [2017.0.3]
-- at: /home/zj/opencv/opencv/build/3rdparty/ippicv/ippicv_lnx
-- Intel IPP IW: sources (2017.0.3)
-- at: /home/zj/opencv/opencv/build/3rdparty/ippicv/ippiw_lnx
-- Lapack: NO
-- Eigen: NO
-- Custom HAL: NO
-- Protobuf: build (3.5.1)
--
-- OpenCL: YES (no extra features)
-- Include path: /home/zj/opencv/opencv/3rdparty/include/opencl/1.2
-- Link libraries: Dynamic load
--
-- Python 2:
-- Interpreter: /usr/bin/python2.7 (ver 2.7.12)
-- Libraries: /usr/lib/x86_64-linux-gnu/libpython2.7.so (ver 2.7.12)
-- numpy: /usr/lib/python2.7/dist-packages/numpy/core/include (ver 1.11.0)
-- packages path: lib/python2.7/dist-packages
--
-- Python 3:
-- Interpreter: /home/zj/software/anaconda/anaconda3/envs/py36/bin/python (ver 3.6.8)
-- Libraries: /home/zj/software/anaconda/anaconda3/envs/py36/lib/libpython3.6m.so (ver 3.6.8)
-- numpy: /home/zj/software/anaconda/anaconda3/envs/py36/lib/python3.6/site-packages/numpy/core/include (ver 1.15.4)
-- packages path: lib/python3.6/site-packages
--
-- Python (for build): /usr/bin/python2.7
-- Pylint: /home/zj/software/anaconda/anaconda3/envs/py36/bin/pylint (ver: 3.6.8, checks: 149)
--
-- Java:
-- ant: NO
-- JNI: NO
-- Java wrappers: NO
-- Java tests: NO
--
-- Matlab: NO
--
-- Install to: /home/zj/opencv/opencv/install
-- -----------------------------------------------------------------
--
-- Configuring done
-- Generating done
-- Build files have been written to: /home/zj/opencv/opencv/build
# 编译
$ make -j8
$ sudo make install
编译完成后修改PKG_CONFIG_PATH的路径
$ pkg-config --libs opencv
-L/home/zj/opencv/opencv/install/lib -lopencv_stitching -lopencv_superres -lopencv_videostab -lopencv_stereo -lopencv_dpm -lopencv_rgbd -lopencv_surface_matching -lopencv_xobjdetect -lopencv_aruco -lopencv_optflow -lopencv_hfs -lopencv_saliency -lopencv_xphoto -lopencv_freetype -lopencv_reg -lopencv_xfeatures2d -lopencv_shape -lopencv_bioinspired -lopencv_dnn_objdetect -lopencv_tracking -lopencv_plot -lopencv_ximgproc -lopencv_fuzzy -lopencv_ccalib -lopencv_img_hash -lopencv_face -lopencv_photo -lopencv_objdetect -lopencv_datasets -lopencv_text -lopencv_dnn -lopencv_ml -lopencv_bgsegm -lopencv_video -lopencv_line_descriptor -lopencv_structured_light -lopencv_calib3d -lopencv_features2d -lopencv_highgui -lopencv_videoio -lopencv_imgcodecs -lopencv_phase_unwrapping -lopencv_imgproc -lopencv_flann -lopencv_core
$ pkg-config --cflags opencv
-I/home/zj/opencv/opencv/install/include/opencv -I/home/zj/opencv/opencv/install/include
-DOPENCV_EXTRA_
MODULES_PATH=/home/zj/opencv/opencv_contrib/modules
[Ubuntu 16.04]OpenCV-3.4测试
编译生成OpenCV C++库和Python库后进行代码测试
C++
参考:Using OpenCV with gcc and CMake
使用2种方式测试C++库
- 编写
makefile文件配置 - 编写
CMakeLists.txt文件配置
编写测试文件DisplayImage.cpp
#include <stdio.h>
#include <opencv2/opencv.hpp>
using namespace cv;
int main(int argc, char** argv )
{
if ( argc != 2 )
{
printf("usage: DisplayImage.out <Image_Path>\n");
return -1;
}
Mat image;
image = imread( argv[1], 1 );
if ( !image.data )
{
printf("No image data \n");
return -1;
}
namedWindow("Display Image", WINDOW_AUTOSIZE );
imshow("Display Image", image);
waitKey(0);
return 0;
}
编写makefile文件配置
新建makefile
INCLUDE=$(shell pkg-config --cflags opencv)
LIB=$(shell pkg-config --libs opencv)
SOURCE=DisplayImage.cpp
RES=DisplayImage
$(RES):$(SOURCE)
g++ $(SOURCE) $(INCLUDE) $(LIB) -o $(RES)
clean:
rm $(RES)
编译、链接生成可执行文件
$ ls
DisplayImage.cpp lena.jpg makefile
$ make
g++ DisplayImage.cpp -I/home/zj/opencv/opencv/install/include/opencv -I/home/zj/opencv/opencv/install/include -L/home/zj/opencv/opencv/install/lib -lopencv_ml -lopencv_shape -lopencv_objdetect -lopencv_stitching -lopencv_superres -lopencv_dnn -lopencv_videostab -lopencv_video -lopencv_photo -lopencv_calib3d -lopencv_features2d -lopencv_highgui -lopencv_flann -lopencv_videoio -lopencv_imgcodecs -lopencv_imgproc -lopencv_core -o DisplayImage
$ ./DisplayImage lena.jpg
问题一:make编译错误
$ make
makefile:7: *** missing separator. Stop.
参考:makefile:4: *** missing separator. Stop
是因为makefile需要用tab键进行缩进而不是空格键,重新用tab键进行缩进即可
问题二:加载共享库出错
$ ./DisplayImage lena.jpg
./DisplayImage: error while loading shared libraries: libopencv_highgui.so.3.4: cannot open shared object file: No such file or directory
首先查询生成可执行文件的动态链接库路径
$ ldd DisplayImage
linux-vdso.so.1 => (0x00007ffca0a96000)
libopencv_highgui.so.3.4 => not found
libopencv_imgcodecs.so.3.4 => not found
libopencv_core.so.3.4 => not found
libstdc++.so.6 => /usr/lib/x86_64-linux-gnu/libstdc++.so.6 (0x00007f7a5c64d000)
libgcc_s.so.1 => /lib/x86_64-linux-gnu/libgcc_s.so.1 (0x00007f7a5c437000)
libc.so.6 => /lib/x86_64-linux-gnu/libc.so.6 (0x00007f7a5c06d000)
libm.so.6 => /lib/x86_64-linux-gnu/libm.so.6 (0x00007f7a5bd64000)
/lib64/ld-linux-x86-64.so.2 (0x00007f7a5c9cf000)
发现它缺少了libopencv_highgui.so.3.4、libopencv_imgcodecs.so.3.4和libopencv_core.so.3.4,这些库应该都在OpenCV的安装路径下
$ locate libopencv_highgui.so.3.4
/home/zj/opencv/opencv/build/lib/libopencv_highgui.so.3.4
/home/zj/opencv/opencv/build/lib/libopencv_highgui.so.3.4.5
/home/zj/opencv/opencv/install/lib/libopencv_highgui.so.3.4
/home/zj/opencv/opencv/install/lib/libopencv_highgui.so.3.4.5
设置环境变量LD_LIBRARY_PATH,添加相应库路径即可
$ export LD_LIBRARY_PATH=/home/zj/opencv/opencv/install/lib/
编写CMakeLists.txt文件配置
新建CMakeLists.txt
$ vim CMakeLists.txt
cmake_minimum_required(VERSION 2.8)
project( DisplayImage )
find_package( OpenCV REQUIRED )
MESSAGE("OpenCV version: ${OpenCV_VERSION}")
include_directories( ${OpenCV_INCLUDE_DIRS} )
add_executable( DisplayImage DisplayImage.cpp )
target_link_libraries( DisplayImage ${OpenCV_LIBS} )
编译、链接生成可执行文件
$ ls
CMakeLists.txt DisplayImage.cpp lena.jpg
$ cmake .
$ make
$ ./DisplayImage lena.jpg
问题一:CMake编译错误
$ cmake .
...
...
CMake Error at CMakeLists.txt:3 (find_package):
By not providing "FindOpenCV.cmake" in CMAKE_MODULE_PATH this project has
asked CMake to find a package configuration file provided by "OpenCV", but
CMake did not find one.
Could not find a package configuration file provided by "OpenCV" with any
of the following names:
OpenCVConfig.cmake
opencv-config.cmake
Add the installation prefix of "OpenCV" to CMAKE_PREFIX_PATH or set
"OpenCV_DIR" to a directory containing one of the above files. If "OpenCV"
provides a separate development package or SDK, be sure it has been
installed.
-- Configuring incomplete, errors occurred!
See also "/home/zj/opencv/cmake_test/CMakeFiles/CMakeOutput.log".
错误信息显示无法发现OpenCV提供的包配置文件,需要添加OpenCV安装路径到CMAKE_PREFIX_PATH或者OpenCV_DIR
参考:OpenCV 3.2.0 CMakeLists.txt question
$ cmake -D CMAKE_PREFIX_PATH=/home/zj/opencv/install3.4 .
-- Found OpenCV: /home/zj/opencv/install3.4 (found version "3.4.5")
OpenCV version: 3.4.5
-- Configuring done
-- Generating done
-- Build files have been written to: /home/zj/opencv/cmake_test
或者把路径添加到配置文件
$ vim CMakeLists.txt
cmake_minimum_required(VERSION 2.8)
project( DisplayImage )
set(CMAKE_PREFIX_PATH /home/zj/opencv/install3.4)
find_package( OpenCV REQUIRED )
MESSAGE("OpenCV version: ${OpenCV_VERSION}")
include_directories( ${OpenCV_INCLUDE_DIRS} )
add_executable( DisplayImage DisplayImage.cpp )
target_link_libraries( DisplayImage ${OpenCV_LIBS} )
重新运行
$ cmake .
-- The C compiler identification is GNU 5.4.0
-- The CXX compiler identification is GNU 5.4.0
-- Check for working C compiler: /usr/bin/cc
-- Check for working C compiler: /usr/bin/cc -- works
-- Detecting C compiler ABI info
-- Detecting C compiler ABI info - done
-- Detecting C compile features
-- Detecting C compile features - done
-- Check for working CXX compiler: /usr/bin/c++
-- Check for working CXX compiler: /usr/bin/c++ -- works
-- Detecting CXX compiler ABI info
-- Detecting CXX compiler ABI info - done
-- Detecting CXX compile features
-- Detecting CXX compile features - done
-- Found OpenCV: /home/zj/opencv/install3.4 (found version "3.4.5")
OpenCV version: 3.4.5
-- Configuring done
-- Generating done
-- Build files have been written to: /home/zj/opencv/cmake_test
Python
编写测试程序DisplayImage.py
$ vim DisplayImage.py
#-*- coding: utf-8 -*-
import cv2
if __name__ == '__main__':
img = cv2.imread('lena.jpg')
if img is None:
print('Error: No image data\n')
exit(1)
cv2.imshow('Display Image', img)
cv2.waitKey(0)
测试
$ $ ls
DisplayImage.py lena.jpg
$ python DisplayImage.py
[PyCharm]解码opencv python库
opencv源码编译得到的python库仅是一个.so文件,在vscode中编辑代码时无法跳转到内部,但是在pycharm中可以查看函数头和常量定义
进入(Ctrl+B)之后发现是一个__init__.py文件,存储python_stubs路径下
/home/zj/.PyCharm2018.3/system/python_stubs/-1678504091/cv2/__init__.py
上网查找了许久,参考
PyCharm, what is python_stubs?
pycharm自己解码了cv2.so文件,生成了类头文件以便更好的编程
[Ubuntu 16.04][Anaconda3]Opencv-4.0.1安装
参考:
[Ubuntu 16.04][Anaconda3][Python3.6]OpenCV-3.4.2源码安装
[Ubuntu 16.04][Anaconda3][Python3.6]OpenCV_Contrib-3.4.2源码安装
4.x 变化
参考:
2018年OpenCV发布了4.0.1版本,保留了OpenCV 3.x中绝大多数的设计原则和库布局,但同时有很多的更新,介绍其中几个
OpenCV 4.0采用C++11库,需要C++11编译器,同时最低CMake的版本为3.5.1- 已将二维码(
QR code)检测器和解码器添加到objdetect模块中。 - 取消了绝大多数的
1.x版本中的C API。比如
对于cvtColor函数
# 3.x
cv::cvtColor(src, dst, CV_RGB2GRAY)
# 4.x
cv::cvtColor(src, dst, cv::COLOR_RGB2GRAY)
对于视频捕获和宽高设置
# 3.x
cv::VideoCapture cap(0); cap.set(CV_CAP_PROP_WIDTH, 640);
# 4.x
cv::VideoCapture cap(0); cap.set(cv::CAP_PROP_WIDTH, 640);
取消了C语言的数据结构,包括CvMat, IplImage, CvMemStorage,以及相对应的函数,包括cvCreateMat(), cvThreshold()
可是替换成C++的数据结构和函数,比如cv::Mat, std::vector, cv::threshold()
预配置
- Ubuntu 16.04
- Anaconda3
安装包
[compiler] sudo apt-get install build-essential
[required] sudo apt-get install cmake git libgtk2.0-dev libgtk-3-dev pkg-config libavcodec-dev libavformat-dev libswscale-dev
[optional] sudo apt-get install python-dev python-numpy libtbb2 libtbb-dev libjpeg-dev libpng-dev libtiff-dev libjasper-dev libdc1394-22-dev
配置
进入opencv文件夹
$ mkdir build
$ mkdir install
$ cd build
$ cmake -D CMAKE_BUILD_TYPE=DEBUG -D CMAKE_INSTALL_PREFIX=../install -D BUILD_DOCS=ON -D BUILD_EXAMPLES=ON -D INSTALL_PYTHON_EXAMPLES=ON -D PYTHON3_EXECUTABLE=/home/zj/software/anaconda/anaconda3/envs/py36/bin/python -D PYTHON3_LIBRARY=/home/zj/software/anaconda/anaconda3/envs/py36/lib/libpython3.6m.so -D PYTHON3_INCLUDE_DIR=/home/zj/software/anaconda/anaconda3/envs/py36/include/python3.6m -D PYTHON3_NUMPY_INCLUDE_DIRS=/home/zj/software/anaconda/anaconda3/envs/py36/lib/python3.6/site-packages/numpy/core/include -D Pylint_DIR=/home/zj/software/anaconda/anaconda3/envs/py36/bin/pylint -D OPENCV_EXTRA_MODULES_PATH=/home/zj/opencv/opencv_contrib/modules ..
生成信息如下:
-- General configuration for OpenCV 4.0.1 =====================================
-- Version control: unknown
--
-- Extra modules:
-- Location (extra): /home/zj/opencv/opencv_contrib/modules
-- Version control (extra): 4.0.1
--
-- Platform:
-- Timestamp: 2019-03-03T11:33:33Z
-- Host: Linux 4.15.0-43-generic x86_64
-- CMake: 3.14.0-rc3
-- CMake generator: Unix Makefiles
-- CMake build tool: /usr/bin/make
-- Configuration: DEBUG
--
-- CPU/HW features:
-- Baseline: SSE SSE2 SSE3
-- requested: SSE3
-- Dispatched code generation: SSE4_1 SSE4_2 FP16 AVX AVX2 AVX512_SKX
-- requested: SSE4_1 SSE4_2 AVX FP16 AVX2 AVX512_SKX
-- SSE4_1 (7 files): + SSSE3 SSE4_1
-- SSE4_2 (2 files): + SSSE3 SSE4_1 POPCNT SSE4_2
-- FP16 (1 files): + SSSE3 SSE4_1 POPCNT SSE4_2 FP16 AVX
-- AVX (5 files): + SSSE3 SSE4_1 POPCNT SSE4_2 AVX
-- AVX2 (13 files): + SSSE3 SSE4_1 POPCNT SSE4_2 FP16 FMA3 AVX AVX2
-- AVX512_SKX (1 files): + SSSE3 SSE4_1 POPCNT SSE4_2 FP16 FMA3 AVX AVX2 AVX_512F AVX512_SKX
--
-- C/C++:
-- Built as dynamic libs?: YES
-- C++ Compiler: /usr/bin/c++ (ver 5.4.0)
-- C++ flags (Release): -fsigned-char -W -Wall -Werror=return-type -Werror=non-virtual-dtor -Werror=address -Werror=sequence-point -Wformat -Werror=format-security -Wmissing-declarations -Wundef -Winit-self -Wpointer-arith -Wshadow -Wsign-promo -Wuninitialized -Winit-self -Wno-narrowing -Wno-delete-non-virtual-dtor -Wno-comment -fdiagnostics-show-option -Wno-long-long -pthread -fomit-frame-pointer -ffunction-sections -fdata-sections -msse -msse2 -msse3 -fvisibility=hidden -fvisibility-inlines-hidden -O3 -DNDEBUG -DNDEBUG
-- C++ flags (Debug): -fsigned-char -W -Wall -Werror=return-type -Werror=non-virtual-dtor -Werror=address -Werror=sequence-point -Wformat -Werror=format-security -Wmissing-declarations -Wundef -Winit-self -Wpointer-arith -Wshadow -Wsign-promo -Wuninitialized -Winit-self -Wno-narrowing -Wno-delete-non-virtual-dtor -Wno-comment -fdiagnostics-show-option -Wno-long-long -pthread -fomit-frame-pointer -ffunction-sections -fdata-sections -msse -msse2 -msse3 -fvisibility=hidden -fvisibility-inlines-hidden -g -O0 -DDEBUG -D_DEBUG
-- C Compiler: /usr/bin/cc
-- C flags (Release): -fsigned-char -W -Wall -Werror=return-type -Werror=non-virtual-dtor -Werror=address -Werror=sequence-point -Wformat -Werror=format-security -Wmissing-declarations -Wmissing-prototypes -Wstrict-prototypes -Wundef -Winit-self -Wpointer-arith -Wshadow -Wuninitialized -Winit-self -Wno-narrowing -Wno-comment -fdiagnostics-show-option -Wno-long-long -pthread -fomit-frame-pointer -ffunction-sections -fdata-sections -msse -msse2 -msse3 -fvisibility=hidden -O3 -DNDEBUG -DNDEBUG
-- C flags (Debug): -fsigned-char -W -Wall -Werror=return-type -Werror=non-virtual-dtor -Werror=address -Werror=sequence-point -Wformat -Werror=format-security -Wmissing-declarations -Wmissing-prototypes -Wstrict-prototypes -Wundef -Winit-self -Wpointer-arith -Wshadow -Wuninitialized -Winit-self -Wno-narrowing -Wno-comment -fdiagnostics-show-option -Wno-long-long -pthread -fomit-frame-pointer -ffunction-sections -fdata-sections -msse -msse2 -msse3 -fvisibility=hidden -g -O0 -DDEBUG -D_DEBUG
-- Linker flags (Release):
-- Linker flags (Debug):
-- ccache: NO
-- Precompiled headers: YES
-- Extra dependencies: dl m pthread rt
-- 3rdparty dependencies:
--
-- OpenCV modules:
-- To be built: aruco bgsegm bioinspired calib3d ccalib core datasets dnn dnn_objdetect dpm face features2d flann freetype fuzzy gapi hfs highgui img_hash imgcodecs imgproc java java_bindings_generator line_descriptor ml objdetect optflow phase_unwrapping photo plot python2 python3 python_bindings_generator reg rgbd saliency shape stereo stitching structured_light superres surface_matching text tracking ts video videoio videostab xfeatures2d ximgproc xobjdetect xphoto
-- Disabled: world
-- Disabled by dependency: -
-- Unavailable: cnn_3dobj cudaarithm cudabgsegm cudacodec cudafeatures2d cudafilters cudaimgproc cudalegacy cudaobjdetect cudaoptflow cudastereo cudawarping cudev cvv hdf js matlab ovis sfm viz
-- Applications: tests perf_tests examples apps
-- Documentation: javadoc
-- Non-free algorithms: NO
--
-- GUI:
-- GTK+: YES (ver 3.18.9)
-- GThread : YES (ver 2.48.2)
-- GtkGlExt: NO
-- VTK support: NO
--
-- Media I/O:
-- ZLib: /usr/lib/x86_64-linux-gnu/libz.so (ver 1.2.8)
-- JPEG: /usr/lib/x86_64-linux-gnu/libjpeg.so (ver 80)
-- WEBP: build (ver encoder: 0x020e)
-- PNG: /usr/lib/x86_64-linux-gnu/libpng.so (ver 1.2.54)
-- TIFF: /usr/lib/x86_64-linux-gnu/libtiff.so (ver 42 / 4.0.6)
-- JPEG 2000: /usr/lib/x86_64-linux-gnu/libjasper.so (ver 1.900.1)
-- OpenEXR: build (ver 1.7.1)
-- HDR: YES
-- SUNRASTER: YES
-- PXM: YES
-- PFM: YES
--
-- Video I/O:
-- DC1394: YES (ver 2.2.4)
-- FFMPEG: YES
-- avcodec: YES (ver 56.60.100)
-- avformat: YES (ver 56.40.101)
-- avutil: YES (ver 54.31.100)
-- swscale: YES (ver 3.1.101)
-- avresample: NO
-- GStreamer: NO
-- v4l/v4l2: linux/videodev2.h
--
-- Parallel framework: pthreads
--
-- Trace: YES (with Intel ITT)
--
-- Other third-party libraries:
-- Intel IPP: 2019.0.0 Gold [2019.0.0]
-- at: /home/zj/opencv/opencv-4.0.1/build/3rdparty/ippicv/ippicv_lnx/icv
-- Intel IPP IW: sources (2019.0.0)
-- at: /home/zj/opencv/opencv-4.0.1/build/3rdparty/ippicv/ippicv_lnx/iw
-- Lapack: NO
-- Eigen: NO
-- Custom HAL: NO
-- Protobuf: build (3.5.1)
--
-- OpenCL: YES (no extra features)
-- Include path: /home/zj/opencv/opencv-4.0.1/3rdparty/include/opencl/1.2
-- Link libraries: Dynamic load
--
-- Python 2:
-- Interpreter: /usr/bin/python2.7 (ver 2.7.12)
-- Libraries: /usr/lib/x86_64-linux-gnu/libpython2.7.so (ver 2.7.12)
-- numpy: /usr/lib/python2.7/dist-packages/numpy/core/include (ver 1.11.0)
-- install path: lib/python2.7/dist-packages/cv2/python-2.7
--
-- Python 3:
-- Interpreter: /home/zj/software/anaconda/anaconda3/envs/py36/bin/python (ver 3.6.8)
-- Libraries: /home/zj/software/anaconda/anaconda3/envs/py36/lib/libpython3.6m.so (ver 3.6.8)
-- numpy: /home/zj/software/anaconda/anaconda3/envs/py36/lib/python3.6/site-packages/numpy/core/include (ver 1.15.4)
-- install path: lib/python3.6/site-packages/cv2/python-3.6
--
-- Python (for build): /usr/bin/python2.7
-- Pylint: /home/zj/software/anaconda/anaconda3/envs/py36/bin/pylint (ver: 3.6.8, checks: 168)
--
-- Java:
-- ant: /home/zj/software/ant/apache-ant-1.10.5/bin/ant (ver 1.10.5)
-- JNI: /home/zj/software/java/jdk1.8.0_201/include /home/zj/software/java/jdk1.8.0_201/include/linux /home/zj/software/java/jdk1.8.0_201/include
-- Java wrappers: YES
-- Java tests: YES
--
-- Install to: /home/zj/opencv/opencv-4.0.1/install
-- -----------------------------------------------------------------
--
-- Configuring done
-- Generating done
-- Build files have been written to: /home/zj/opencv/opencv-4.0.1/build
安装
$ make -j8
$ sudo make install
opencv.pc
在install/lib文件夹内没有发现pkg-config包,模拟之前版本新建一个,然后在里面新建opencv.pc
# Package Information for pkg-config
prefix=/home/zj/opencv/opencv-4.0.1/install
exec_prefix=${prefix}
libdir=${exec_prefix}/lib
includedir_old=${prefix}/include/opencv4
includedir_new=${prefix}/include/opencv4/opencv2
Name: OpenCV
Description: Open Source Computer Vision Library
Version: 4.0.1
Libs: -L${exec_prefix}/lib -lopencv_stitching -lopencv_superres -lopencv_videostab -lopencv_stereo -lopencv_dpm -lopencv_rgbd -lopencv_surface_matching -lopencv_xobjdetect -lopencv_aruco -lopencv_optflow -lopencv_hfs -lopencv_saliency -lopencv_xphoto -lopencv_freetype -lopencv_reg -lopencv_xfeatures2d -lopencv_shape -lopencv_bioinspired -lopencv_dnn_objdetect -lopencv_tracking -lopencv_plot -lopencv_ximgproc -lopencv_fuzzy -lopencv_ccalib -lopencv_img_hash -lopencv_face -lopencv_photo -lopencv_objdetect -lopencv_datasets -lopencv_text -lopencv_dnn -lopencv_ml -lopencv_bgsegm -lopencv_video -lopencv_line_descriptor -lopencv_structured_light -lopencv_calib3d -lopencv_features2d -lopencv_highgui -lopencv_videoio -lopencv_imgcodecs -lopencv_phase_unwrapping -lopencv_imgproc -lopencv_flann -lopencv_core
Libs.private: -ldl -lm -lpthread -lrt
Cflags: -I${includedir_old} -I${includedir_new}
修改环境配置文件~/.bashrc
$ vim ~/.bashrc
...
# opencv4.0.1
export PKG_CONFIG_PATH=/home/zj/opencv-4.0.1/install/lib/pkgconfig
刷新并查询
$ source ~/.bashrc
$ pkg-config --libs opencv
-L/home/zj/opencv/opencv-4.0.1/install/lib -lopencv_stitching -lopencv_superres -lopencv_videostab -lopencv_stereo -lopencv_dpm -lopencv_rgbd -lopencv_surface_matching -lopencv_xobjdetect -lopencv_aruco -lopencv_optflow -lopencv_hfs -lopencv_saliency -lopencv_xphoto -lopencv_freetype -lopencv_reg -lopencv_xfeatures2d -lopencv_shape -lopencv_bioinspired -lopencv_dnn_objdetect -lopencv_tracking -lopencv_plot -lopencv_ximgproc -lopencv_fuzzy -lopencv_ccalib -lopencv_img_hash -lopencv_face -lopencv_photo -lopencv_objdetect -lopencv_datasets -lopencv_text -lopencv_dnn -lopencv_ml -lopencv_bgsegm -lopencv_video -lopencv_line_descriptor -lopencv_structured_light -lopencv_calib3d -lopencv_features2d -lopencv_highgui -lopencv_videoio -lopencv_imgcodecs -lopencv_phase_unwrapping -lopencv_imgproc -lopencv_flann -lopencv_core
$ pkg-config --cflags opencv
-I/home/zj/opencv/opencv-4.0.1/install/include/opencv4 -I/home/zj/opencv/opencv-4.0.1/install/include/opencv4/opencv2
[Ubuntu 16.04]OpenCV-4.0.1测试
和之前OpenCV版本不同,OpenCV-4.0.1使用c++11,所以需要在配置文件中指定编译环境
cmake
参考:cmake增加C++11
$ cat CMakeLists.txt
cmake_minimum_required(VERSION 2.8)
# 指定c++11
add_definitions(-std=c++11)
project( DisplayImage )
find_package( OpenCV REQUIRED )
MESSAGE("OpenCV version: ${OpenCV_VERSION}")
include_directories( ${OpenCV_INCLUDE_DIRS} )
add_executable( DisplayImage DisplayImage.cpp )
target_link_libraries( DisplayImage ${OpenCV_LIBS} )
make
$ cat makefile
INCLUDE=$(shell pkg-config --cflags opencv)
LIB=$(shell pkg-config --libs opencv)
SOURCE=DisplayImage.cpp
RES=DisplayImage
$(RES):$(SOURCE)
g++ -std=c++11 $(SOURCE) $(INCLUDE) $(LIB) -o $(RES)
clean:
rm $(RES)
错误
参考:Linux locate ldconfig pkg-config ldd 以及 OpenCV C++库的使用
$ ./DisplayImage lena.jpg
./DisplayImage: error while loading shared libraries: libopencv_highgui.so.4.0: cannot open shared object file: No such file or directory
系统找不到动态库,需要配置进行动态库的绑定,在路径/etc/ld.so.conf.d下新建配置文件opencv.conf并刷新
$ sudo vim opencv.conf
/home/zj/opencv/opencv-4.0.1/install/lib
$ sudo ldconfig
[Ubuntu 16.04][Anaconda3][OpenCV_Contrib 4.0.1]编译OpenCV4Android
参考:
Building OpenCV4Android from source code
OpenCV4.0.1中的人脸识别模块被移植到了opencv_contrib仓库,官网没有编译好的OpenCV4Android包,所以需要自己编译
前后大概花了两天时间,一个是需要配置许多依赖,另外一个是官网没有很好的提供对于编译选项的解释,导致多次编译错误
OpenCV在2.x/3.x/4.x的迭代中有了很多的改变,NDK同样也有改变,可能不再支持一些版本,或者指定一些版本工具
为了减少编译错误,当前使用最新的配置环境
源码下载
下载OpenCV-4.0.1压缩包以及OpenCV_Contrib仓库,
$ wget https://github.com/opencv/opencv/archive/4.0.1.zip
$ git clone https://github.com/opencv/opencv_contrib.git
注意:切换opencv_contrib到4.0.1版本
配置环境
当前操作系统:Ubuntu 16.04
NDK:android-ndk-r18b
cmake:
$ cmake --version
cmake version 3.14.0-rc3
CMake suite maintained and supported by Kitware (kitware.com/cmake).
ninja:
$ ninja --version
1.8.2
java:
$ java -version
java version "1.8.0_201"
Java(TM) SE Runtime Environment (build 1.8.0_201-b09)
Java HotSpot(TM) 64-Bit Server VM (build 25.201-b09, mixed mode)
ant:
$ ant -version
Apache Ant(TM) version 1.10.5 compiled on July 10 2018
python:
$ python --version
Python 3.6.8 :: Anaconda, Inc.
同时设置环境变量
# cmake
export PATH=/home/zj/software/cmake/cmake-3.14.0-rc3-Linux-x86_64/bin:$PATH
# ant
export ANT_HOME=/home/zj/software/ant/apache-ant-1.10.5
export PATH=$PATH:$ANT_HOME/bin
## android
export ANDROID_NDK=/home/zj/Android/android-ndk-r18b
export ANDROID_SDK=/home/zj/Android/Sdk
export ANDROID_HOME=/home/zj/Android/Sdk
# JAVA
export JAVA_HOME=/home/zj/software/java/jdk1.8.0_201
export CLASSPATH=.:$JAVA_HOME/lib:$JRE_HOME/lib:$CLASSPATH
export PATH=$JAVA_HOME/bin:$JRE_HOME/bin:$PATH
export JRE_HOME=$JAVA_HOME/jre
编译脚本
在opencv-4.0.1/platforms/android文件夹内有编译脚本build_sdk.py
$ ./build_sdk.py --help
usage: build_sdk.py [-h] [--config CONFIG] [--ndk_path NDK_PATH]
[--sdk_path SDK_PATH]
[--extra_modules_path EXTRA_MODULES_PATH]
[--sign_with SIGN_WITH] [--build_doc] [--no_ccache]
[--force_copy] [--force_opencv_toolchain]
[work_dir] [opencv_dir]
Build OpenCV for Android SDK
positional arguments:
work_dir Working directory (and output)
opencv_dir Path to OpenCV source dir
optional arguments:
-h, --help show this help message and exit
--config CONFIG Package build configuration
--ndk_path NDK_PATH Path to Android NDK to use for build
--sdk_path SDK_PATH Path to Android SDK to use for build
--extra_modules_path EXTRA_MODULES_PATH
Path to extra modules to use for build
--sign_with SIGN_WITH
Certificate to sign the Manager apk
--build_doc Build javadoc
--no_ccache Do not use ccache during library build
--force_copy Do not use file move during library build (useful for
debug)
--force_opencv_toolchain
Do not use toolchain from Android NDK
执行脚本程序
python build_sdk.py --config=ndk-18.config.py --extra_modules_path=/home/zj/opencv/opencv_contrib/modules --no_ccache /home/zj/opencv/opencv-4.0.1/build_android/ /home/zj/opencv/opencv-4.0.1
- 参数
config指定了要编译的指令集,文件ndk-18.config.py是opencv自带的,里面指定了armeabi-v7a/arm64-v8a/x86_64/x86 - 参数
extra_modules_path用于指定opencv_contrib的路径 - 参数
no_ccache能够避免编译错误 - 还需要设置
work_dir以及opencv_dir
注意:如果没有在之前没有设置过NDK和SDK的环境变量,需要在执行脚本时添加
--ndk_path NDK_PATH ... --sdk_path SDK_PATH ...
使用该脚本能够实现opencv4android编译,但是还需要在里面修改一些参数
一个方面是禁止对于Android工程/服务的编译,因为这涉及到外网连接,常常会失败;另一个方面是为了编译libopencv_java4.so,需要打开一些开关
修改build_sdk.py中的build_library函数
# 原先
def build_library(self, abi, do_install):
cmd = ["cmake", "-GNinja"]
cmake_vars = dict(
CMAKE_TOOLCHAIN_FILE=self.get_toolchain_file(),
INSTALL_CREATE_DISTRIB="ON",
WITH_OPENCL="OFF",
WITH_IPP=("ON" if abi.haveIPP() else "OFF"),
WITH_TBB="ON",
BUILD_EXAMPLES="OFF",
BUILD_TESTS="OFF",
BUILD_PERF_TESTS="OFF",
BUILD_DOCS="OFF",
BUILD_ANDROID_EXAMPLES="OFF",
INSTALL_ANDROID_EXAMPLES="OFF",
)
# 修改后
def build_library(self, abi, do_install):
cmd = ["cmake", "-GNinja"]
cmake_vars = dict(
CMAKE_TOOLCHAIN_FILE=self.get_toolchain_file(),
INSTALL_CREATE_DISTRIB="ON",
WITH_OPENCL="OFF",
WITH_IPP=("ON" if abi.haveIPP() else "OFF"),
WITH_TBB="ON",
BUILD_EXAMPLES="OFF",
BUILD_TESTS="OFF",
BUILD_PERF_TESTS="OFF",
BUILD_DOCS="OFF",
BUILD_ANDROID_EXAMPLES="OFF",
INSTALL_ANDROID_EXAMPLES="OFF",
BUILD_ANDROID_SERVICE="OFF",
CMAKE_BUILD_TYPE="RELEASE",
BUILD_ZLIB="ON"
)
编译问题
问题一:
CMake Error: CMake was unable to find a build program corresponding to "Ninja". CMAKE_MAKE_PROGRAM is not set. You probably need to select a different build tool.
缺少ninja,下载安装
conda install ninja
问题二:
CMake Error at /home/zj/Android/android-ndk-r16b/build/cmake/android.toolchain.cmake:40 (cmake_minimum_required):
CMake 3.6.0 or higher is required. You are running version 3.5.1
下载CMake源码编译安装
问题三:
CMake Error at /home/zj/software/cmake/cmake-3.14.0-rc3-Linux-x86_64/share/cmake-3.14/Modules/CMakeTestCXXCompiler.cmake:53 (message):
The C++ compiler
"/home/zj/Android/android-ndk-r16b/toolchains/arm-linux-androideabi-4.9/prebuilt/linux-x86_64/bin/arm-linux-androideabi-g++"
is not able to compile a simple test program.
...
...
/bin/sh: 1: ccache: not found
ninja: build stopped: subcommand failed.
问题四:编译完成后没有libopencv_java.so
参考:
Building OpenCV4Android from source does not output libopencv_java.so
creat libopencv_java.so from source
这个没有很好理解,但是通过添加CMAKE_BUILD_TYPE="RELEASE"能够解决这个问题
cmake解析
参考:libc++
执行build_sdk.py就能够实现opencv4android编译,里面调用了cmake进行构建,执行如下
cmake -GNinja -DOPENCV_EXTRA_MODULES_PATH='/home/zj/opencv/opencv_contrib/modules' -DCMAKE_TOOLCHAIN_FILE='/home/zj/Android/android-ndk-r18b/build/cmake/android.toolchain.cmake' -DINSTALL_CREATE_DISTRIB='ON' -DWITH_OPENCL='OFF' -DWITH_IPP='OFF' -DWITH_TBB='ON' -DBUILD_EXAMPLES='OFF' -DBUILD_TESTS='OFF' -DBUILD_PERF_TESTS='OFF' -DBUILD_DOCS='OFF' -DBUILD_ANDROID_EXAMPLES='OFF' -DINSTALL_ANDROID_EXAMPLES='OFF' -DBUILD_ANDROID_SERVICE='OFF' -DCMAKE_BUILD_TYPE='RELEASE' -DBUILD_ZLIB='ON' -DANDROID_STL='c++_static' -DANDROID_ABI='arm64-v8a' -DANDROID_PLATFORM_ID='3' -DANDROID_TOOLCHAIN='clang' /home/zj/opencv/opencv-4.0.1
参数CMAKE_TOOLCHAIN_FILE指定了交叉编译的配置文件,使用的是NDK包里面的android.toolchain.cmake
参数ANDROID_STL指定了编译用的标准库,这是因为Android自NDK r18以来指定了c++_static作为唯一可用的STL
相关参考
OpenCV提供了一个非正式的编译库:master-contrib_pack-contrib-android/
[Ubuntu 16.04][Anaconda3]OpenCV-4.1.0安装
编译OpenCV以及OpenCV_Contrib的Linux版本
先决条件
所需的依赖库以及编译器
[compiler] sudo apt-get install build-essential
[required] sudo apt-get install cmake git libgtk2.0-dev pkg-config libavcodec-dev libavformat-dev libswscale-dev
[optional] sudo apt-get install python-dev python-numpy libtbb2 libtbb-dev libjpeg-dev libpng-dev libtiff-dev libjasper-dev libdc1394-22-dev
源码
分别下载OpenCV和OpenCV_Contrib源码
$ mkdir opencv-4.1.0
$ cd opencv-4.1.0
$ git clone https://github.com/opencv/opencv.git
$ git clone https://github.com/opencv/opencv_contrib.git
切换到指定标签
$ cd opencv
$ git checkout -b 4.1.0 4.1.0
$ cd ../opencv_contrib
$ git checkout -b 4.1.0 4.1.0
编译
CMake编译命令如下:
$ mkdir build
$ mkdir install
$ ls
build install opencv opencv_contrib
$ cd build
$ cmake -D CMAKE_BUILD_TYPE=DEBUG \
-D CMAKE_INSTALL_PREFIX=../install \
-D BUILD_DOCS=ON \
-D BUILD_EXAMPLES=ON \
-D INSTALL_PYTHON_EXAMPLES=ON \
-D PYTHON3_EXECUTABLE=/home/zj/software/anaconda/anaconda3/envs/py36/bin/python \
-D PYTHON3_LIBRARY=/home/zj/software/anaconda/anaconda3/envs/py36/lib/libpython3.6m.so \
-D PYTHON3_INCLUDE_DIR=/home/zj/software/anaconda/anaconda3/envs/py36/include/python3.6m \
-D PYTHON3_NUMPY_INCLUDE_DIRS=/home/zj/software/anaconda/anaconda3/envs/py36/lib/python3.6/site-packages/numpy/core/include \
-D Pylint_DIR=/home/zj/software/anaconda/anaconda3/envs/py36/bin/pylint \
-D OPENCV_EXTRA_MODULES_PATH=../opencv_contrib/modules \
-D OPENCV_GENERATE_PKGCONFIG=ON \
../opencv
编译问题一
IPPICV: Download: ippicv_2019_lnx_intel64_general_20180723.tgz
下载额外包的过程中卡中,参考源码编译opencv卡在IPPICV: Download: ippicv_2017u3_lnx_intel64_general_20170822.tgz解决办法
先下载ippicv:ippicv_2019_lnx_intel64_general_20180723.tgz,放置在/home/zj/opencv/opencv-4.1.0目录下
修改文件opencv/3rdparty/ippicv/ippicv.cmake第47行
# 原先
"https://raw.githubusercontent.com/opencv/opencv_3rdparty/${IPPICV_COMMIT}/ippicv/"
# 修改
"/home/zj/opencv/opencv-4.1.0/"
编译问题二
-- data: Download: face_landmark_model.dat
同样需要额外下载配置,参考ubuntu16.04 安装opencv IPPICV 和 face_landmark_model.dat下载不下来的问题解决
下载face_landmark_model.dat,放置在/home/zj/opencv/opencv-4.1.0目录下
修改文件opencv_contrib/modules/face/CMakeLists.txt第19行
# 原先
"https://raw.githubusercontent.com/opencv/opencv_3rdparty/${__commit_hash}/"
# 修改
"/home/zj/opencv/opencv-4.1.0/"
安装
$ make -j7
$ make install
[Ubuntu 16.04][Anaconda3]OpenCV-4.1.0配置及测试
环境变量
编辑~/.bashrc
# opencv4.1.0
export OpenCV_DIR=/home/zj/opencv/opencv-4.1.0/install
export PKG_CONFIG_PATH=${OpenCV_DIR}/lib/pkgconfig
export CMAKE_PREFIX_PATH=${OpenCV_DIR}
查询
$ pkg-config --cflags opencv4
-I/home/zj/opencv/opencv-4.1.0/install/include/opencv4/opencv -I/home/zj/opencv/opencv-4.1.0/install/include/opencv4
$ pkg-config --libs opencv4
-L/home/zj/opencv/opencv-4.1.0/install/lib -lopencv_gapi -lopencv_stitching -lopencv_aruco -lopencv_bgsegm -lopencv_bioinspired -lopencv_ccalib -lopencv_dnn_objdetect -lopencv_dpm -lopencv_face -lopencv_freetype -lopencv_fuzzy -lopencv_hdf -lopencv_hfs -lopencv_img_hash -lopencv_line_descriptor -lopencv_quality -lopencv_reg -lopencv_rgbd -lopencv_saliency -lopencv_stereo -lopencv_structured_light -lopencv_phase_unwrapping -lopencv_superres -lopencv_optflow -lopencv_surface_matching -lopencv_tracking -lopencv_datasets -lopencv_text -lopencv_dnn -lopencv_plot -lopencv_videostab -lopencv_video -lopencv_xfeatures2d -lopencv_shape -lopencv_ml -lopencv_ximgproc -lopencv_xobjdetect -lopencv_objdetect -lopencv_calib3d -lopencv_features2d -lopencv_highgui -lopencv_videoio -lopencv_imgcodecs -lopencv_flann -lopencv_xphoto -lopencv_photo -lopencv_imgproc -lopencv_core
测试
CMakeLists.txt文件如下:
cmake_minimum_required(VERSION 2.8)
project( DisplayImage )
add_definitions(-std=c++11)
find_package( OpenCV REQUIRED )
MESSAGE("OpenCV version: ${OpenCV_VERSION}")
include_directories( ${OpenCV_INCLUDE_DIRS} )
add_executable( DisplayImage DisplayImage.cpp )
target_link_libraries( DisplayImage ${OpenCV_LIBS} )
源文件DisplayImage.cpp如下:
#include <stdio.h>
#include <opencv2/opencv.hpp>
using namespace cv;
int main(int argc, char** argv )
{
if ( argc != 2 )
{
printf("usage: DisplayImage.out <Image_Path>\n");
return -1;
}
Mat image;
image = imread( argv[1], 1 );
if ( !image.data )
{
printf("No image data \n");
return -1;
}
namedWindow("Display Image", WINDOW_AUTOSIZE );
imshow("Display Image", image);
waitKey(0);
return 0;
}
实现如下:
$ ls
CMakeLists.txt DisplayImage.cpp lena.jpg
# 配置
$ cmake .
-- The C compiler identification is GNU 5.4.0
-- The CXX compiler identification is GNU 5.4.0
-- Check for working C compiler: /usr/bin/cc
-- Check for working C compiler: /usr/bin/cc -- works
-- Detecting C compiler ABI info
-- Detecting C compiler ABI info - done
-- Detecting C compile features
-- Detecting C compile features - done
-- Check for working CXX compiler: /usr/bin/c++
-- Check for working CXX compiler: /usr/bin/c++ -- works
-- Detecting CXX compiler ABI info
-- Detecting CXX compiler ABI info - done
-- Detecting CXX compile features
-- Detecting CXX compile features - done
-- Found OpenCV: /home/zj/opencv/opencv-4.1.0/install (found version "4.1.0")
OpenCV version: 4.1.0
-- Configuring done
-- Generating done
-- Build files have been written to: /home/zj/opencv/test/cmake_test
# 编译
$ make
Scanning dependencies of target DisplayImage
[ 50%] Building CXX object CMakeFiles/DisplayImage.dir/DisplayImage.cpp.o
[100%] Linking CXX executable DisplayImage
[100%] Built target DisplayImage
# 执行
$ ./DisplayImage lena.jpg
[python]Anaconda配置OpenCV
有两种方式在Anaconda中配置OpenCV
- 配置本地
OpenCV源码编译的python包 conda安装(推荐)
在Anaconda中配置源码编译的opencv-python包
参考[Ubuntu 16.04][Anaconda3]OpenCV-4.1.0安装,编译OpenCV源码后得到python包
参考[Ubuntu 16.04][Anaconda3][Python3.6]OpenCV-3.4.2源码安装,将python包放置在anaconda指定位置
conda安装
参考:
使用上述操作能够使用python-opencv,但是存在一个问题就是使用PyCharm时没有代码提示了。所以最好还是使用conda工具进行opencv安装
conda默认源下的opencv版本比较低,没有最新版本
$ conda search opencv
Loading channels: done
# Name Version Build Channel
opencv 3.3.1 py27h17fce66_0 pkgs/main
opencv 3.3.1 py27h61133dd_2 pkgs/main
...
...
而使用源conda-forge能够得到最新版本的OpenCV,登录conda-forge/packages/opencv查询
$ conda search -c conda-forge opencv | grep 4.1.0
opencv 4.1.0 py27h3aa1047_5 conda-forge
opencv 4.1.0 py27h3aa1047_6 conda-forge
opencv 4.1.0 py27h4a2692f_2 conda-forge
...
...
下载指定版本的python-opencv
$ conda install -c conda-forge opencv=4.1.0
运行时间统计
参考:Performance Measurement and Improvement Techniques
OpenCV提供了函数getTickCount和getTickFrequency来计算程序运行时间(单位:秒)
double t = (double) getTickCount();
// do something ...
t = ((double) getTickCount() - t) / getTickFrequency();
[normalize]标准化数据
图像处理过程中常用的操作之一就是数据标准化,OpenCV提供了函数cv::normalize来完成
函数解析
CV_EXPORTS_W void normalize( InputArray src, InputOutputArray dst, double alpha = 1, double beta = 0,
int norm_type = NORM_L2, int dtype = -1, InputArray mask = noArray());
src:输入数组dst:输出数组,大小和原图一致alpha:标准化值或者按范围标准化的下范围边界beta:按范围标准化时的上范围边界;它不作用于范数标准化norm_type:标准化类型,参考cv::NormTypesdtype:如果为负(默认),则输出数组的类型与src相同;否则,其通道数与src相同,数据深度=CV_MAT_DEPTH(dtype)mask:操作掩码(可选)
标准化方式
函数normalize根据参数norm_type决定数据标准化方式
当normType=NORM_INF/NORM_L1/NORM_L2时,其计算方式如下:

当normType=NORM_MINMAX时,其计算方式如下:

示例
假定测试数据如下:
vector<double> positiveData = { 2.0, 8.0, 10.0 };
当normType=NORM_L1时,通过L1范数计算总数,然后缩放到alpha大小,比如
normalize(positiveData, normalizedData_l1, 1.0, 0.0, NORM_L1);
则计算结果为
sum(numbers) = 20.0
2.0 0.1 (2.0/20.0)
8.0 0.4 (8.0/20.0)
10.0 0.5 (10.0/20.0)
当normType=NORM_L2时,通过L2范数计算总数,然后缩放到alpha大小,比如
normalize(positiveData, normalizedData_l2, 1.0, 0.0, NORM_L2);
计算结果如下
sum(numbers) = sqrt(2*2 + 8*8 + 10*10) = sqrt(168) = 12.96
Norm to unit vector: ||positiveData|| = 1.0
2.0 0.15 (2 / 12.96)
8.0 0.62 (8 / 12.96)
10.0 0.77 (10/ 12.96)
当normType=NORM_MINMAX时,将数据缩放到[alpha, beta]大小,比如
normalize(positiveData, normalizedData_minmax, 1.0, 0.0, NORM_MINMAX);
将数据缩放到[0.0, 1.0]大小,计算结果如下:
2.0 0.0 (shift to left border)
8.0 0.75 (6.0/8.0)
10.0 1.0 (shift to right border)
[convertTo]数据转换
参考:convertTo()
图像处理过程中经常需要缩放数据值以及转换数据类型,OpenCV提供了函数cv::convertTo来完成
函数解析
void convertTo( Mat& m, int rtype, double alpha=1, double beta=0 ) const;
m:输出矩阵;如果在操作之前没有分配适当的大小或类型,则会根据操作重新分配rtype:输出数据类型,如果为负,表示和原图一致alpha:缩放因子beta:增加到缩放后数据的因子
函数convertTo执行如下操作:

示例
#include <iostream>
#include <opencv2/opencv.hpp>
#include <opencv2/core/mat.hpp>
using namespace std;
using namespace cv;
void print(const Mat &src, const Mat &dst) {
cout << "数据类型" << endl;
cout << src.type() << endl;
cout << dst.type() << endl;
cout << "结果" << endl;
cout << src << endl;
cout << dst << endl;
}
int main() {
Mat src = Mat(1, 3, CV_8UC1);
src.at<uchar>(0) = 3;
src.at<uchar>(1) = 4;
src.at<uchar>(2) = 5;
Mat dst;
src.convertTo(dst, CV_32F, 0.5);
print(src, dst);
}
转换成浮点类型,并进行缩放
数据类型
0
5
结果
[ 3, 4, 5]
[1.5, 2, 2.5]
[vconcat][hconcat]按行合并以及按列合并
OpenCV提供了多种方式进行矩阵的合并
函数解析
主要函数包括
vconcat
CV_EXPORTS void vconcat(const Mat* src, size_t nsrc, OutputArray dst);
CV_EXPORTS void vconcat(InputArray src1, InputArray src2, OutputArray dst);
CV_EXPORTS_W void vconcat(InputArrayOfArrays src, OutputArray dst);
src:输入矩阵的数组或向量。所有矩阵必须具有相同的列数和相同的深度nsrc:src中的矩阵数src2:用于垂直连接的第二个输入数组dst:输出数组
hconcat
CV_EXPORTS void hconcat(const Mat* src, size_t nsrc, OutputArray dst);
CV_EXPORTS void hconcat(InputArray src1, InputArray src2, OutputArray dst);
CV_EXPORTS void hconcat(InputArray src1, InputArray src2, OutputArray dst);
CV_EXPORTS_W void hconcat(InputArrayOfArrays src, OutputArray dst);
参数和vconcat类似
示例
以下操作按行合并示例,按列合并操作类似
示例一
cv::Mat matArray[] = {cv::Mat(1, 4, CV_8UC1, cv::Scalar(1)),
cv::Mat(1, 4, CV_8UC1, cv::Scalar(2)),
cv::Mat(1, 4, CV_8UC1, cv::Scalar(3)),};
cv::Mat out;
cv::vconcat(matArray, 3, out);
cout << out << endl;
// out
[ 1, 1, 1, 1;
2, 2, 2, 2;
3, 3, 3, 3]
示例二
cv::Mat_<float> A = (cv::Mat_<float>(3, 2) << 1, 7, 2, 8, 3, 9);
cv::Mat_<float> B = (cv::Mat_<float>(3, 2) << 4, 10, 5, 11, 6, 12);
cv::Mat C;
cv::vconcat(A, B, C);
cout << C << endl;
// out
[1, 7;
2, 8;
3, 9;
4, 10;
5, 11;
6, 12]
示例三
std::vector<cv::Mat> matrices = {cv::Mat(1, 4, CV_8UC1, cv::Scalar(1)),
cv::Mat(1, 4, CV_8UC1, cv::Scalar(2)),
cv::Mat(1, 4, CV_8UC1, cv::Scalar(3)),};
cv::Mat out;
cv::vconcat(matrices, out);
cout << out << endl;
// out
[ 1, 1, 1, 1;
2, 2, 2, 2;
3, 3, 3, 3]
使用其他函数完成合并
[Point_]坐标点的保存和使用
经常需要对图像坐标点进行操作,OpenCV提供了类Point_来保存x/y坐标
解析
类定义如下:
template<typename _Tp> class Point_
{
public:
typedef _Tp value_type;
//! default constructor
Point_();
Point_(_Tp _x, _Tp _y);
Point_(const Point_& pt);
Point_(Point_&& pt) CV_NOEXCEPT;
Point_(const Size_<_Tp>& sz);
Point_(const Vec<_Tp, 2>& v);
Point_& operator = (const Point_& pt);
Point_& operator = (Point_&& pt) CV_NOEXCEPT;
//! conversion to another data type
template<typename _Tp2> operator Point_<_Tp2>() const;
//! conversion to the old-style C structures
operator Vec<_Tp, 2>() const;
//! dot product
_Tp dot(const Point_& pt) const;
//! dot product computed in double-precision arithmetics
double ddot(const Point_& pt) const;
//! cross-product
double cross(const Point_& pt) const;
//! checks whether the point is inside the specified rectangle
bool inside(const Rect_<_Tp>& r) const;
_Tp x; //!< x coordinate of the point
_Tp y; //!< y coordinate of the point
};
定义了两个变量x和y,同时允许执行以下操作:
pt1 = pt2 + pt3; # 加法
pt1 = pt2 - pt3; # 减法
pt1 = pt2 * a; # 乘以固定数
pt1 = a * pt2;
pt1 = pt2 / a; # 除以固定数
pt1 += pt2;
pt1 -= pt2;
pt1 *= a;
pt1 /= a;
double value = norm(pt); // L2 norm # L2范数
pt1 == pt2; # 比较两个点是否相等
pt1 != pt2;
别名
类Point_是一个模板,所以可以在定义类对象时指定数据类型,比如int/float/double。OpenCV也提供了一些常用数据类型别名
typedef Point_<int> Point2i; # 整型点
typedef Point2i Point;
typedef Point_<float> Point2f; # 浮点型点
typedef Point_<double> Point2d; # 双精度浮点型点
类型转换
浮点数Point可以转换成整数Point,其通过四舍五入方式进行转换
示例
#include <iostream>
#include <opencv2/opencv.hpp>
#include <opencv2/core/types.hpp>
int main() {
cv::Point2i pt2i(2, 3);
cv::Point2f pt2f(2.2, 3.6);
std::cout << pt2i << std::endl;
std::cout << pt2f << std::endl;
cv::Point2f pt = static_cast<cv::Point2f>(pt2i) + pt2f; // 加法
std::cout << pt << std::endl;
pt2i = pt2f; // 类型转换
std::cout << pt2i << std::endl;
std::cout << cv::norm(pt2i) << std::endl; // L2范数
}
执行结果
[2, 3]
[2.2, 3.6]
[4.2, 6.6]
[2, 4]
4.47214
相关
类似的数据结构还包括3维点(Point3_)、大小(Size_)、2维矩阵(Rect_)等等
[Scalar_]4维向量
OpenCV常用Scalar保存像素值
解析
OpenCV定义了一个模板类,其派生自4维向量
template<typename _Tp> class Scalar_ : public Vec<_Tp, 4>
{
public:
//! default constructor
Scalar_();
Scalar_(_Tp v0, _Tp v1, _Tp v2=0, _Tp v3=0);
Scalar_(_Tp v0);
Scalar_(const Scalar_& s);
Scalar_(Scalar_&& s) CV_NOEXCEPT;
Scalar_& operator=(const Scalar_& s);
Scalar_& operator=(Scalar_&& s) CV_NOEXCEPT;
template<typename _Tp2, int cn>
Scalar_(const Vec<_Tp2, cn>& v);
//! returns a scalar with all elements set to v0
static Scalar_<_Tp> all(_Tp v0);
//! conversion to another data type
template<typename T2> operator Scalar_<T2>() const;
//! per-element product
Scalar_<_Tp> mul(const Scalar_<_Tp>& a, double scale=1 ) const;
//! returns (v0, -v1, -v2, -v3)
Scalar_<_Tp> conj() const;
//! returns true iff v1 == v2 == v3 == 0
bool isReal() const;
};
最多可以保存4个值,定义类对象时需要输入至少两个数值
示例
#include <iostream>
#include <opencv2/opencv.hpp>
#include <opencv2/core/types.hpp>
int main() {
cv::Scalar s1(1, 2);
cv::Scalar s2(0.23, 3.2, 11.13);
std::cout << s1 << std::endl;
std::cout << s2 << std::endl;
cv::Scalar s3 = s1 + s2; // 加法
std::cout << s3 << std::endl;
cv::Scalar s4 = s1 - s2; // 减法
std::cout << s4 << std::endl;
std::cout << cv::norm(s1) << std::endl; // L2范数
std::cout << (s1 * 3) << std::endl; // 乘以一个因子
}
运行结果
[1, 2, 0, 0]
[0.23, 3.2, 11.13, 0]
[1.23, 5.2, 11.13, 0]
[0.77, -1.2, -11.13, 0]
2.23607
[3, 6, 0, 0]
[copyMakeBorder]添加边界
参考:Adding borders to your images
OpenCV提供函数copyMakeBorder()来添加图像边界
声明
头文件声明:#include <opencv2/core.hpp>
解析
CV_EXPORTS_W void copyMakeBorder(InputArray src, OutputArray dst,
int top, int bottom, int left, int right,
int borderType, const Scalar& value = Scalar() );
src:原图dst:结果图像,其大小为Size(src.cols+left+right, src.rows+top+bottom)top:指定图像上方填充多少像素。其他方向同理bottomleftrightborderType:填充类型value:borderType==BORDER_CONSTANT的填充值。默认值为0的Scalar
函数将源图像复制到目标图像的中间。在源图像左侧、右侧、上方和下方的区域进行像素填充
填充类型
borderType == BORDER_CONSTRAINT:指定像素值进行填充borderType== BORDER_REPLICATE:使用边缘像素值进行填充
示例
#include "opencv2/imgproc.hpp"
#include "opencv2/imgcodecs.hpp"
#include "opencv2/highgui.hpp"
using namespace cv;
// Declare the variables
Mat src, dst;
int top, bottom, left, right;
int borderType = BORDER_CONSTANT;
const char *window_name = "copyMakeBorder Demo";
RNG rng(12345);
int main(int argc, char **argv) {
const char *imageName = argc >= 2 ? argv[1] : "../lena.jpg";
// Loads an image
src = imread(imageName, IMREAD_COLOR); // Load an image
// Check if image is loaded fine
if (src.empty()) {
printf(" Error opening image\n");
printf(" Program Arguments: [image_name -- default ../data/lena.jpg] \n");
return -1;
}
// Brief how-to for this program
printf("\n \t copyMakeBorder Demo: \n");
printf("\t -------------------- \n");
printf(" ** Press 'c' to set the border to a random constant value \n");
printf(" ** Press 'r' to set the border to be replicated \n");
printf(" ** Press 'ESC' to exit the program \n");
namedWindow(window_name, WINDOW_AUTOSIZE);
// Initialize arguments for the filter
top = (int) (0.05 * src.rows);
bottom = top;
left = (int) (0.05 * src.cols);
right = left;
for (;;) {
Scalar value(rng.uniform(0, 255), rng.uniform(0, 255), rng.uniform(0, 255));
copyMakeBorder(src, dst, top, bottom, left, right, borderType, value);
imshow(window_name, dst);
char c = (char) waitKey(500);
if (c == 27) { break; }
else if (c == 'c') { borderType = BORDER_CONSTANT; }
else if (c == 'r') { borderType = BORDER_REPLICATE; }
}
return 0;
}
设置为BORDER_CONSTRAINT时

设置为BORDER_REPLICATE时

[cartToPolar]二维向量的大小和角度
OpenCV提供函数cv::cartToPolar用于计算2维向量的大小和角度
函数解析
CV_EXPORTS_W void cartToPolar(InputArray x, InputArray y,
OutputArray magnitude, OutputArray angle,
bool angleInDegrees = false);
x:x轴坐标数组;这必须是单精度或双精度浮点数组y:y轴坐标数组,其大小和类型必须与x相同magnitude:输出与x相同大小和类型的大小数组angle:与x具有相同大小和类型的角度的输出数组;角度以弧度(从0到2*Pi)或度(0到360度)度量angleInDegrees:标志,指示结果是以弧度(默认情况下是以弧度)还是以度度量
注意:输入数组必须具有相同精度
输入x/y均为2维向量,其实现如下:

源码地址:/path/to/modules/core/test/test_arithm.cpp
示例
#include <iostream>
#include <opencv2/opencv.hpp>
using namespace std;
using namespace cv;
int main() {
Mat xx = Mat(2, 3, CV_32FC1, Scalar(6, 0, 0));
Mat yy = Mat(2, 3, CV_32FC1, Scalar(6, 0, 0));
cout << xx << endl;
cout << yy << endl;
Mat mag, angle;
// 输出角度 等边直角三角形,小角=45度
cartToPolar(xx, yy, mag, angle, true);
cout << mag << endl;
cout << angle << endl;
}
// out
[6, 6, 6;
6, 6, 6]
[6, 6, 6;
6, 6, 6]
[8.485281, 8.485281, 8.485281;
8.485281, 8.485281, 8.485281]
[44.990456, 44.990456, 44.990456;
44.990456, 44.990456, 44.990456]
[filter2D]线性滤波器
参考:
Making your own linear filters!
线性滤波器实现
相关
相关(correlation)指的是图像的每一个部分与操作符(内核)之间的操作
内核
内核本质上是一个固定大小的数值系数数组,每个内核拥有一个锚点,该锚点通常位于数组中心
实现过程
滤波器计算过程如下:
- 将内核锚点放置在确定的像素点上,内核其余部分覆盖图像中相应的领域像素点
- 将核系数乘以相应的图像像素值并求和
- 将结果放置回锚点的位置(输出图像)
- 从左到右、从上到下滑动内核,对所有像素重复该过程
表达式如下:

其中I是图像像素值,K是内核系数值,(a_{i}, a_{j})表示内核锚点的坐标,比如3x3大小的内核锚点坐标是(1,1)
filter2D
OpenCV使用函数filter2D进行线性滤波
CV_EXPORTS_W void filter2D( InputArray src, OutputArray dst, int ddepth,
InputArray kernel, Point anchor = Point(-1,-1),
double delta = 0, int borderType = BORDER_DEFAULT );
src:原图dst:结果图像ddepth:结果图像深度,输入负数(比如-1)表示和原图一样kernel:内核anchor:锚点位置,默认为Point(-1,-1),表明锚点在内核中心delta:计算过程中添加到每个像素的值,默认为0borderType:边界填充像素方法,默认为BORDER_DEFAULT
测试
执行标准化的方框滤波(normalized box filgter)。比如内核大小为3x3

OpenCV实现
滑动条设置范围[0-5],分别实现内核大小为1/3/5/7/9/11的滤波效果(当内核大小为1时,滤波没有效果)
#include "opencv2/imgproc.hpp"
#include "opencv2/imgcodecs.hpp"
#include "opencv2/highgui.hpp"
#include <iostream>
using namespace std;
using namespace cv;
// 滑动条名
const string trackbarname = "size";
// 窗口名
const string winname = "filter2D";
// 最大值
const int maxNum = 5;
// Initialize arguments for the filter
Point anchor = Point(-1, -1);
int delta = 0;
int ddepth = -1;
Mat src, dst, kernel;
int ind = 0;
void onResize(int, void *) {
// Update kernel size for a normalized box filter
int kernel_size = 1 + 2 * (ind % 6);
kernel = Mat::ones(kernel_size, kernel_size, CV_32F) / (float) (kernel_size * kernel_size);
cout << kernel << endl;
// Apply filter
filter2D(src, dst, ddepth, kernel, anchor, delta, BORDER_DEFAULT);
imshow(winname, dst);
}
int main(int argc, char **argv) {
// Declare variables
const char *imageName = argc >= 2 ? argv[1] : "../lena.jpg";
// Loads an image
src = imread(imageName, IMREAD_COLOR); // Load an image
if (src.empty()) {
printf(" Error opening image\n");
printf(" Program Arguments: [image_name -- default ../lena.jpg] \n");
return -1;
}
namedWindow(winname);
createTrackbar(trackbarname, winname, &ind, maxNum, onResize, NULL);
onResize(0, NULL);
waitKey(0);
return 0;
}
[Sobel]图像求导
参考:
通过Sobel算子计算图像导数
导数和边缘
图像边缘处的像素值变化强烈,通过导数计算更能够发现变化强烈的地方,所以在进行边缘检测之前先进行求导操作,能够有利于图像轮廓的检测
Sobel算子
Sobel算子是对一阶导数的近似计算,通过定义内核对图像进行水平和垂直方向的卷积运算,最后求取L2范数得到图像的近似梯度
水平方向计算如下:

垂直方向计算如下:

从内核可看出,Sobel算子结合了高斯平滑和差分功能,更加具有抗噪声的能力
计算梯度:

也可以使用近似计算公式:

函数解析
源文件:
/path/to/modules/imgproc/src/filter.dispatch.cpp/path/to/modules/imgproc/src/deriv.cpp
OpenCV提供了Sobel算子的实现:
CV_EXPORTS_W void Sobel( InputArray src, OutputArray dst, int ddepth,
int dx, int dy, int ksize = 3,
double scale = 1, double delta = 0,
int borderType = BORDER_DEFAULT );
src:原图dst:结果图像ddepth:输出图像深度,使用CV_16S以避免溢出dx:导数在x轴方向的阶数dy:导数在y轴方向的阶数ksize:Sobel内核大小,比如3/5/7/9/11等等scale:计算导数值的比例因子,默认为1delta:添加到每个梯度的值,默认为0borderType:边界填充类型,默认为BORDER_DEFAULT
还有一个相关的函数是getDerivKernels,其返回计算空间图像导数的滤波系数
void cv::getDerivKernels( OutputArray kx, OutputArray ky, int dx, int dy,
int ksize, bool normalize, int ktype )
{
if( ksize <= 0 )
getScharrKernels( kx, ky, dx, dy, normalize, ktype );
else
getSobelKernels( kx, ky, dx, dy, ksize, normalize, ktype );
}
如果指定内核大小ksize大于0,则调用函数getSobelKernels制作Sobel算子内核
示例
#include "opencv2/imgproc.hpp"
#include "opencv2/imgcodecs.hpp"
#include "opencv2/highgui.hpp"
#include <iostream>
using namespace cv;
using namespace std;
// 滑动条名
const string ksize_trackbarname = "ksize";
const string scale_trackbarname = "scale";
const string delta_trackbarname = "delta";
// 窗口名
const string winname = "Sobel Demo - Simple Edge Detector";
// 最大值
const int maxNum = 4;
int ksize_value, scale_value, delta_value;
Mat image, src, src_gray, grad;
int ddepth = CV_16S;
void onSobel(int, void *) {
int ksize = 1 + 2 * (ksize_value % 5); // ksize取值为 1/3/5/7/9
double scale = 1 + scale_value; // scale取值为 1/2/3/4/5
double delta = 10 * delta_value; // delta取值为 0/10/20/30/40
Mat grad_x, grad_y;
Mat abs_grad_x, abs_grad_y;
Sobel(src_gray, grad_x, ddepth, 1, 0, ksize, scale, delta, BORDER_DEFAULT); // x方向求导
Sobel(src_gray, grad_y, ddepth, 0, 1, ksize, scale, delta, BORDER_DEFAULT); // y方向求导
// converting back to CV_8U
convertScaleAbs(grad_x, abs_grad_x);
convertScaleAbs(grad_y, abs_grad_y);
addWeighted(abs_grad_x, 0.5, abs_grad_y, 0.5, 0, grad); // 近似计算图像梯度
imshow(winname, grad);
}
int main(int argc, char **argv) {
cv::CommandLineParser parser(argc, argv,
"{@input |../lena.jpg|input image}"
"{help h|false|show help message}");
cout << "The sample uses Sobel or Scharr OpenCV functions for edge detection\n\n";
parser.printMessage();
cout << "\nPress 'ESC' to exit program.\nPress 'R' to reset values ( ksize will be -1 equal to Scharr function )";
String imageName = parser.get<String>("@input");
// As usual we load our source image (src)
image = imread(imageName, IMREAD_COLOR); // Load an image
// Check if image is loaded fine
if (image.empty()) {
printf("Error opening image: %s\n", imageName.c_str());
return 1;
}
// Remove noise by blurring with a Gaussian filter ( kernel size = 3 )
GaussianBlur(image, src, Size(3, 3), 0, 0, BORDER_DEFAULT);
// Convert the image to grayscale
cvtColor(src, src_gray, COLOR_BGR2GRAY);
namedWindow(winname);
createTrackbar(ksize_trackbarname, winname, &ksize_value, maxNum, onSobel, NULL);
createTrackbar(scale_trackbarname, winname, &scale_value, maxNum, onSobel, NULL);
createTrackbar(delta_trackbarname, winname, &delta_value, maxNum, onSobel, NULL);
onSobel(0, NULL);
waitKey(0);
return 0;
}
Sobel算子有3个关键参数:ksize/scale/delta。实现步骤如下:
- 读取彩色图像
- 高斯平滑操作,去除噪声
- 转换成灰度图像
- 创建
3个滑动条,分别控制ksize/scale/delta Sobel滤波
从实验结果发现
ksize越大,图像轮廓越不明显,取ksize=3即可scale有助于显示更多图像轮廓信息,不过scale过大会导致过多的轮廓信息出现,取scale=1或2即可delta有助于提高图像整体亮度

ksize=3, scale=1, delta=0

ksize=5, scale=1, delta=0

ksize=3, scale=2, delta=0
[Scharr]图像求导
参考:
通过Scharr算子计算图像导数
Scharr算子
Scharr算子和Sobel算子类似,均用于计算图像近似梯度。其3x3内核如下

相比于Sobel算子,其同样结合了高斯平滑和差分的功能,并且因为中间差分系数相比于两边更高,所以相应地梯度计算精度更高
函数解析
CV_EXPORTS_W void Scharr( InputArray src, OutputArray dst, int ddepth,
int dx, int dy, double scale = 1, double delta = 0,
int borderType = BORDER_DEFAULT );
src:原图dst:结果图像ddepth:输出图像深度,使用CV_16S以避免溢出dx:导数在x轴方向的阶数dy:导数在y轴方向的阶数scale:计算导数值的比例因子,默认为1delta:添加到每个梯度的值,默认为0borderType:边界填充类型,默认为BORDER_DEFAULT
OpenCV提供的Scharr函数仅支持3x3大小模板
示例
#include "opencv2/imgproc.hpp"
#include "opencv2/imgcodecs.hpp"
#include "opencv2/highgui.hpp"
#include <iostream>
using namespace cv;
using namespace std;
// 滑动条名
const string scale_trackbarname = "scale";
const string delta_trackbarname = "delta";
// 窗口名
const string winname = "Scharr Demo - Simple Edge Detector";
// 最大值
const int maxNum = 4;
int scale_value, delta_value;
Mat image, src, src_gray, grad;
int ddepth = CV_16S;
void onSobel(int, void *) {
double scale = 1 + scale_value; // scale取值为 1/2/3/4/5
double delta = 10 * delta_value; // delta取值为 0/10/20/30/40
Mat grad_x, grad_y;
Mat abs_grad_x, abs_grad_y;
Scharr(src_gray, grad_x, ddepth, 1, 0, scale, delta, BORDER_DEFAULT); // x方向求导
Scharr(src_gray, grad_y, ddepth, 0, 1, scale, delta, BORDER_DEFAULT); // y方向求导
// converting back to CV_8U
convertScaleAbs(grad_x, abs_grad_x);
convertScaleAbs(grad_y, abs_grad_y);
addWeighted(abs_grad_x, 0.5, abs_grad_y, 0.5, 0, grad); // 近似计算图像梯度
imshow(winname, grad);
}
int main(int argc, char **argv) {
cv::CommandLineParser parser(argc, argv,
"{@input |../lena.jpg|input image}"
"{help h|false|show help message}");
cout << "The sample uses Sobel or Scharr OpenCV functions for edge detection\n\n";
parser.printMessage();
cout << "\nPress 'ESC' to exit program.\nPress 'R' to reset values ( ksize will be -1 equal to Scharr function )";
String imageName = parser.get<String>("@input");
// As usual we load our source image (src)
image = imread(imageName, IMREAD_COLOR); // Load an image
// Check if image is loaded fine
if (image.empty()) {
printf("Error opening image: %s\n", imageName.c_str());
return 1;
}
// Remove noise by blurring with a Gaussian filter ( kernel size = 3 )
GaussianBlur(image, src, Size(3, 3), 0, 0, BORDER_DEFAULT);
// Convert the image to grayscale
cvtColor(src, src_gray, COLOR_BGR2GRAY);
namedWindow(winname);
createTrackbar(scale_trackbarname, winname, &scale_value, maxNum, onSobel, NULL);
createTrackbar(delta_trackbarname, winname, &delta_value, maxNum, onSobel, NULL);
onSobel(0, NULL);
waitKey(0);
return 0;
}

scale=1, delta=0

scale=2, delta=0

scale=1, delta=10
[Laplacian]图像求导
参考:
OpenCV提供了二阶求导算子Laplacian
Laplacian算子
对于Sobel算子而言,图像边缘区域的像素值变化剧烈,其表现在一阶导数上就是出现极大值

Laplacian算子计算的是图像的二阶导数,此时边缘区域的像素值在二阶导数中表现为0值


与一阶导数相比,二阶导数能够区分像素值递增和递减区域,并且通过比较递增极大值和递减极小值,能够进一步区分出像素值变化缓慢和剧烈区域
对于二维图像而言,其数学公式如下:

需要对水平和垂直方向进行二阶求导操作
函数解析
参考:Laplacian()
CV_EXPORTS_W void Laplacian( InputArray src, OutputArray dst, int ddepth,
int ksize = 1, double scale = 1, double delta = 0,
int borderType = BORDER_DEFAULT );
src:原图dst:结果图像ddepth:输出图像深度,使用CV_16S以避免溢出dx:导数在x轴方向的阶数dy:导数在y轴方向的阶数ksize:Sobel内核大小,比如3/5/7/9/11等等scale:计算导数值的比例因子,默认为1delta:添加到每个梯度的值,默认为0borderType:边界填充类型,默认为BORDER_DEFAULT
源代码地址:/path/to/modules/imgproc/src/deriv.cpp
if( ksize == 1 || ksize == 3 )
{
float K[2][9] =
{
{ 0, 1, 0, 1, -4, 1, 0, 1, 0 },
{ 2, 0, 2, 0, -8, 0, 2, 0, 2 }
};
Mat kernel(3, 3, CV_32F, K[ksize == 3]);
if( scale != 1 )
kernel *= scale;
CV_OCL_RUN(_dst.isUMat() && _src.dims() <= 2,
ocl_Laplacian3_8UC1(_src, _dst, ddepth, kernel, delta, borderType));
}
if( ksize == 1 || ksize == 3 )
{
float K[2][9] =
{
{ 0, 1, 0, 1, -4, 1, 0, 1, 0 },
{ 2, 0, 2, 0, -8, 0, 2, 0, 2 }
};
Mat kernel(3, 3, CV_32F, K[ksize == 3]);
if( scale != 1 )
kernel *= scale;
filter2D( _src, _dst, ddepth, kernel, Point(-1, -1), delta, borderType );
}
else
{
int ktype = std::max(CV_32F, std::max(ddepth, sdepth));
int wdepth = sdepth == CV_8U && ksize <= 5 ? CV_16S : sdepth <= CV_32F ? CV_32F : CV_64F;
int wtype = CV_MAKETYPE(wdepth, cn);
Mat kd, ks;
getSobelKernels( kd, ks, 2, 0, ksize, false, ktype );
...
...
}
当ksize=1时,OpenCV提供的内核为
0 1 0
1 -4 1
0 1 0
通过差分方式进行计算,并没有平滑的效果
当ksize=3时,OpenCV提供的内核为
2 0 2
0 -8 0
2 0 2
示例
#include "opencv2/imgproc.hpp"
#include "opencv2/imgcodecs.hpp"
#include "opencv2/highgui.hpp"
#include <iostream>
using namespace cv;
using namespace std;
// 滑动条名
const string ksize_trackbarname = "ksize";
const string scale_trackbarname = "scale";
const string delta_trackbarname = "delta";
// 窗口名
const string winname = "Laplacian Demo - Simple Edge Detector";
// 最大值
const int maxNum = 4;
int ksize_value, scale_value, delta_value;
Mat image, src, src_gray;
int ddepth = CV_16S;
void onLaplacian(int, void *) {
int ksize = 1 + 2 * (ksize_value % 5); // ksize取值为 1/3/5/7/9
double scale = 1 + scale_value; // scale取值为 1/2/3/4/5
double delta = 10 * delta_value; // delta取值为 0/10/20/30/40
Mat grad, abs_grad;
Laplacian(src_gray, grad, ddepth, ksize, scale, delta, BORDER_DEFAULT);
// converting back to CV_8U
convertScaleAbs(grad, abs_grad);
imshow(winname, abs_grad);
}
int main(int argc, char **argv) {
cv::CommandLineParser parser(argc, argv,
"{@input |../lena.jpg|input image}"
"{help h|false|show help message}");
cout << "The sample uses Laplacian OpenCV functions for edge detection\n\n";
parser.printMessage();
String imageName = parser.get<String>("@input");
// As usual we load our source image (src)
image = imread(imageName, IMREAD_COLOR); // Load an image
// Check if image is loaded fine
if (image.empty()) {
printf("Error opening image: %s\n", imageName.c_str());
return 1;
}
// Remove noise by blurring with a Gaussian filter ( kernel size = 3 )
GaussianBlur(image, src, Size(3, 3), 0, 0, BORDER_DEFAULT);
// Convert the image to grayscale
cvtColor(src, src_gray, COLOR_BGR2GRAY);
namedWindow(winname);
createTrackbar(ksize_trackbarname, winname, &ksize_value, maxNum, onLaplacian, NULL);
createTrackbar(scale_trackbarname, winname, &scale_value, maxNum, onLaplacian, NULL);
createTrackbar(delta_trackbarname, winname, &delta_value, maxNum, onLaplacian, NULL);
onLaplacian(0, NULL);
waitKey(0);
return 0;
}

ksize=1, scale=1, delta=0

ksize=3, scale=1, delta=0

ksize=3, scale=2, delta=0
小结
OpenCV中的Laplacian实现和Sobel/Scharr实现相比,没有高斯平滑功能,更注重像素值的变化,所以能够得到更加精细的图像轮廓
[Canny]边缘检测
参考:
opencv cvCanny算子以及与其他边缘检测算子的比较
学习Canny边缘检测器
Canny算子
Canny算子是常用的边缘检测算法,其执行步骤如下:
- 应用高斯滤波器平滑图像以去除噪声
- 计算图像的强度梯度
- 应用非最大抑制(
Non-maximum suppression)消除边缘检测的虚假响应 - 应用双阈值确定潜在边缘
- 通过滞后(
hysteresis)方法跟踪边缘:通过抑制所有其他弱边缘和未连接到强边缘的边缘,完成边缘检测

图像梯度计算
通过Sobel算子计算图像的水平和垂直反向导数,然后计算梯度大小和方向

将梯度方向通过四舍五入方法归入到水平/垂直/对角 (0°, 45°, 90°和135°),比如[0°, 22.5°]和[157.5°, 180°]映射为0°
非最大抑制
非最大抑制是一种边缘细化技术。进行梯度计算后的图像边缘仍旧很模糊,边缘拥有多个候选位置,所以需要应用非最大抑制来寻找“最大”像素点,即具有最大强度值变化的位置,移除其他梯度值,保证边缘具有准确的响应。其原理如下
- 将当前像素的边缘强度与像素在正梯度方向和负梯度方向上的边缘强度进行比较
- 如果与相同方向的掩模中的其他像素相比,当前像素的边缘强度是最大的(例如,指向y轴方向的像素将与垂直轴上方和下方的像素相比较),则该值将被保留。否则,该值将被抑制(去除梯度值为0)
具体实现时,将连续梯度方向分类为一组小的离散方向,然后在上一步的输出(即边缘强度和梯度方向)上移动3x3滤波器。在每个像素处,如果中心像素的大小不大于渐变方向上两个相邻像素的大小,它将抑制中心像素的边缘强度(通过将其值设置为0)
- 如果梯度角度为
0°(即边缘在南北方向),如果其梯度大小大于东西方向像素处的大小,则该点将被视为在边缘上 - 如果梯度角度为
45°(即边缘位于西北-东南方向),如果其梯度大小大于东北和西南方向像素处的大小,则该点将被视为位于边缘上 - 如果梯度角度为
90°(即边缘在东西方向),如果其梯度大小大于南北方向像素处的大小,则该点将被视为在边缘上 - 如果梯度角度为
135°(即边缘位于东北-西南方向),如果其梯度大小大于西北和东南方向像素处的大小,则该点将被视为位于边缘上
双边阈值
通过非最大抑制,可以有效确定边缘的最大像素点,剩余的边缘像素提供了图像中真实边缘的更精确表示。但是,由于噪声和颜色变化,一些边缘像素仍然存在。为了去除这些虚假响应,必须滤除具有弱梯度值的边缘像素,并保留具有高梯度值的边缘像素。这是通过选择高阈值和低阈值来实现的。如果边缘像素的渐变值高于高阈值,则将其标记为强边缘像素。如果边缘像素的渐变值小于高阈值且大于低阈值,则将其标记为弱边缘像素。如果边缘像素的值小于低阈值,它将被抑制
两个阈值是通过经验确定的,其定义将取决于给定输入图像的内容。通过其比率(upper:lower)设置为2:1和3:1之间
函数解析
CV_EXPORTS_W void Canny( InputArray image, OutputArray edges,
double threshold1, double threshold2,
int apertureSize = 3, bool L2gradient = false );
image:原图(深度为CV_8U)edges:结果图像(单通道CV_8U,大小和原图一样)threshold1:低阈值threshold2:高阈值apertureSize:Sobel算子的大小。默认为3L2gradient:是否使用更精确的L2范数sqrt(dI/dx)^2+(dI/dy)^2)计算梯度,默认为false,表示使用L1范数|dI/dx|+|dI/dy|
源文件地址:/path/to/modules/imgproc/src/canny.cpp
apaertureSize可设置为3或者7
if ((aperture_size & 1) == 0 || (aperture_size != -1 && (aperture_size < 3 || aperture_size > 7)))
CV_Error(CV_StsBadFlag, "Aperture size should be odd between 3 and 7");
示例
#include "opencv2/imgproc.hpp"
#include "opencv2/highgui.hpp"
#include <iostream>
#include <cstring>
using namespace std;
using namespace cv;
// 滑动条名
const string lowthreshold_trackbarname = "low threshold"; // 取值为 0-250
const string highthreshold_trackbarname = "high threshold"; // 取值为 0-250
const string sigma_trackbarname = "sigma"; // 取值为 0-2.0
// 窗口名
const string winname = "Canny Demo - Simple Edge Detector";
// 最大值
const int max_threshold = 250;
Mat src, src_gray;
Mat dst, detected_edges;
int lowThreshold = 40;
int highThreshold = 120;
int sigma = 14;
void onCanny(int, void *) {
const int kernel_size = 3;
GaussianBlur(src_gray, detected_edges, Size(5, 5), sigma / 10.0);
Canny(detected_edges, detected_edges, lowThreshold, highThreshold, kernel_size);
dst = Scalar::all(0);
src.copyTo(dst, detected_edges);
imshow(winname, dst);
}
int main(int argc, char **argv) {
CommandLineParser parser(argc, argv, "{@input | ../lena.jpg | input image}");
src = imread(parser.get<String>("@input"), IMREAD_COLOR); // Load an image
if (src.empty()) {
std::cout << "Could not open or find the image!\n" << std::endl;
std::cout << "Usage: " << argv[0] << " <Input image>" << std::endl;
return -1;
}
dst.create(src.size(), src.type());
cvtColor(src, src_gray, COLOR_BGR2GRAY);
namedWindow(winname, WINDOW_AUTOSIZE);
createTrackbar(lowthreshold_trackbarname, winname, &lowThreshold, max_threshold, onCanny);
createTrackbar(highthreshold_trackbarname, winname, &highThreshold, max_threshold, onCanny);
createTrackbar(sigma_trackbarname, winname, &sigma, 20, onCanny);
onCanny(0, nullptr);
waitKey(0);
return 0;
}
设置3个滑动条,分别控制高斯滤波sigma值,Canny算子的最小/最大阈值

sigma=1.4, min_threshold=40, max_threshold=120
[threshold]基本阈值操作
参考:
opencv cvThreshold() cvAdaptiveThreshold()
使用OpenCV函数cv::threshold实现基本阈值操作
什么是阈值操作
阈值操作是最简单的分割方法,通过像素值的判断分离出目标和背景
函数cv::threshold提供了多种阈值操作,参考ThresholdTypes
THRESH_BINARYTHRESH_BINARY_INVTHRESH_TRUNCTHRESH_TOZEROTHRESH_TOZERO_INVTHRESH_OTSUTHRESH_TRIANGLE
假定将原图变形为一行,其像素值和阈值关系如下图所示

每列红色表示像素值大小,蓝色直线表示阈值


THRESH_OTSU
使用OTSU算法计算最佳阈值。其实现参考:opencv 最大类间方差(大津法OTSU)
THRESH_TRIANGLE
使用Triangle算法计算最佳阈值
函数解析
CV_EXPORTS_W double threshold( InputArray src, OutputArray dst,
double thresh, double maxval, int type );
src:原图。可以是多通道,8位深度或者32位深度dst:结果图像。大小和类型与原图一致thresh:阈值maxval:最大阈值。当阈值类型为THRESH_BINARY或THRESH_BINARY_INV时使用type:阈值类型
头文件声明:#include <opencv2/imgproc.hpp>
源文件地址:/path/to/modules/imgproc/src/thresh.cpp
示例
#include "opencv2/imgproc.hpp"
#include "opencv2/imgcodecs.hpp"
#include "opencv2/highgui.hpp"
#include <iostream>
using namespace cv;
using std::cout;
int threshold_value = 0;
int threshold_type = 3;
int const max_value = 255;
int const max_type = 6;
int const max_binary_value = 255;
Mat src, src_gray, dst;
const char *window_name = "Threshold Demo";
const char *trackbar_type =
"Type: \n 0: Binary \n 1: Binary Inverted \n 2: Truncate \n 3: To Zero \n 4: To Zero Inverted \n 5: Ostu \n "
"6: Triangle";
const char *trackbar_value = "Value";
static void Threshold_Demo(int, void *) {
/* 0: Binary
1: Binary Inverted
2: Threshold Truncated
3: Threshold to Zero
4: Threshold to Zero Inverted
*/
if (threshold_type == 5) {
threshold_type = THRESH_OTSU;
} else if (threshold_type == 6) {
threshold_type = THRESH_TRIANGLE;
}
threshold(src_gray, dst, threshold_value, max_binary_value, threshold_type);
imshow(window_name, dst);
}
int main(int argc, char **argv) {
String imageName("../stuff.jpg"); // by default
if (argc > 1) {
imageName = argv[1];
}
src = imread(samples::findFile(imageName), IMREAD_COLOR); // Load an image
if (src.empty()) {
cout << "Cannot read the image: " << imageName << std::endl;
return -1;
}
cvtColor(src, src_gray, COLOR_BGR2GRAY); // Convert the image to Gray
namedWindow(window_name, WINDOW_AUTOSIZE); // Create a window to display results
createTrackbar(trackbar_type,
window_name, &threshold_type,
max_type, Threshold_Demo); // Create a Trackbar to choose type of Threshold
createTrackbar(trackbar_value,
window_name, &threshold_value,
max_value, Threshold_Demo); // Create a Trackbar to choose Threshold value
Threshold_Demo(0, 0); // Call the function to initialize
waitKey();
return 0;
}
创建两个滑动条,一个改变阈值类型,一个改变最小阈值
[旋转][平移][缩放]仿射变换
参考:
opencv 拉伸、扭曲、旋转图像-仿射变换 opencv1 / opencv2 / python cv2(代码)
使用OpenCV完成图像旋转、平移和缩放操作
仿射变换
本质上看仿射变换表示两个图像之间的关系。任何仿射变换均可以由矩阵乘法(线性变换,linear transformation)加上向量加法(translation,平移变换)组成。所以通过仿射变换能够完成以下3个功能
- 旋转(
rotation, linear transformation) - 平移(
translation, vector addition) - 缩放(
scale opeation, linear transformation)
使用2x3大小数组M来进行仿射变换。数组由两个矩阵A/B组成,其中矩阵A(大小为2x2)用于矩阵乘法,矩阵B(大小为2x1)用于向量加法

将二维图像的坐标点x/y组成二维数组X,大小为2xN,其操作如下:


得到转换后的坐标点再将赋予像素值

函数解析
有以下关键函数:
- cv::warpAffine:完成仿射变换
- getRotationMatrix2D():计算旋转矩阵
- getAffineTransform() :从三对对应点中计算仿射变换矩阵
- RotatedRect():计算仿射图像大小
warpAffine
CV_EXPORTS_W void warpAffine( InputArray src, OutputArray dst,
InputArray M, Size dsize,
int flags = INTER_LINEAR,
int borderMode = BORDER_CONSTANT,
const Scalar& borderValue = Scalar());
src:原图dst:结果图像。数据深度和类型与原图一致M:2x3大小旋转矩阵dsize:输出图像的大小flags:插值方法组合(参考InterpolationFlags)。如果设置为WARP_INVERSE_MAP,表示M是逆变换borderMode:边界填充方法,参考BorderTypes。当设置为BORDER_TRANSPARENT,这意味着目标图像中与源图像中的“异常值”相对应的像素不被函数修改borderValue:用于固定填充的值;默认情况下为0
函数warpAffine执行以下操作:

getRotationMatrix2D
CV_EXPORTS_W Mat getRotationMatrix2D( Point2f center, double angle, double scale );
center:源图像中的旋转中心angle:旋转角度(度)。正值表示逆时针旋转(坐标原点假定为左上角)scale:各向同性比例因子,就是缩放因子,如果不进行缩放则设置为1.0
函数getRotationMatrix2D执行如下操作:

其中α和β由以下方法得到

getAffineTransform
CV_EXPORTS Mat getAffineTransform( const Point2f src[], const Point2f dst[] );
src[]:原图点坐标dst[]:结果图对应点坐标
RotatedRect
inline
RotatedRect::RotatedRect(const Point2f& _center, const Size2f& _size, float _angle)
: center(_center), size(_size), angle(_angle) {}
_center:旋转中心_size:原图大小_angle:旋转角度
调用函数cv::warpAffine时设置结果图像大小和原图一致,则仿射图像有可能截断部分内容
示例
#include "opencv2/imgcodecs.hpp"
#include "opencv2/highgui.hpp"
#include "opencv2/imgproc.hpp"
#include <iostream>
using namespace cv;
using namespace std;
int main(int argc, char **argv) {
CommandLineParser parser(argc, argv, "{@input | ../lena.jpg | input image}");
Mat src = imread(parser.get<String>("@input"));
if (src.empty()) {
cout << "Could not open or find the image!\n" << endl;
cout << "Usage: " << argv[0] << " <Input image>" << endl;
return -1;
}
// 已知点坐标计算仿射矩阵和结果图像
Point2f srcTri[3];
srcTri[0] = Point2f(0.f, 0.f);
srcTri[1] = Point2f(src.cols - 1.f, 0.f);
srcTri[2] = Point2f(0.f, src.rows - 1.f);
Point2f dstTri[3];
dstTri[0] = Point2f(0.f, src.rows * 0.33f);
dstTri[1] = Point2f(src.cols * 0.85f, src.rows * 0.25f);
dstTri[2] = Point2f(src.cols * 0.15f, src.rows * 0.7f);
Mat warp_mat = getAffineTransform(srcTri, dstTri);
Mat warp_dst = Mat::zeros(src.rows, src.cols, src.type());
warpAffine(src, warp_dst, warp_mat, warp_dst.size());
// 图像以图像中央为旋转中心,顺时针旋转45度
Point center = Point(warp_dst.cols / 2, warp_dst.rows / 2);
double angle = -45.0;
double scale = 1.0;
Mat rot_mat = getRotationMatrix2D(center, angle, scale);
Rect bbox = cv::RotatedRect(center, src.size(), angle).boundingRect();
rot_mat.at<double>(0, 2) += bbox.width / 2.0 - center.x;
rot_mat.at<double>(1, 2) += bbox.height / 2.0 - center.y;
cout << "旋转45度: " << rot_mat << endl;
Mat rotate_dst;
warpAffine(src, rotate_dst, rot_mat, bbox.size());
// 旋转+缩放
scale = src.rows / sqrt(pow(src.rows, 2) * 2);
rot_mat = getRotationMatrix2D(center, angle, scale);
cout << "旋转45度并缩放" << rot_mat << endl;
Mat scale_rotate_dst;
warpAffine(src, scale_rotate_dst, rot_mat, src.size());
// 根据仿射图像得到原图,将图像逆时针旋转45度,然后从中提取原图大小
angle = 45;
scale = 1.0;
center = Point((int) (rotate_dst.cols / 2.0), (int) (rotate_dst.rows / 2.0));
rot_mat = getRotationMatrix2D(center, angle, scale);
Mat affine_src_tmp, affine_src;
warpAffine(rotate_dst, affine_src_tmp, rot_mat, bbox.size());
affine_src = affine_src_tmp(Rect((bbox.width - src.cols) / 2, (bbox.height - src.rows) / 2, src.cols, src.rows));
imshow("Source image", src);
imshow("Warp", warp_dst);
imshow("Rotate", rotate_dst);
imshow("scale_rotate_dst", scale_rotate_dst);
imshow("affine_src", affine_src);
waitKey();
return 0;
}
完成图像变形、旋转、旋转+缩放以及逆旋转的功能

[line]绘制线段
使用OpenCV函数line绘制两点之间的线段
函数解析
CV_EXPORTS_W void line(InputOutputArray img, Point pt1, Point pt2, const Scalar& color,
int thickness = 1, int lineType = LINE_8, int shift = 0);
img:绘制图像pt1:起始点pt2:终止点color:线条颜色thickness:线条粗细lineType:线条绘制类型。参考LineTypesshift:点坐标中的小数位数
示例
#include <iostream>
#include <opencv2/opencv.hpp>
using namespace std;
using namespace cv;
int main() {
int width = 400;
int height = 200;
// 3通道8位大小图像
Mat src = Mat(height, width, CV_8UC3);
cout << src.size() << endl;
// 过中心点的斜线
line(src, Point(10, 10), Point(390, 190), Scalar(255, 0, 0), 2);
// 过中心点的直线
line(src, Point(10, 100), Point(390, 100), Scalar(0, 0, 255), 2);
imshow("line", src);
waitKey(0);
return 0;
}
新建图像src,大小为200x400,绘制两条线段

Matplotlib
引言
matplotlib是Python 2D绘图库
之前对它的概念不太理解,都是在网上找的示例代码,所以很难在原先代码基础上添加一些特性
这一次深入matplotlib的绘图架构,争取能够实现好的绘图
matplotlib.plot
参考:Matplotlib, pyplot and pylab: how are they related?
matplotlib.plot是matplotlib的一个模块,为底层的面向对象绘图库提供状态机接口,状态机隐式并自动创建图形和轴以实现所需的绘图
其API风格类似于MATLIB,更加简单直观
输入数据格式
参考:Types of inputs to plotting functions
matplotlib支持多种格式数据输入,特别是np.array对象,所以最好在数据输入之前转换成np.array对象
b = np.matrix([[1,2],[3,4]])
b_asarray = np.asarray(b)
属性配置
查找配置文件
使用命令查找配置文件
>>> import matplotlib
>>> matplotlib.matplotlib_fname()
'xxx/xxx/matplotlib/mpl-data/matplotlibrc'
属性查找
使用命令查看当前属性
>>> import matplotlib.pyplot as plt
>>> plt.rcParams
/home/zj/software/anaconda/anaconda3/lib/python3.7/site-packages/matplotlib/__init__.py:886: MatplotlibDeprecationWarning:
examples.directory is deprecated; in the future, examples will be found relative to the 'datapath' directory.
"found relative to the 'datapath' directory.".format(key))
RcParams({'_internal.classic_mode': False,
'agg.path.chunksize': 0,
'animation.avconv_args': [],
'animation.avconv_path': 'avconv',
'animation.bitrate': -1,
'animation.codec': 'h264',
'animation.convert_args': [],
'animation.convert_path': 'convert',
'animation.embed_limit': 20.0,
'animation.ffmpeg_args': [],
'animation.ffmpeg_path': 'ffmpeg',
'animation.frame_format': 'png',
'animation.html': 'none',
...
...
[Ubuntu 16.04][matplotlib]中文乱码
参考:
存放
找到matplotlib字体存放位置
>>> import matplotlib
>>> matplotlib.matplotlib_fname()
'/home/zj/software/anaconda/anaconda3/lib/python3.7/site-packages/matplotlib/mpl-data/matplotlibrc'
进入mpl-data/fonts/ttf文件夹,存放刚才下载的simhei.ttf
配置
可以全局配置,也可以局部配置
全局配置
在mpl-data有配置文件matplotlibrc,添加以下配置
font.family : sans-serif
font.sans-serif : SimHei, DejaVu Sans, Bitstream Vera Sans, Computer Modern Sans Serif, Lucida Grande, Verdana, Geneva, Lucid, Arial, Helvetica, Avant Garde, sans-serif
axes.unicode_minus : False
局部配置
在程序中配置使用中文字体
plt.rcParams['font.sans-serif']=['simhei'] #用来正常显示中文标签
plt.rcParams['axes.unicode_minus']=False #用来正常显示负号
绘图关键概念Figure和Axes
解析绘图重要概念:Figure、Axes
Figure
Figure指的是整张图,绘图操作都在其上进行
程序中可以创建多张图,但是每次图形操作仅针对单张图进行
常用函数:
figuresuptitle
figure
调用函数matplotlib.pyplot.figure能够创建一张图
matplotlib.pyplot.figure(num=None, figsize=None, dpi=None, facecolor=None, edgecolor=None, frameon=True, FigureClass=<class 'matplotlib.figure.Figure'>, clear=False, **kwargs)[source]
关键参数是num,默认为空,每次调用figure递增图像数字,用以区分创建的不同图形;输入指定数字,如果已存在,则返回已创建的图形,否则,新建一个图形
注意:如果调用figure创建了很多图形,退出之前显式调用pyplot.close(),以便pyplot能够正确清理内存
调整大小
设置参数figsize来调整大小,默认大小为640x480,参考rcParams["figure.figsize"] = [6.4, 4.8]
设置图像为600x800
fig = plt.figure(figsize=(6, 8))
保存图形
使用函数matplotlib.pyplot.savefig保存当前Figure
plt.savefig('xxx.png')
使用参数bbox_inches='tight'能够在保存图像时减少四周的空白区域
suptitle
调用matplotlib.pyplot.suptitle为一张图形添加居中标题
Axes
Axes指的是绘图区域(或者称之为子图),绘图操作是在Axes上完成的,可以在Figure上实现多个Axes
一个Axes包含两个(在3D中包含三个)Axis(轴)对象,可以设置标题、x轴标签、y轴标签
常用函数:
plotsubplottitle/xlabel/ylabel
plot
函数matplotlib.pyplot.plot能够在当前Axes上绘制线段或者标记
matplotlib.pyplot.plot(*args, scalex=True, scaley=True, data=None, **kwargs)
输入一个列表,表示仅输入y轴坐标,输入y轴坐标就能够自动生成相应长度的x轴坐标
y = list(range(1, 10))
plt.plot(y)
plt.show()

注意:x轴长度和y轴相同,但是从0开始计数
输入两个列表,表示输入x轴和y轴坐标,注意:两个列表的长度应该相同
x = list(range(11, 20))
y = list(range(1, 10))
plt.plot(x, y)
plt.savefig("plot-x-y.png")
plt.show()

还可以绘制标记点而不是线段
x = list(range(11, 20))
y = list(range(1, 10))
plt.subplot(121)
plt.title('121')
plt.subplot(122) # 1行,2列,第二个
plt.title('122')
plt.plot(x, y, 'r+')
plt.savefig("subplot-1-2-2.png")
plt.show()

subplot
函数matplotlib.pyplot.subplot能够指定当前Figure上要绘制的Axes列表,以及接下来要绘制的Axes位置
matplotlib.pyplot.subplot(*args, **kwargs)
比如指定当前Figure有1行2列共2个Axes,指定接下来要绘制的是第二个
x = list(range(11, 20))
y = list(range(1, 10))
# plt.plot(y)
plt.subplot(122) # 1行,2列,第二个
plt.plot(x, y, 'r+')
plt.savefig("subplot-1-2-2.png")
plt.show()

还可以分开表示Axes在Figure中的行数/列数和指定当前Axes
subplot(nrows, ncols, index, **kwargs)
subplot(pos, **kwargs)
title/xlabel/ylabel
能够为每个Axes设置标签,x轴标签和y轴标签
参考:
设置标题大小
参考:matplotlib命令与格式:标题(title),标注(annotate),文字说明(text)
默认为large(大小为12``),参考rcParams['axes.titlesize']
可以直接设置数值,也可以使用关键字
[‘xx-small’, ‘x-small’, ‘small’, ‘medium’, ‘large’,’x-large’, ‘xx-large’]
设置如下:
fontdict = {'fontsize': 'small'}
plt.title('xxx', fontdict)
示例程序
实现一个2行2列子图的图形
fig = plt.figure(figsize=(7.2, 9.6))
fontdict = {'fontsize': 'small'}
x = list(range(1, 5))
y = list(range(6, 10))
plt.subplot(221) # 第一行第一列
plt.plot(x, y)
plt.title('第一行第一列', fontdict)
plt.xlabel('第一行')
plt.ylabel('第一列')
plt.subplot(222) # 第一行第二列
plt.plot(x, y, 'r+')
plt.title('第一行第二列', fontdict)
plt.xlabel('x')
plt.ylabel('y')
plt.subplot(223) # 第二行第一列
plt.plot(x, y, 'bo')
plt.title('第二行第一列', fontdict)
plt.xlabel('x')
plt.ylabel('y')
plt.subplot(224) # 第二行第二列
plt.plot(x, y, 'go')
plt.title('第二行第二列', fontdict)
plt.xlabel('x')
plt.ylabel('y')
plt.suptitle('2行2列Axes')
plt.savefig('axes-2-2.png')
plt.show()

[译][matplotlib]Pyplot教程
Pyplot接口简介
Pyplot介绍
matplotlib.pyplot是命令样式函数的集合,目的是让matplotlib像MATLAB一样工作。每个pyplot函数都对图像做一些改变:比如,创建一张图像、在图形中创建绘图区域、在绘图区域中绘制一些线条、用标签装饰绘图,等等
在matplotlib.pyplot中,不同的状态在函数调用之间被保留,这样它就可以跟踪当前图形和绘图区域,并且绘图功能被定向到当前轴(请注意,这里的“轴”以及文档中大多数地方指的是绘图区域,参考下图,而不是严格意义上的数学术语)

注意:Pyplot API通常不如面向对象的API灵活。您在这里看到的大多数函数调用也可以作为来自axes对象的方法调用。我们建议浏览教程和示例,以了解这是如何工作的
使用pyplot生成可视化非常便捷
import matplotlib.pyplot as plt
plt.plot([1, 2, 3, 4])
plt.ylabel('some numbers')
plt.show()

你肯定想知道为什么x轴取值为0-3而y轴取值为1-4。如果你输入单个列表或者数组到命令plot(),matplotlib假定它是y轴的序列值,同时自动生成x轴值。因为python从0开始,生成的x轴向量和y轴向量长度相同,但是从0开始。因此x轴数据是[0,1,2,3]
plot()是一个通用的命令,可以接受任意数量的参数。例如,要绘制x与y,可以发出以下命令:
plt.plot([1, 2, 3, 4], [1, 4, 9, 16])

格式化绘图样式
对于每对x,y参数,都有一个可选的第三个参数,它是指示绘图颜色和线条类型的格式字符串。格式字符串的字母和符号来自matlab,你可以将颜色字符串与线样式字符串连接起来。默认的格式字符串是
b-,表示一条实心蓝线。比如,用红色圆圈绘图,可以输入ro
plt.plot([1, 2, 3, 4], [1, 4, 9, 16], 'ro')
plt.axis([0, 6, 0, 20])
plt.show()

查看matplotlib.pyplot.plot文档关于完整的线类型和格式字符串的列表。上面的axis()命令输入一组[xmin, xmax, ymin, ymax],同时指定轴的视区
如果matplotlib仅限于使用列表,那么它对于数字处理将相当无用。通常,您将使用numpy数组。实际上,所有序列都在内部转换为numpy数组。下面的示例说明如何使用数组在一个命令中绘制具有不同格式样式的多条线
import numpy as np
# evenly sampled time at 200ms intervals
t = np.arange(0., 5., 0.2)
# red dashes, blue squares and green triangles
plt.plot(t, t, 'r--', t, t**2, 'bs', t, t**3, 'g^')
plt.show()

使用关键字字符串绘图
某些情况下允许您使用字符串访问特定变量。比如numpy.recarray或者pandas.DataFrame
matplotlib允许您为此类对象提供data关键字参数。如果提供,则可以使用与这些变量对应的字符串生成绘图
data = {'a': np.arange(50),
'c': np.random.randint(0, 50, 50),
'd': np.random.randn(50)}
data['b'] = data['a'] + 10 * np.random.randn(50)
data['d'] = np.abs(data['d']) * 100
plt.scatter('a', 'b', c='c', s='d', data=data)
plt.xlabel('entry a')
plt.ylabel('entry b')
plt.show()

使用分类变量绘图
也可以使用分类变量创建一个图。Matplotlib允许您将分类变量直接传递给许多绘图函数。例如:
names = ['group_a', 'group_b', 'group_c']
values = [1, 10, 100]
plt.figure(1, figsize=(9, 3))
plt.subplot(131)
plt.bar(names, values)
plt.subplot(132)
plt.scatter(names, values)
plt.subplot(133)
plt.plot(names, values)
plt.suptitle('Categorical Plotting')
plt.show()

控制线条属性
线条具有许多可以设置的属性:线条宽度、虚线样式、抗锯齿等;参见matplotlib.lines.line2D。有几种设置线条属性的方法
- 使用关键字参数
plt.plot(x, y, linewidth=2.0)
- 使用
Line2D实例的setter方法。plot返回一列Line2D对象,比如line1, line2 = plot(x1, y1, x2, y2)。在下面的代码中,我们假设只有一行,因此返回的列表长度为1。我们使用元组解压的方式来获取该列表的第一个元素:
line, = plt.plot(x, y, '-')
line.set_antialiased(False) # turn off antialising
- 使用setp()属性。下面示例使用
matlab样式的命令在一个行列表上设置多个属性。setp透明地处理对象列表或单个对象。您可以使用python关键字参数或matlab样式的字符串/值对:
lines = plt.plot(x1, y1, x2, y2)
# use keyword args
plt.setp(lines, color='r', linewidth=2.0)
# or MATLAB style string value pairs
plt.setp(lines, 'color', 'r', 'linewidth', 2.0)
以下是有效的Line2D属性


要获取可设置行属性的列表,请使用line或lines作为参数调用setp()函数
>>> import matplotlib.pyplot as plt
>>> lines = plt.plot([1, 2, 3])
>>> plt.setp(lines)
agg_filter: a filter function, which takes a (m, n, 3) float array and a dpi value, and returns a (m, n, 3) array
alpha: float
animated: bool
...
...
使用多个图形和轴
matlab和pyplot都有当前图形和当前轴的概念。所有绘图命令都应用于当前轴。函数gca()返回当前轴(matplotlib.axes.Axes实例),gcf()返回当前图形(matplotlib.figure.figure实例)。通常情况下,你不必担心这件事,因为它都是在幕后处理的。下面是创建两个子图的脚本
def f(t):
return np.exp(-t) * np.cos(2*np.pi*t)
t1 = np.arange(0.0, 5.0, 0.1)
t2 = np.arange(0.0, 5.0, 0.02)
plt.figure(1)
plt.subplot(211)
plt.plot(t1, f(t1), 'bo', t2, f(t2), 'k')
plt.subplot(212)
plt.plot(t2, np.cos(2*np.pi*t2), 'r--')
plt.show()

这里的figure()命令是可选的,因为默认情况下将创建figure(1),正如如果不手动指定任何轴,默认情况下将创建subplot(111)。subplot()命令指定了数字行(numrows)、数字列(numcols)、绘图编号(plot_number),其中绘图编号的取值范围是[1, numrows*numcols]。如果numrows*numcols<10,那么subplot命令中可以不使用逗号(comma)隔开,所以subplot(211)等同于subplot(2, 1, 1)
你可以创建任意数量的子图和轴。如果你想要手动放置一个轴,比如,不是常规的网格,使用axes()命令,该命令允许您将位置指定为axes([左、下、宽、高]),其中所有值都以分数(0到1)坐标表示。参考一个手动放置实例Axes Demo以及一个放置许多子图的实例Basic Subplot Demo
可以使用带有递增数字的多个figure()调用来创建多个图像。当然,每个图形可以包含尽可能多的轴和子图:
import matplotlib.pyplot as plt
plt.figure(1) # the first figure
plt.subplot(211) # the first subplot in the first figure
plt.plot([1, 2, 3])
plt.subplot(212) # the second subplot in the first figure
plt.plot([4, 5, 6])
plt.figure(2) # a second figure
plt.plot([4, 5, 6]) # creates a subplot(111) by default
plt.figure(3) # figure 1 current; subplot(212) still current
plt.subplot(211) # make subplot(211) in figure1 current
plt.title('Easy as 1, 2, 3') # subplot 211 title
plt.show()


使用命令clf()可以清理当前图像,使用命令cla()清理当前轴。如果你觉得在幕后维护状态(特别是当前图像、图形和轴)很烦人,不要失望:这只是围绕面向对象API的一个薄的有状态包装器,您可以使用其他来代替(请参见艺术家教程)
文本工作
text()命令可用于在任意位置添加文本,xlable()、ylabel()和title()用于在指定位置添加文本。
mu, sigma = 100, 15
x = mu + sigma * np.random.randn(10000)
# the histogram of the data
n, bins, patches = plt.hist(x, 50, density=1, facecolor='g', alpha=0.75)
plt.xlabel('Smarts')
plt.ylabel('Probability')
plt.title('Histogram of IQ')
plt.text(60, .025, r'$\mu=100,\ \sigma=15$')
plt.axis([40, 160, 0, 0.03])
plt.grid(True)
plt.show()

所有的text()命令都返回matplotlib.text.text实例。与上面的行一样,可以通过将关键字参数传递到文本函数或使用setp()自定义属性:
t = plt.xlabel('my data', fontsize=14, color='red')
更多详细属性在Text properties and layout
在文本中使用数学表达式
matplotlib接受任何文本表达式中的tex表达式。比如在标题中写入$\sigma_{i}=15$,可以写一个TeX表达式,用$符号括起来:
plt.title(r'$\sigma_i=15$')
标题字符串前面的r很重要——它表示该字符串是原始字符串,而不是将反斜杠视为python转义。matplotlib有一个内置的tex表达式解析器和布局引擎,并提供自己的数学字体——有关详细信息,请参阅Writing mathematical expressions。因此,您可以跨平台使用数学文本,而无需安装tex。对于安装了LaTex和Dvipng的用户,还可以使用LaTex来格式化文本,并将输出直接合并到显示图形或保存的PostScript中,参考Text rendering With LaTeX
注解文本
上面使用的基础text()命令将文本放置在轴上的任意位置。文本的一个常见用途是注释绘图的某些特征。annotate()方法提供了帮助器功能,使注释变得容易。在注释中,需要考虑两点:由参数xy表示的注释位置和文本xytext的位置。这两个参数都是(x,y)元组格式。
ax = plt.subplot(111)
t = np.arange(0.0, 5.0, 0.01)
s = np.cos(2*np.pi*t)
line, = plt.plot(t, s, lw=2)
plt.annotate('local max', xy=(2, 1), xytext=(3, 1.5),
arrowprops=dict(facecolor='black', shrink=0.05),
)
plt.ylim(-2, 2)
plt.show()

在这个基本示例中,xy(箭头尖端)和xytext位置(文本位置)都在数据坐标中。您可以选择其他各种坐标系——有关详细信息,请参见基本注释和高级注释。更多的例子可以在注释图中找到
对数轴和其他非线性轴
pyplot不仅支持线性轴比例,还支持对数和逻辑比例。如果数据跨越多个数量级,则通常使用这种方法。更改轴的比例很容易:
plt.xscale('log')
下面是四个具有相同数据和不同比例的Y轴绘图的示例
from matplotlib.ticker import NullFormatter # useful for `logit` scale
# Fixing random state for reproducibility
np.random.seed(19680801)
# make up some data in the interval ]0, 1[
y = np.random.normal(loc=0.5, scale=0.4, size=1000)
y = y[(y > 0) & (y < 1)]
y.sort()
x = np.arange(len(y))
# plot with various axes scales
plt.figure(1)
# linear
plt.subplot(221)
plt.plot(x, y)
plt.yscale('linear')
plt.title('linear')
plt.grid(True)
# log
plt.subplot(222)
plt.plot(x, y)
plt.yscale('log')
plt.title('log')
plt.grid(True)
# symmetric log
plt.subplot(223)
plt.plot(x, y - y.mean())
plt.yscale('symlog', linthreshy=0.01)
plt.title('symlog')
plt.grid(True)
# logit
plt.subplot(224)
plt.plot(x, y)
plt.yscale('logit')
plt.title('logit')
plt.grid(True)
# Format the minor tick labels of the y-axis into empty strings with
# `NullFormatter`, to avoid cumbering the axis with too many labels.
plt.gca().yaxis.set_minor_formatter(NullFormatter())
# Adjust the subplot layout, because the logit one may take more space
# than usual, due to y-tick labels like "1 - 10^{-3}"
plt.subplots_adjust(top=0.92, bottom=0.08, left=0.10, right=0.95, hspace=0.25,
wspace=0.35)
plt.show()

也可以添加自己的比例,有关详细信息,请参阅Developer’s guide for creating scales and transformations
下载Python源码:pyplot.py
下载Jupyter notebook:pyplot.ipynb
折线图
绘制折线图操作
格式化绘图样式
关键函数matplotlib.pyplot.plot调用格式如下:
plot([x], y, [fmt], data=None, **kwargs)
plot([x], y, [fmt], [x2], y2, [fmt2], ..., **kwargs)
使用参数fmt格式化线条,输入值是一个字符串
fmt = ‘[color][marker][line]’
由3部分组成:颜色+标记符+线条类型,每一个值都是可选的。如果给定了line,但是没有指定marker,那么线条仅仅是线段,没有标记符
支持以下颜色:

- b:蓝色
- g:绿色
- r:红色
- c:青色
- m:紫红
- y:黄色
- k:黑色
- w:白色
支持以下标记符:

支持以下线条类型:

-:实线--:虚线-.:点划线::点线
# -*- coding: utf-8 -*-
"""
折线图(line chart)
"""
import matplotlib.pyplot as plt
y = list(range(1, 5))
fig = plt.figure()
plt.subplot(221)
plt.plot(y, 'ro-')
plt.title('红色圆形实线')
plt.subplot(222)
plt.plot(y, 'b.--')
plt.title('蓝色点形虚线')
plt.subplot(223)
plt.plot(y, 'ms-.')
plt.title('紫红色方形点划线')
plt.subplot(224)
plt.plot(y, 'g^:')
plt.title('绿色上三角形点线')
plt.savefig('line-chart.png')
plt.show()

设置线条标签
当在Axes中绘制多条线时,使用函数matplotlib.pyplot.legend显示线条标签
# -*- coding: utf-8 -*-
"""
折线图(line chart)
"""
import matplotlib.pyplot as plt
import numpy as np
x = y = np.array(range(1, 5))
plt.plot(x, y, label='线条1')
plt.plot(x, y ** 2, label='线条2')
plt.plot(x, y ** 3, label='线条3')
plt.legend()
plt.savefig('line-legend-1.png')
plt.show()

添加文本
使用函数matplotlib.pyplot.text可以在Axes上添加额外文本信息
matplotlib.pyplot.text(x, y, s, fontdict=None, withdash=False, **kwargs)
参数x/y是标量,表示文本坐标,需要匹配相应坐标系
参数s表示文本内容
参数fontsize用于设置文本大小,默认为12
# -*- coding: utf-8 -*-
"""
折线图(line chart)
"""
import matplotlib.pyplot as plt
import numpy as np
x = y = np.array(range(1, 5))
plt.plot(x, y, label='线条1')
plt.plot(x, y ** 2, label='线条2')
plt.plot(x, y ** 3, label='线条3')
plt.text(1.0, 55, r'$\mu=100,\ \sigma=15$', fontsize=12)
plt.text(1.0, 50, r'蓝色:线条1', fontsize=20)
plt.savefig('line-text.png')
plt.show()
可以在文本字符串中输入Tex数学公式

已知两点坐标绘制直线
使用函数matplotlib.axes.Axes.add_line绘制图像,使用matplotlib.lines.Line2D保存点数据
from matplotlib.lines import Line2D
import matplotlib.pyplot as plt
if __name__ == '__main__':
spots = [[2, 5], [10, 66]]
(line_xs, line_ys) = zip(*spots)
print(line_xs)
print(line_ys)
figure, ax = plt.subplots()
plt.scatter(line_xs, line_ys, color='r')
ax.add_line(Line2D(line_xs, line_ys, linewidth=1, color='b'))
ax.add_line
plt.show()

饼图
参考:
使用函数matplotlib.pyplot.pie进行饼图的绘制
matplotlib.pyplot.pie(x, explode=None, labels=None, colors=None, autopct=None, pctdistance=0.6, shadow=False, labeldistance=1.1, startangle=None, radius=None, counterclock=True, wedgeprops=None, textprops=None, center=(0, 0), frame=False, rotatelabels=False, *, data=None)
必选参数x是一个标量数组,表示生成饼图的楔子(wedge)个数和分数(fractional)比例,其中分数比例通过x/sum(x)计算得出。如果sum(x)<1,那么饼图会有一部分(1-sum(x))面积空白
可选参数explode是一个标量数组,长度和楔子数组x相同,表示楔子分离距离
可选参数labels是一个字符列表,长度和x相同,提供每个楔子的标签
可选参数autopct可输入字符串或函数,用于标记每个楔子的数值大小,显示在楔子内部
可选参数shadow用于绘制饼图阴影
可选参数startangle决定启动绘制的角度。注意:从x轴正方向沿着逆时针开始
默认绘制饼图从x轴开始,逆时针(counterclockwise)方向绘制
确保饼图绘制为圆形,使用等高比例plt.axis('equal')
绘制饼图
完整饼图
# -*- coding: utf-8 -*-
"""
饼图(pie chart)
"""
import matplotlib.pyplot as plt
x = [1, 2, 3]
plt.pie(x)
plt.savefig('pie-1.png')
plt.show()

不完整饼图
# -*- coding: utf-8 -*-
"""
饼图(pie chart)
"""
import matplotlib.pyplot as plt
x = [0.1, 0.2, 0.3]
plt.pie(x)
plt.savefig('pie-2.png')
plt.show()

提供标签
# -*- coding: utf-8 -*-
"""
饼图(pie chart)
"""
import matplotlib.pyplot as plt
x = [1, 2, 3]
labels = ["1", "2", "3"]
plt.pie(x, labels=labels)
plt.savefig('pie-3.png')
plt.show()

显示百分比
# -*- coding: utf-8 -*-
"""
饼图(pie chart)
"""
import matplotlib.pyplot as plt
x = [1, 2, 3]
labels = ["1", "2", "3"]
plt.pie(x, labels=labels, autopct='%1.1f%%')
plt.savefig('pie-4.png')
plt.show()

绘制阴影
# -*- coding: utf-8 -*-
"""
饼图(pie chart)
"""
import matplotlib.pyplot as plt
x = [1, 2, 3]
labels = ["1", "2", "3"]
plt.pie(x, labels=labels, autopct='%1.1f%%', shadow=True)
plt.savefig('pie-5.png')
plt.show()

分离楔子
# -*- coding: utf-8 -*-
"""
饼图(pie chart)
"""
import matplotlib.pyplot as plt
x = [1, 2, 3]
labels = ["1", "2", "3"]
explode = [0, 0.1, 0]
plt.pie(x, explode=explode, labels=labels, autopct='%1.1f%%', shadow=True)
plt.axis('equal')
plt.savefig('pie-6.png')
plt.show()

散点图
绘制散点图使用函数matplotlib.pyplot.scatter
matplotlib.pyplot.scatter(x, y, s=None, c=None, marker=None, cmap=None, norm=None, vmin=None, vmax=None, alpha=None, linewidths=None, verts=None, edgecolors=None, *, data=None, **kwargs)[source]
参数x,y是数组形式,表示数据位置
参数c表示颜色,可选颜色值参考格式化绘图样式
- b:蓝色
- g:绿色
- r:红色
- c:青色
- m:紫红
- y:黄色
- k:黑色
- w:白色
参数marker表示图标形状,可选值参考MarkerStyle
filled_markers = ('o', 'v', '^', '<', '>', '8', 's', 'p', '*', 'h', 'H', 'D', 'd', 'P', 'X')
参数s表示点大小,默认为rcParams['lines.markersize'] ** 2
>>> import matplotlib.pyplot as plt
>>> plt.rcParams['lines.markersize']
6.0
示例
简单的散点图
# -*- coding: utf-8 -*-
import matplotlib.pyplot as plt
import numpy as np
if __name__ == '__main__':
fig = plt.figure()
x = np.random.rand(10)
y = np.random.rand(10)
plt.scatter(x, y)
plt.show()

使用颜色和maker标记多条散点图
import matplotlib.pyplot as plt
import numpy as np
if __name__ == '__main__':
fig = plt.figure()
x = np.random.rand(10)
y = np.random.rand(10)
plt.scatter(x, y, c='r', marker='<')
plt.scatter(x, y ** 2, c='g', marker='8')
plt.scatter(x ** 2, y, c='y', marker='*')
plt.show()

图像读取、显示和保存
Matplotlib.pyplot支持读取、显示和保存图像操作
读取图像
使用函数matplotlib.pyplot.imread读取本地图像
matplotlib.pyplot.imread(fname, format=None)
参数fname是字符串,表示图片路径;返回值imagedata是一个numpy.array对象
从源码查看,matplotlib使用PIL进行图片读取
显示图像
取消绘制x/y轴
plt.axis('off')
显示彩色图像
# -*- coding: utf-8 -*-
"""
图像操作
"""
import matplotlib.pyplot as plt
img = plt.imread('lena.jpg')
plt.imshow(img)
plt.axis('off')
plt.show()
注意:如果使用opencv读取图像,需要先转换成RGB格式
显示灰度图像
需要加载灰度图后,在imshow函数中设置参数cmap='gray'
# -*- coding: utf-8 -*-
"""
图像操作
"""
import matplotlib.pyplot as plt
import cv2 as cv
img = cv.imread('lena.jpg', cv.IMREAD_GRAYSCALE)
plt.imshow(img, cmap='gray')
plt.axis('off')
plt.title('灰度图')
plt.savefig('gray.png')
plt.show()

绘制多张图
# -*- coding: utf-8 -*-
"""
图像操作
"""
import matplotlib.pyplot as plt
import cv2 as cv
img = cv.imread('lena.jpg', cv.IMREAD_GRAYSCALE)
plt.figure(figsize=(10, 5)) # 设置窗口大小
plt.suptitle('2行3列') # 图片名称
plt.subplot(2, 3, 1)
plt.title('231')
plt.imshow(img, cmap='gray'), plt.axis('off')
plt.subplot(2, 3, 2)
plt.title('232')
plt.imshow(img, cmap='gray'), plt.axis('off')
plt.subplot(2, 3, 3)
plt.title('233')
plt.imshow(img, cmap='gray'), plt.axis('off')
plt.subplot(2, 3, 4)
plt.title('234')
plt.imshow(img, cmap='gray'), plt.axis('off')
plt.subplot(2, 3, 5)
plt.title('235')
plt.imshow(img, cmap='gray'), plt.axis('off')
plt.subplot(2, 3, 6)
plt.title('236')
plt.imshow(img, cmap='gray'), plt.axis('off')
plt.savefig('gray-2-3.png', bbox_inches='tight')
plt.show()

保存图像
使用函数matplotlib.pyplot.imsave保存数组为本地图像
matplotlib.pyplot.imsave(fname, arr, **kwargs)[source]
参数fname表示保存地址
参数arr表示图像数组
3d绘图
使用mpl_toolkits.mplot3d.axes3d.Axes3D进行3d绘图操作
绘制3d坐标系
使用函数add_subplot绘制3d坐标系
fig = plt.figure()
ax = fig.add_subplot(111, projection='3d')
fig.show()

曲线图
使用函数Axes3D.plot进行线图绘制,增加了可选参数zs来输入z值
import numpy as np
import matplotlib.pyplot as plt
from mpl_toolkits.mplot3d import Axes3D
plt.rcParams['legend.fontsize'] = 10
if __name__ == '__main__':
fig = plt.figure()
ax = fig.add_subplot(111, projection='3d')
# Prepare arrays x, y, z
theta = np.linspace(-4 * np.pi, 4 * np.pi, 100)
z = np.linspace(-2, 2, 100)
r = z ** 2 + 1
x = r * np.sin(theta)
y = r * np.cos(theta)
ax.plot(x, y, z, label='参数曲线')
ax.set_xlabel('x轴')
ax.set_ylabel('y轴')
ax.set_zlabel('z轴')
ax.legend()
plt.show()

散点图
Axes3D.scatter(xs, ys, zs=0, zdir=’z’, s=20, c=None, depthshade=True, *args, **kwargs)[source]
import numpy as np
import matplotlib.pyplot as plt
from mpl_toolkits.mplot3d import Axes3D
# Fixing random state for reproducibility
np.random.seed(19680801)
def randrange(n, vmin, vmax):
'''
Helper function to make an array of random numbers having shape (n, )
with each number distributed Uniform(vmin, vmax).
'''
return (vmax - vmin) * np.random.rand(n) + vmin
if __name__ == '__main__':
fig = plt.figure()
ax = fig.add_subplot(111, projection='3d')
n = 100
# For each set of style and range settings, plot n random points in the box
# defined by x in [23, 32], y in [0, 100], z in [zlow, zhigh].
for c, m, zlow, zhigh in [('r', 'o', -50, -25), ('b', '^', -30, -5)]:
xs = randrange(n, 23, 32)
ys = randrange(n, 0, 100)
zs = randrange(n, zlow, zhigh)
ax.scatter(xs, ys, zs, c=c, marker=m)
ax.set_xlabel('X轴')
ax.set_ylabel('Y轴')
ax.set_zlabel('Z轴')
plt.show()

曲面图
Axes3D.plot_surface(X, Y, Z, *args, norm=None, vmin=None, vmax=None, lightsource=None, **kwargs)
输入参数x/y/z都是二维数组
import numpy as np
import matplotlib.pyplot as plt
from mpl_toolkits.mplot3d import Axes3D
if __name__ == '__main__':
fig = plt.figure()
ax = fig.gca(projection='3d')
# Make data.
X = np.arange(-5, 5, 0.25)
Y = np.arange(-5, 5, 0.25)
X, Y = np.meshgrid(X, Y)
R = np.sqrt(X ** 2 + Y ** 2)
Z = np.sin(R)
# 绘制曲面
# Plot the surface.
surf = ax.plot_surface(X, Y, Z, cmap=plt.cm.winter)
# 添加将值映射到颜色的颜色栏
# Add a color bar which maps values to colors.
fig.colorbar(surf, shrink=0.5, aspect=5)
plt.show()

可修改曲面颜色,比如matplotlib绘图系列—-3D曲面图与散点图
plt.cm.coolwarmplt.cm.springplt.cm.summerplt.cm.autumnplt.cm.winter
等高线图
绘制等高线图
相关函数:
contour vs contourf
contour和contourf都用于绘制等高线图,区别在于contour绘制等高线,contourf填充等高区域,同一版本的两个函数使用相同的参数列表和返回值
contour([X, Y,] Z, [levels], **kwargs)
X/Y是等高线值Z的坐标- 如果
X/Y是2-D大小,必须和Z一致 - 如果
X/Y是1-D大小,那么len(X)==M表示Z的列数,len(Y)==N表示Z的行数 - 如果
X/Y未给定,初始化为整数下标(integer indices),比如,X=range(M),Y=range(N)
- 如果
Z是等高线值,大小为(N, M)levels是可选参数,它确定轮廓线/区域的数量和位置- 如果给定为整数
n,那么绘制n+1条轮廓线,轮廓线表示的高度是自动选定的 - 如果是数组,绘制轮廓线在指定的识别。数组值必须是增序
- 如果给定为整数
colors是可选参数,指定等高线颜色,比如colors='black'cmap是可选参数,指定颜色图,比如cmap=mpl.cm.jet
contour/contourf函数返回的是一个颜色标记对象QuadContourSet
- 输入到函数matplotlib.pyplot.colorbar绘制颜色条
- 输入到函数matplotlib.pyplot.clabel绘制等高线值
网格坐标
可使用函数numpy.meshgrid扩展1-D坐标值为2-D网格
>>> a = np.arange(3)
>>> a
array([0, 1, 2])
>>> b = np.arange(5,9)
>>> b
array([5, 6, 7, 8])
>>> c,d = np.meshgrid(a,b)
>>> c
array([[0, 1, 2],
[0, 1, 2],
[0, 1, 2],
[0, 1, 2]])
>>> d
array([[5, 5, 5],
[6, 6, 6],
[7, 7, 7],
[8, 8, 8]])
其作用是将行坐标向量向列扩展,列坐标向量向行扩展
绘制等高线图
参考matplotlib的基本用法(九)——绘制等高线图实现多个局部最高点
import numpy as np
import matplotlib.pyplot as plt
def height(x, y):
return (1 - x / 2 + x ** 5 + y ** 3) * np.exp(- x ** 2 - y ** 2)
if __name__ == '__main__':
x = np.linspace(-4, 4, 100)
y = np.linspace(-4, 4, 100)
X, Y = np.meshgrid(x, y)
Z = height(X, Y)
plt.figure(1)
plt.subplot(211)
plt.contour(X, Y, Z)
plt.subplot(212)
plt.contourf(X, Y, Z)
plt.show()

参考路遥知马力——Momentum实现
import numpy as np
import matplotlib.pyplot as plt
def height(x, y):
return x ** 2 + 100 * (y - 1) ** 2
if __name__ == '__main__':
x = np.linspace(-200, 200, 1000)
y = np.linspace(-200, 200, 1000)
X, Y = np.meshgrid(x, y)
Z = height(X, Y)
plt.figure(1)
plt.contour(X, Y, Z, colors='black')
plt.show()

参考【python碎碎念】如何画等高线实现双峰等高线
import numpy as np
import matplotlib.pyplot as plt
import matplotlib as mpl
def height(x, y):
return np.exp(-(x - 2) ** 2 - (y - 2) ** 2) + 1.2 * np.exp(-x ** 2 - y ** 2)
if __name__ == '__main__':
x = np.linspace(-2.5, 4, 1000)
y = np.linspace(-3, 4, 1000)
X, Y = np.meshgrid(x, y)
Z = height(X, Y)
plt.figure(1)
plt.subplot(211)
plt.contour(X, Y, Z, cmap=mpl.cm.jet)
plt.subplot(212)
plt.contourf(X, Y, Z)
plt.show()

绘制颜色条
import numpy as np
import matplotlib.pyplot as plt
import matplotlib as mpl
def height(x, y):
return np.exp(-(x - 2) ** 2 - (y - 2) ** 2) + 1.2 * np.exp(-x ** 2 - y ** 2)
if __name__ == '__main__':
x = np.linspace(-2.5, 4, 1000)
y = np.linspace(-3, 4, 1000)
X, Y = np.meshgrid(x, y)
Z = height(X, Y)
plt.figure(1)
C = plt.contour(X, Y, Z, cmap=mpl.cm.jet)
plt.colorbar(C)
plt.show()

绘制等高线值
import numpy as np
import matplotlib.pyplot as plt
import matplotlib as mpl
def height(x, y):
res = np.exp(-(x - 2) ** 2 - (y - 2) ** 2) + 1.2 * np.exp(-x ** 2 - y ** 2)
return -1 * res
if __name__ == '__main__':
x = np.linspace(-2, 3.5, 1000)
y = np.linspace(-2, 3.5, 1000)
X, Y = np.meshgrid(x, y)
Z = height(X, Y)
plt.figure(1)
C = plt.contour(X, Y, Z, cmap=mpl.cm.jet)
plt.clabel(C)
plt.show()

C++
学习c++之路
从大学开始,陆陆续续的学习和使用c++。最开始是从c入门,然后自学过c++,当时看的是书籍:《c程序设计》和《C++ Primer》等;后来做项目的时候需要c++编程,看得更多的是博客,专注于要解决的困难点;最近学习深度学习,想要使用c++,所以在网上找一些教程和参考网站
以下涉及的网站同样提供了c语言规范和教程
语法
网站cplusplus和cppreference提供了全面的c++语法规范
库参考
cplusplus提供了标准c++库参考:Standard C++ Library reference
关键字
Microsoft - Keywords (C++)提供了完整的关键字列表
关键字是具有特殊含义的预定义保留标识符,它们不能用作程序中的自定义标识符。以下标识符是微软C++保留的关键字,下划线开头的名字和附加(C++/CLI)的名字是微软扩展
操作符
C++ Built-in Operators, Precedence and Associativity提供了完整的操作符列表
C++语言包括所有的C运算符,并添加了几个新的运算符。运算符指定一个或多个操作数执行计算
语言规范
c++规范已经经历了多个版本的迭代(98/03/11/14/17/20),其实现方式从c语言风格转向脚本语言风格,越来越智能和现代化。当前专注于c++11版本的学习和使用,关于c++11舍弃的命令和使用方式,参考Which C++ idioms are deprecated in C++11?
c++标准
参考:C++ 的历史
c++标准一直在进步,从远到近有以下版本:
- c++98
- c++03
- c++11
- c++14
- c++17
- c++20
使用哪个标准
之前编译opencv 4.0的时候,发现其特征之一就是完全符合c++11标准,所以当前学习和使用c++11标准
main
main函数是所有C和C++程序的执行起点
语法
int main () { body }
int main (int argc, char *argv[]) { body }
argc(argument count):包含后面参数argv数组的计数,argc参数始终大于或等于1argv(argument vector):字符串数组,表示程序输入的命令行参数。按照惯例,argv[0]是用来调用程序的命令,argv[1]是第一个命令行参数,依此类推,直到argv[argc]=null
argc和argv的名称是任意的,并且使用指针表示数组同样有效:int main(int ac,char**av)
打印命令行参数
参考:How to parse command line parameters.
int main(int argc, char **argv) {
// Walk through list of strings until a NULL is encountered.
for (int i = 0; argv[i] != nullptr; ++i) {
cout << i << ": " << argv[i] << "\n";
}
}
输入:
$ ./first hi zj
结果:
0: ./first
1: hi
2: zj
启动注意事项
参考:Additional Startup Considerations
在C++中,对象构造(constructor)和析构(destructor)涉及执行用户代码(executing user code)。因此,重要的是要了解哪些初始化发生在进入main之前,哪些析构函数在退出main之后被调用
在进入main之前进行以下初始化:
- 静态数据的默认初始化为零。在执行任何其他代码(包括运行时初始化)之前,所有没有显式初始值设定项的静态数据都设置为零。静态数据成员必须显式定义
- 在翻译单元中初始化全局静态对象。这可能发生在进入
main之前,也可能发生在对象所在的翻译单元中的任何函数或对象首次使用之前
声明和定义
参考:
Declarations and Definitions (C++)
Declarations, Prototypes, Definitions, and Implementations
声明和定义
- 声明(
declaration)用于为程序引入名称 - 定义(
definition)是在内存中创建实体位置
声明通常可看成定义,除了以下情况:
- 函数原型(
function prototype):只有函数声明,没有函数体 - 包含
extern标识符,同时没有初始化值(对于对象和变量而言)或没有函数体(对于函数而言)。这意味着不一定在当前单元进行定义,给予其外部链接 - 类声明中的静态数据成员:因为静态类数据成员是类中所有对象共享的离散变量,所以必须在类声明之外定义和初始化它们
- 不包含定义的类声明,比如
class T; typedef表达式
声明后都需要进行定义,除了以下两种情况:
- 函数已声明,但从未被函数调用或者被表达式引用其地址
- 类的使用方式不需要知道其定义,但是必须声明类。比如
class WindowCounter; // Forward declaration; no definition
class Window
{
// Definition of WindowCounter not required
static WindowCounter windowCounter;
};
int main()
{
}
为什么要区分声明和定义
从源文件编译得到程序可分为两个过程:编译(compile)和链接(link)

- 编译阶段:独立编译每一个
.cpp文件。将所有#include文件插入到.cpp中,然后从头到尾进行编译,生成机器码输出为.obj文件 - 链接阶段:组合所有
.obj文件,生成内存寻址以及函数调用,最后输出一个可执行程序
在编译阶段编译器只需要知道函数参数类型以及返回值类型即可,不关心具体实现过程
所以声明作用于编译阶段,定义作用于链接阶段
使用声明和定义
在编译阶段编译器从头到尾处理.cpp文件,所以在使用变量、函数等名称之前必须有声明,有两种方式:
- 前向声明(
Forward declaration):仅包含声明,在之后进行定义(推荐) - 在使用之前同时进行声明和定义
size_t
参考:
无符号整数值,可作为基本无符号整数类型的别名
它是一种能够以字节表示任何对象大小的类型:size_t是sizeof运算符返回的类型,在标准库中广泛用于表示大小和计数
#include <cstddef>
#include <iostream>
#include <array>
int main()
{
std::array<std::size_t,10> a;
for (std::size_t i = 0; i != a.size(); ++i)
a[i] = i;
for (std::size_t i = a.size()-1; i < a.size(); --i)
std::cout << a[i] << " ";
}
[c++11]常量
参考:
Numeric, Boolean and Pointer Literals (C++)
String and character literals (C++)
常量(literal)指的是直接表示值的程序元素,常用于初始化命名变量和将参数传递给函数。按类型可分为以下几种:
- 整数常量(
integer literal) - 浮点数常量(
floating-point literal) - 布尔常量(
boolean literal) - 指针常量(
pointer literal) - 字符常量(
character literal) - 字符串常量(
string literal) - 自定义常量(
user-defined literal)
如果要指定特定的常量类型,可以为其添加前缀(prefix)和后缀(suffix)。比如16进制值0x35,长整型数123L
整数常量
- 整型常量以数字开头,没有小数或指数部分
- 可以指定十进制(
Decimal)、八进制(Octal)或十六进制(Hexadecimal)形式的整型常量 - 可以指定有符号(
unsigned)或无符号(unsigned)类型以及长(long)或短(short)类型
默认整数常量的类型是int(32位),如果常量超出32位,则给定类型为long long(64位)
八/十/十六进制
八进制整数常量以0开头,十六进制整数常量以0x开头,十进制整数常量没有前缀
int a = 32;
int b = 040;
int c = 0x20;
// 以十进制输出
cout << a << endl;
cout << b << endl;
cout << c << endl;
// 以各自进制输出
cout << std::dec << a << endl;
cout << std::oct << b << endl;
cout << std::hex << c << endl;
整数常量类型
- 指定无符号整数类型,加上前缀
u或U - 指定长整数类型,加上后缀
l或L。比如指定64位整数类型,加上ll或LL后缀
数字分隔符
为便于阅读,可以使用单引号字符(single-quote)为较大的数字分隔位置。分隔符对编译没有影响
int i = 123'456'789;
long j = 0x123'456'789;
cout << i << endl;
cout << std::hex << j << endl;
浮点数常量
浮点数常量必须包含小数部分,必须包含小数点(.)并且可以包含指数
- 使用尾数指定常量的小数部分
- 使用指数(
exponent)指定常量的量级(magnitude):将数字大小指定为10的幂
指数
使用e或E指定,后跟可选符号(+或-)以及一串数字。如果指数存在可以不包含小数点
// a = 1220
double a = 1.22e3;
cout << a << endl;
// b = 0.00122
double b = 1.22e-3;
cout << b << endl;
浮点数常量类型
默认浮点数常量为double类型(64位),可以使用后缀名f或者l(也可以使用大写形式)分别指定为float(32位)或long double(64位)
虽然long double和double具有相同的表示形式,但它们不是相同的类型
float a = 1.22e3f;
long double b = 1.22e-3l;
布尔常量
布尔常量是true和false
bool a = true;
bool b = false;
// 整数 1
cout << a << endl;
// 整数 0
cout << b << endl;
指针常量
c++11开始新增了一个指针常量 - nullptr
字符常量
字符常量由常量字符组成,它由单引号包围的字符表示。有五种类型的字符常量:
- 普通的
char类型的字符常量,比如'a' utf-8格式的char类型字符常量,比如u8'a'(c++20开始)wchar_t类型的宽字符常量,比如L’a’utf-16格式的char16_t类型字符常量,比如u'a'utf-32格式的char32_t类型字符常量,比如U'a'
用于字符常量的字符可以是任何字符,除了保留字符反斜杠/、单引号'或换行符\n,不过可以使用转义序列指定保留字符;也可以使用通用字符名指定字符,只要类型足够大以容纳字符
转义序列
常用的转义序列包括
- 换行(
newline)-\n - 反斜杠(
backslash)-\\ - 水平制表符(
horizontal tab)-\t - 垂直制表符(
vertical tab)-\v - 单引号(
single quote)-\' - 双引号(
double quote)-\" - 空字符(
the null character)-\0 - 空格(
backspace)-\b - 问号(
question mark)-?或\?
char newline = '\n';
char tab = '\t';
char backspace = '\b';
char backslash = '\\';
char nullChar = '\0';
cout << "Newline character: " << newline << "ending" << endl; // Newline character:
// ending
cout << "Tab character: " << tab << "ending" << endl; // Tab character : ending
cout << "Backspace character: " << backspace << "ending" << endl; // Backspace character : ending
cout << "Backslash character: " << backslash << "ending" << endl; // Backslash character : \ending
cout << "Null character: " << (void *) nullChar << "ending" << endl; //Null character: ending
字符串常量
字符串常量表示以空字符结尾的字符序列,且字符必须用双引号括起来
// 赋值字符数组
char a[3] = "12";
// 赋值字符指针
const char *b = "12";
// 可以添加后缀s表示转换成std::string
std::string ss = "12"s;
自定义常量
有5种主要类别的常量:整数、浮点数、字符、字符串和布尔常量。从c++11开始,可以利用这些常量进行自定义,为常见习惯用法(common idioms)提供语法快捷方式并提高类型安全性
用户定义的常量没有性能优势或劣势;它们主要是为了方便或编译时的类型推导。标准库提供了自定义常量类型std::string、std::complex
用户定义的常量运算符签名
在命名空间范围内使用以下形式操作operator"",可以实现用户自定义常量:
ReturnType operator "" _a(unsigned long long int); // Literal operator for user-defined INTEGRAL literal
ReturnType operator "" _b(long double); // Literal operator for user-defined FLOATING literal
ReturnType operator "" _c(char); // Literal operator for user-defined CHARACTER literal
ReturnType operator "" _d(wchar_t); // Literal operator for user-defined CHARACTER literal
ReturnType operator "" _e(char16_t); // Literal operator for user-defined CHARACTER literal
ReturnType operator "" _f(char32_t); // Literal operator for user-defined CHARACTER literal
ReturnType operator "" _g(const char*, size_t); // Literal operator for user-defined STRING literal
ReturnType operator "" _h(const wchar_t*, size_t); // Literal operator for user-defined STRING literal
ReturnType operator "" _i(const char16_t*, size_t); // Literal operator for user-defined STRING literal
ReturnType operator "" _g(const char32_t*, size_t); // Literal operator for user-defined STRING literal
ReturnType operator "" _r(const char*); // Raw literal operator
template<char...> ReturnType operator "" _t(); // Literal operator template
- 运算符名称
a/b/c/...是占位符 - 下划线(
the leading underscore)是必须的(只有标准库中的自定义常量可以不用下划线) - 返回值根据需要进行指定
- 自定义常量也可被定义为
constexpr
定义结构体Distance,自定义常量_km和_m用于转换千米和米,
struct Distance {
public:
long double get_meters() { return meters; }
Distance operator+(Distance &other) {
return Distance(get_meters() + other.get_meters());
}
private:
friend Distance operator "" _km(long double val);
friend Distance operator "" _m(long double val);
explicit Distance(long double val) : meters(val) {}
// 定义私有成员,保存米数
long double meters{0};
};
Distance operator "" _km(long double val) {
return Distance(val * 1000);
}
Distance operator "" _m(long double val) {
return Distance(val);
}
int main() {
// Must have a decimal point to bind to the operator we defined!
Distance d{402.0_m}; // construct using kilometers
cout << "meters in d: " << d.get_meters() << endl; // 402
Distance d2{4.02_m}; // construct using miles
cout << "meters in d2: " << d2.get_meters() << endl; // 4020
Distance d3 = 4.2_km;
Distance d4 = 36.0_m;
// add distances constructed with different units
Distance d5 = d3 + d4;
cout << "d5 value = " << d5.get_meters() << endl; // 99.6
// 不能调用私有构造函数
// Distance d6(90.0); // error constructor not accessible
string s;
getline(std::cin, s);
return 0;
}
常量使用规范
不推荐直接在表达式或语句中使用常量,这通常被称为魔法常量(magic constants),更好的方式是使用具有明确含义的命名常量,这有助于上下文理解
[c++11]nullptr
参考:nullptr
std::nullptr是类型std::nullptr_t的空指针常量,可以转换成任何原始指针类型
之前通常使用NULL或者0来表示空指针,这有可能造成编译错误。从c++11开始推荐使用常量std::nullptr
示例一
void f(int *pi) {
std::cout << "Pointer to integer overload\n";
}
void f(double *pd) {
std::cout << "Pointer to double overload\n";
}
void f(std::nullptr_t nullp) {
std::cout << "null pointer overload\n";
}
int main() {
int *pi;
double *pd;
f(pi);
f(pd);
f(nullptr); // would be ambiguous without void f(nullptr_t)
// f(0); // ambiguous call: all three functions are candidates
// f(NULL); // ambiguous if NULL is an integral null pointer constant
// (as is the case in most implementations)
}
定义了三个重载函数,分别使用int/double/nullptr_t作为参数类型。如果输入0或者NULL作为参数,会存在二义性(ambiguous),因为均符合这3个重载函数
示例二
参考:nullptr, the pointer literal
std::nullptr能够输入模板函数,而0和NULL会发生错误
template<class F, class A>
void Fwd(F f, A a) {
f(a);
}
void g(int *i) {
std::cout << "Function g called\n";
}
int main() {
g(NULL); // Fine
g(0); // Fine
Fwd(g, nullptr); // Fine
// Fwd(g, NULL); // ERROR: No function g(int)
}
头文件
参考:
Headers and Includes: Why and How
学习头文件的使用规范
为什么要使用头文件
通常将变量、函数、类、结构体的声明放置在头文件(header file)中,在源文件中使用#include指令插入头文件
有两个作用:
- 保证所有源文件使用同一个声明
- 加快编译时间
- 结构化程序,比如接口和实现分离
include guard
通常,头文件具有include guard或#pragma once指令,以确保它们不会多次插入到单个.cpp文件中
// my_class.h
#ifndef MY_CLASS_H // if my_class.h hasn't been included yet...
#define MY_CLASS_H // #define this so the compiler knows it has been included
namespace N
{
class my_class
{
public:
void do_something();
};
}
#endif /* MY_CLASS_H */
头文件包含内容
头文件和源文件一样,也可以包含定义,但是不推荐使用,因为这会造成同一个名称的多次定义
以下内容是不允许或被认为是非常糟糕的做法:
- 在全局作用域或命名空间进行内置类型定义
- 非内联函数定义
- 非
const变量定义 - 聚合定义(
aggregate definitions) - 未命名的名称空间
using指令
使用using指令不一定会导致错误,但可能会导致问题,因为它将命名空间引入直接或间接包含该头文件的每个.cpp文件的作用域
.h/.hpp/.c/.cpp/.cc的区别
不同的文件扩展名可表示不同的作用
- 头文件:使用
.h__扩展名,比如.h、.hpp、.hxx等 c++源文件:使用.c__扩展名,比如.cpp、.cxx、.cc等c源文件:使用.c扩展名
循环依赖问题
有两个头文件a.h和b.h,各自头文件定义了类,同时相互调用,这会产生循环依赖(Circular Dependencies)问题
错误示例
主程序使用类a:
// a.h
#include "b.h"
class A {
public:
B *b;
};
// b.h
#include "a.h"
class B {
public:
A *a;
int h;
};
// main.cpp
#include "a.h"
int main() {
A aa;
aa.b = new B();
aa.b->h = 3;
cout << aa.b->h << endl;
return 0;
}
会出现编译问题:
[ 40%] Building CXX object CMakeFiles/first.dir/a.cpp.o
In file included from /home/zj/CLionProjects/first/a.h:8:0,
from /home/zj/CLionProjects/first/a.cpp:5:
/home/zj/CLionProjects/first/b.h:14:5: error: ‘A’ does not name a type
A *a;
^
编译器首先编译源文件a.cpp,根据#include指令编译头文件a.h,再根据#include指令编译b.h,最后根据#include指令编译a.h。然而因为include guard保护,所以跳过了a.h的编译,造成b.h中的类A未进行声明

解决方案:前向声明
在使用之前进行前向声明(forward declaring),所以需要在a.h中声明类B,在b.h中声明类A。完整代码如下:
# a.h
#ifndef FIRST_A_H
#define FIRST_A_H
#include "b.h"
class B;
class A {
public:
B *b;
};
#endif //FIRST_A_H
# b.h
#ifndef FIRST_B_H
#define FIRST_B_H
#include "a.h"
class A;
class B {
public:
A *a;
int h;
};
#endif //FIRST_B_H
# main.cpp
#include "a.h"
int main() {
A aa;
aa.b = new B();
aa.b->h = 3;
cout << aa.b->h << endl;
return 0;
}
执行结果
3
编写规范
参考:在开发大C++工程的时候如何判断和避免循环include?
- 使用include guard
- 在
A.cpp文件中放置A.h在第一位 - 出现循环依赖,重新思考文件布局,拆分文件
- 在
.h使用前向声明,在.cpp引入对应.h文件
示例代码
#pragma once
#include <vector> // #include directive
#include <string>
namespace N // namespace declaration
{
inline namespace P
{
//...
}
enum class colors : short { red, blue, purple, azure };
const double PI = 3.14; // const and constexpr definitions
constexpr int MeaningOfLife{ 42 };
constexpr int get_meaning()
{
static_assert(MeaningOfLife == 42, "unexpected!"); // static_assert
return MeaningOfLife;
}
using vstr = std::vector<int>; // type alias
extern double d; // extern variable
#define LOG // macro definition
#ifdef LOG // conditional compilation directive
void print_to_log();
#endif
class my_class // regular class definition,
{ // but no non-inline function definitions
friend class other_class;
public:
void do_something(); // definition in my_class.cpp
inline void put_value(int i) { vals.push_back(i); } // inline OK
private:
vstr vals;
int i;
};
struct RGB
{
short r{ 0 }; // member initialization
short g{ 0 };
short b{ 0 };
};
template <typename T> // template definition
class value_store
{
public:
value_store<T>() = default;
void write_value(T val)
{
//... function definition OK in template
}
private:
std::vector<T> vals;
};
template <typename T> // template declaration
class value_widget;
}
[c++11]类型别名设置
参考:
Type aliases (typedef / using)
处于封装的目的,又或者是为了简化复杂度,经常会为已有类型声明一个新类型名
有两种方式实现:typedef和using
typedef
类型声明符typedef能够创建一个别名(alias),可以在任何地方使用它来代替(可能是复杂的)类型名。语法如下:
typedef old_type new_type;
- 整数别名
typedef unsigned char uchar;
uchar a = 255;
cout << static_cast<int>(a) << endl;
# 输出
255
- 指针别名
typedef char *pointer_char;
char ch = 'c';
pointer_char pCh = &ch;
cout << *pCh << endl;
# 输出
c
- 结构体别名
typedef struct ss {
int a;
} S, *pS;
int main() {
struct ss test1;
S test2;
test1.a = 3;
test2.a = 4;
pS test3 = &test2;
cout << test3->a << endl;
return 0;
}
构造结构体ss,设置类型别名S和指针别名*pS
重定义
typedef允许在同一个作用域内有重复类型别名定义,但是必须是相同类型的设置typedef允许在不同作用域内有相同类型别名,不同类型的重复定义
# name.h
typedef unsigned char uchar;
# main.cpp
#include "name.h"
typedef unsigned char uchar;
void main() {
uchar c = 'c';
typedef unsigned int uchar;
uchar a = 3232;
cout << a << endl;
return 0;
}
using
参考:Type alias, alias template (since C++11)
从c++11开始,同样可以使用using关键字设置类型别名。语法如下
using identifier = type;
示例如下:
using C = char;
using WORD = unsigned int;
using pChar = char *;
using field = char [50];
除了能够实现typedef的功能外,using的优势在于它能够和模板一起工作
# 创建别名模板
template<typename T> using ptr = T*;
// the name 'ptr<T>' is now an alias for pointer to T
ptr<int> ptr_int;
ptr<char> ptr_char;
作用域
参考:
种类
作用域指实体可以操作的范围。通常称在任何类、函数或命名空间之外声明的名称拥有全局作用域(global scope),在里面声明的名称拥有局部作用域(local scope)
其中局部作用域还可细分如下:
- 名称空间作用域(
namespace scope):指的是在名称空间内,任何类、枚举定义或者函数块之外的空间 - 类作用域(
class scope):指的是类定义内的空间 - 表达式作用域(
statement scope):指的是for、if、while、switch等表达式内的空间 - 函数作用域(
function scope):指的是函数内的空间 - 块作用域(
block scope):指的是被一个块包围起来的空间 - 模板参数作用域(
Template parameter scope):模板参数名称的潜在范围从声明点立即开始,并继续到引入它的最小模板声明的结尾。尤其是模板参数可以用于后续模板参数的声明和基类的规范中,但不能用于前面模板参数的声明中
可见性
实际操作中作用域之间相互涵盖,实体在不同位置的作用域会发生变化
变量、常量、函数、类、结构体等实体仅在当前作用域内可见,如果小作用域定义了一个同样的名称,那么会覆盖大空间相同名称的可见性
比如,定义类Account,同时定义全局变量Account,在main函数内定义局部变量Account。示例代码如下:
// Declare class Account at global scope.
class Account {
public:
Account(double InitialBalance) { balance = InitialBalance; }
double GetBalance() { return balance; }
private:
double balance;
};
double Account = 15.37; // Hides class name Account
int main() {
class Account Checking(Account); // Qualifies Account as
// class name
cout << "Opening account with balance of: "
<< Checking.GetBalance() << "\n";
int Account = 33;
cout << Account << endl;
cout << ::Account << endl;
{
char Account = 'c';
cout << Account << endl;
cout << ::Account << endl;
}
}
- 程序中全局变量
Account覆盖了类Account的可见性,如果要使用类,必须添加说明符class - 程序中局部变量
Account覆盖了全局变量Account的可见行,如果要使用全局变量,必须添加作用域解析运算符::
运行结果如下:
Opening account with balance of: 15.37
33
15.37
c
15.37
注意:C++不推荐类名和变量名相同的编写方式
链接
参考:
链接(linkage)指的是程序中全局符号(如变量、类型名和函数名)在整个翻译单元中的可见性,它影响程序在链接阶段的处理
为什么要学习链接
单定义规则
在C++程序中,符号(global,比如变量名或函数名)可以在同一作用域(scope)内多次声明(declaration),但是只能有一次定义(definition),称之为单定义规则(one definition rule, 简称为ODR)
- 变量定义指的是变量初始化
- 函数定义指的是指定函数返回值(
signature)和函数体实现
程序组成
一个程序由多个翻译单元(translation unit)组成,每个翻译单元由一个源文件(.cpp/.cxx等)加上其直接或间接引入的头文件组成。编译器首先单独编译每一个翻译单元,再由链接器编译这些翻译单元到一个程序
链接问题
如果违反ODR,在不同链接单元存在同一个名称的定义,那么会造成链接失败
最好的解决方案是将变量定义放置在一个头文件中,然后在各个源文件中通过#include
方式引入该头文件,并通过include guard方式保证该头文件仅被编译一次,这样就能解决重复定义问题
另一种方式是区分符号的内部(internal)链接和外部(external)链接,以保证符合ODR
链接 vs. 作用域
- 链接的概念是指程序中全局符号(如变量、类型名和函数名)在单个翻译单元中的可见性
- 作用域的概念是指声明的符号(如名称空间、类或函数体)在整个程序中的可见性
内部 vs. 外部
链接的作用是判定符号是否仅在当前翻译单元内可见
默认具有内部链接的对象如下:
const对象constexpr对象typedef声明类型- 名称空间中的静态对象
默认具有外部链接的对象如下:
- 非
const全局变量 free function:指的是定义在全局或名称空间作用域的函数
内部链接对象仅在单个翻译单元中可见,所以其它单元中可能存在相同名称的全局对象(变量、类定义等);外部链接对象的名称在整个程序中唯一
外部转内部
声明static能够改变全局符号的链接特性为内部,示例如下:
// named.h
#ifndef FIRST_NAMED_H
#define FIRST_NAMED_H
#include <iostream>
namespace zj {
void hello();
}
#endif //FIRST_NAMED_H
// named.cpp
#include "named.h"
static int aa = 3;
void zj::hello() {
std::cout << aa << std::endl;
}
// main.cpp
static char aa = 'a';
int main() {
zj::hello();
cout << aa << endl;
}
在main.cpp和named.cpp中定义相同的全局符号名aa,不会造成链接错误。结果如下:
3
a
extern
参考:extern (C++)
extern关键字有以下四种使用方式:
- 作用于非
const全局变量,指定该变量的定义来自于其他翻译单元。除了定义该全局变量的单元外,所有其他单元上该变量的声明必须加上extern - 作用于
const全局变量,指定该变量拥有外部链接。在其他翻译单元上该变量的声明必须加上extern extren "C"表示函数在其他单元上定义并使用C语言调用规范。可以作用于单个函数,也可使用块操作,表示作用于多个函数- 作用于模板声明,它指定模板已在其他地方实例化。这是一种优化,它告诉编译器它可以重用另一个实例化,而不是在当前位置创建一个新的实例化
示例二
作用于const对象,默认情况下const对象拥有内部链接,所以需要const声明和定义中都要加上extern说明符
//fileA.cpp
extern const int i = 42; // extern const definition
//fileB.cpp
extern const int i; // declaration only. same as i in FileA
示例三
使用extern "C"表示对象在别处定义并符合C语言调用规范
// Cause everything in the specified
// header files to have C linkage.
extern "C" {
// add your #include statements here
#include <stdio.h>
}
// Declare the two functions ShowChar
// and GetChar with C linkage.
extern "C" {
char ShowChar(char ch);
char GetChar(void);
}
// Declare a global variable, ee, with C linkage.
extern "C" int ee;
不能同时存在extern "C"和extern "C++"
extern "C" {
int open(const char *pathname, int flags); // C function declaration
}
int main()
{
int fd = open("test.txt", 0); // calls a C function from a C++ program
}
// This C++ function can be called from C code
extern "C" void handler(int) {
std::cout << "Callback invoked\n"; // It can use C++
}
程序终止
学习c++程序不同的终止方式,共有3种
- 调用exit
- 调用abort
- 在main函数调用return表达式
exit
参考:
声明在头文件stdlib.h,其参数值作为程序返回代码或退出代码。按照惯例,返回0表示成功退出
void exit (int status);
在stdlib.h中定义了两个返回代码常量:
/* We define these the same for all machines.
Changes from this to the outside world should be done in `_exit'. */
#define EXIT_FAILURE 1 /* Failing exit status. */
#define EXIT_SUCCESS 0 /* Successful exit status. */
在main函数使用return语句等同于使用返回值作为参数调用exit函数
abort
参考:
声明在头文件stdlib.h,函数abort表示终止C++程序
void abort() noexcept;
其和exit函数的区别在于
exit函数允许运行时终止进程(run-time termination processing)发生(将会调用全局对象析构函数)abort函数立即终止程序
退出注意事项
参考:
- 构造:全局对象(
global object)在main函数执行前进行构造 - 退出:在执行
exit或者return语句后,按相反顺序执行析构函数
如果执行abort函数,就不会调用对象的析构函数
示例代码
#include <iostream>
#include <cstring>
#include <array>
using std::cout;
using std::endl;
class ShowData {
public:
// Constructor opens a file.
ShowData(const char *szDev) {
filename = szDev;
cout << "construct: " << filename << endl;
OutputDev = fopen(szDev, "w");
}
// Destructor closes the file.
~ShowData() {
cout << "destruct: " << filename << endl;
fclose(OutputDev);
}
// Disp function shows a string on the output device.
void Disp(char *szData) {
fputs(szData, OutputDev);
}
private:
FILE *OutputDev;
const char *filename;
};
ShowData sd3 = "sd3";
ShowData sd4 = "sd4";
int main() {
cout << "begin" << endl;
ShowData sd1 = "sd1";
ShowData sd2 = "sd2";
sd1.Disp("hello to default device\n");
sd2.Disp("hello to file hello.dat\n");
sd3.Disp("hello to sd3");
sd4.Disp("hello to sd4");
cout << "end" << endl;
// abort();
return 0;
}
注意:上面代码中全局对象的定义顺序
结果
construct: sd3
construct: sd4
begin
construct: sd1
construct: sd2
end
destruct: sd2
destruct: sd1
destruct: sd4
destruct: sd3
atexit
参考:
在调用全局对象的析构函数之前会调用atexit函数
如果对程序指定了多个atexit函数,则它们都将以栈的形式按相反顺序执行(即最后一次调用将第一个执行)
示例如下:
...
...
void f() {
cout << "quickly, exit will happen" << endl;
}
int main() {
cout << "begin" << endl;
ShowData sd1 = "sd1";
ShowData sd2 = "sd2";
sd1.Disp("hello to default device\n");
sd2.Disp("hello to file hello.dat\n");
sd3.Disp("hello to sd3");
sd4.Disp("hello to sd4");
cout << "end" << endl;
atexit(f);
return 0;
}
结果
construct: sd3
construct: sd4
begin
construct: sd1
construct: sd2
end
destruct: sd2
destruct: sd1
quickly, exit will happen
destruct: sd4
destruct: sd3
abort
参考:Using abort
调用abort函数中止程序不仅会绕过局部和全局对象的析构函数,还会绕过atexit函数的调用,示例如下:
...
atexit(f);
abort();
return 0;
}
结果:
construct: sd3
construct: sd4
begin
construct: sd1
construct: sd2
end
只有构造函数,没有析构函数了
[c++11]enum
c++枚举(enum)类型是由一组自定义标识符(custom identifiers,也称为枚举器enumerator)定义的类型。枚举类型定义的对象可以赋值为任一个自定义标识符。
从c++11开始,还可以使用枚举类型定义类,以及自定义枚举数据类型
枚举类型语法
定义枚举类型
enum type_name {
value1,
value2,
value3,
.
.
} object_names;
type_name object_name = valuen;
- 使用关键字
enum定义枚举类型,输入类型名type_name和自定义标识符value1/value2/value3/...,就完成了枚举类型的定义 - 可以直接输入
object_names进行对象实例化,也可以用类型名来定义新的枚举对象 - 枚举对象可以赋值为任一个自定义标识符
示例一
定义颜色枚举colors_t
enum colors_t {black, blue, green, cyan, red, purple, yellow, white};
创建枚举对象mycolor,赋值为其中一个自定义标识符,并进行测试
colors_t colors = green;
if (colors == green) {
cout << "green" << endl;
}
输出结果:
green
枚举与整数的关系
使用枚举声明的枚举类型的值可以隐式转换为整数类型,反之亦然。默认自定义标识符集的第一个值转换成整数0,第二个转换成1,以此类推
也可以为枚举类型中的任何标识符指定特定的整数值。如果后面的标识符本身没有给出它自己的整数值,那么它会自动假定为前一个标识符表示的整数值加一
每个枚举对象的内存大小等同于整数值的大小:sizeof(int)=4
示例二
对于颜色枚举colors_t而言,枚举值green表示整数值2
colors_t colors = green;
if (colors == 2) {
cout << "green" << endl;
}
结果
green
新建枚举类型months_t,第一个枚举值赋值为整数1,那么整数2表示的是第二个枚举值
enum months_t {
january = 1, february, march, april,
may, june, july, august,
september, october, november, december
} y2k;
int main() {
months_t months = (months_t) 2;
if (months == february) {
cout << "february" << endl;
}
return 0;
}
结果
february
比较枚举对象的大小和整数值的内存大小
cout << sizeof(months) << endl;
cout << sizeof(march) << endl;
cout << sizeof(2) << endl;
结果
4
4
4
枚举类语法
参考: Enumerated types with enum class
从c++11开始,可以定义枚举类
也可以定义枚举结构体:enum struct
定义枚举类类型
enum class type_name {
value1,
value2,
value3,
.
.
} object_names;
type_name object_name = type_name::valuen;
- 使用关键字
enum class定义枚举类,输入枚举类名type_name,枚举类值value1/value2/value3/... - 以直接输入
object_names进行对象实例化,也可以用类型名来定义新的枚举类对象
使用枚举类型定义类(即枚举类),里面的枚举值不能够隐式转换为int类型,能够保证类型安全;同时枚举器名称必须由枚举类型名称限定,有利于程序健壮性。
示例三
enum class colors_t {
black, blue, green, cyan, red, purple, yellow, white
};
int main() {
colors_t colors = colors_t::green;
if (colors == (colors_t) 3) {
cout << "green" << endl;
}
cout << sizeof(colors) << endl;
cout << sizeof(colors_t) << endl;
cout << sizeof(colors_t::green) << endl;
return 0;
}
结果:
4
4
4
由测试结果可知,虽然其内存大小仍旧等同于整数,但枚举值无法转换为整数值
自定义数据类型
从c++11开始,用枚举声明的枚举类型对其基础类型也有更多的控制;它可以是任何整型数据类型,比如char/short/unsigned int/int等等。指定数据类型可以有效减少占用内存
enum type_name : int_type {
value1,
value2,
value3,
.
.
} object_names;
enum class type_name : int_type {
value1,
value2,
value3,
.
.
} object_names;
在枚举类名后加上指定整数类型即可
测试四
enum class colors_t : char {
black, blue, green, cyan, red, purple, yellow, white
};
cout << sizeof(colors) << endl;
cout << sizeof(colors_t) << endl;
cout << sizeof(colors_t::green) << endl;
结果
1
1
1
空枚举
如果枚举没有枚举器,则默认为0
enum byte_t : unsigned char {
};
int main() {
byte_t byte;
cout << byte << endl;
cout << sizeof(byte) << endl;
return 0;
}
结果
0
1
[c++11]namespace
参考:
为了解决实体(entity)命名冲突(name collision)的问题,c++提出了命名空间(或称为名称空间),将具有全局作用域(global scope)的命名实体分组为更窄的命名空间作用域(namespace scope)。命令空间范围内的所有标识符(类型、函数、变量等)都是彼此可见,没有限定。命名空间之外的标识符可以使用每个标识符的完全限定名访问成员
语法
声明namespace
namespace identifier
{
named_entities
}
使用关键字namespace指定命名空间,指定空间名称identifier,命名实体named_entities是一组变量、类型和函数
- 在外部访问命名空间中的对象需要加上范围运算符
::
identifier::named_entity
- 可以在不同文件、不同位置多次定义同一个命名空间,里面的对象在同一个作用域内
- 命名空间可以嵌套定义
- 通常会将函数、类的声明和实现放置在两个文件中(头文件
.h和源文件.cpp),如果在命名空间中定义函数声明,那么需要在函数实现代码加入完全限定符,类定义同样如此
示例一
声明命名空间aaa和bbb,声明相同变量名x和y,并访问
namespace aaa {
int x;
int y;
void he() {
cout << "hello zj" << endl;
}
}
namespace bbb {
char x;
char y;
}
int main() {
aaa::x = 3;
cout << aaa::x << endl;
bbb::x = '4';
cout << bbb::x << endl;
return 0;
}
结果
3
4
使用命名空间可以有效解决名称冲突
示例二
分离定义命名空间aaa
namespace aaa {
int x;
char y;
}
namespace aaa {
void he() {
cout << "hello aaa" << endl;
}
}
int main() {
aaa::x = 3;
cout << aaa::x << endl;
aaa::y = '4';
cout << aaa::y << endl;
aaa::he();
return 0;
}
结果
3
4
hello aaa
示例三
头文件操作:在命名空间zj中声明函数hello和定义类Te
源文件操作:实现函数和类
# named.h
#ifndef FIRST_NAMED_H
#define FIRST_NAMED_H
#include <iostream>
namespace zj {
void hello();
class Te {
public:
Te();
void hi();
};
}
#endif //FIRST_NAMED_H
# named.cpp
#include "named.h"
void zj::hello() {
}
// 构造器
zj::Te::Te() {}
void zj::Te::hi() {
}
命名空间std
c++标准库中所有的实体(变量、类型、常量和函数)都定义在命名空间std中
using
关键字using可以将名称引入当前声明区域,从而避免限定名称的需要
操作using
有3种方式可以访问std里面的对象,以cout为例:
方式一
#include <iostream>
std::cout << "hello cout";
不使用关键字using,使用完全受限的名称访问命名空间
方式二:
#include <iostream>
using namespace std;
cout << "hello cout";
使用关键字组合using namespace可以将整个命名空间std加入当前作用域
方式三
#include <iostream>
using std::cout;
cout <<"hello cout";
使用关键字using将std中的cout对象引入当前作用域,所以在接下来的操作中不需要加上限定符std::。不过访问std中的其他对象还是需要限定符
为什么尽量不要使用using namespace std?
网上一直有关于命名空间的讨论 - 为什么尽量不要使用using namespace std?
有很多意见哈,主要意见还是说不要把整个命名空间引入当前作用域,因为这违反了命名空间的初衷,所以还是尽量使用方式一和方式二进行操作
头文件中的代码应始终使用完全限定的命名空间名称
嵌套 vs. 内联
嵌套命名空间
可以定义嵌套命名空间,内部的命名空间可以直接访问外部命名空间的标识符,而外部命名空间必须使用限定符访问内部的命名空间
示例四
定义3层嵌套命名空间
namespace aaa {
int x;
int y;
namespace bbb {
void he() {
x = 3;
cout << x << endl;
}
namespace ccc {
void hi() {
he();
cout << x << endl;
}
}
}
}
int main() {
aaa::bbb::ccc::hi();
return 0;
}
结果
3
3
内联命名空间
内联命名空间是c++11的新特性。相比较于嵌套命名空间,内联命名空间的成员可直接看成外部空间的成员
可以使用内联命名空间作为版本控制机制来管理对库公共接口的更改。例如,可以创建单个父命名空间,并将接口的每个版本封装到嵌套在父命名空间中的自己的命名空间中。保存最新版本或首选版本的命名空间被限定为内联,因此被公开,就好像它是父命名空间的直接成员一样。调用Parent::Class的客户端代码将自动绑定到新代码。喜欢使用旧版本的客户机仍然可以通过使用具有该代码的嵌套命名空间的完全限定路径来访问它
示例五
namespace Test {
namespace old_ns {
std::string Func() { return std::string("Hello from old"); }
}
inline namespace new_ns {
std::string Func() { return std::string("Hello from new"); }
}
std::string hi() {
return Func();
}
}
int main() {
cout << Test::Func() << endl;
cout << Test::hi() << endl;
return 0;
}
结果
Hello from new
Hello from new
命名空间别名
对于多重嵌套或者长字符的命名空间,可以使用别名方便访问。语法如下:
namespace new_name = current_name;
示例六
在命名空间aaa内部设置命名空间bbb,可以使用限定符进行嵌套访问,也可以设置命名空间别名
namespace aaa {
int x;
char y;
namespace bbb {
void he() {
cout << "hello aaa" << endl;
}
}
}
int main() {
aaa::bbb::he();
namespace aaabbb = aaa::bbb;
aaabbb::he();
return 0;
}
结果:
hello aaa
hello aaa
匿名或未命名空间
如果创建一个匿名空间(或称为未命名空间,anonymous or unnamed namespace),那么同一文件中的所有代码都可以看到未命名命名空间中的标识符,但标识符以及命名空间本身在该文件外部不可见
示例七
namespace {
namespace old_ns {
std::string Func() { return std::string("Hello from old"); }
}
inline namespace new_ns {
std::string Func() { return std::string("Hello from new"); }
}
std::string hi() {
return Func();
}
}
int main() {
cout << Func() << endl;
cout << hi() << endl;
cout << old_ns::Func() << endl;
return 0;
}
结果
Hello from new
Hello from new
Hello from old
[c++11]函数
学习函数的类别、声明、重载、模板等内容,并学习c++11规范
函数类别
根据作用域定义函数类别
- 成员函数(
member function):定义在类作用域内 - 自由函数(
free function):定义在命名空间作用域或者全局作用域内,也称为非成员函数(non-member function)
函数声明
最简单的函数声明包括返回类型,函数名和形参列表(可以为空),最后加上一个分号(semicolon)
return_type function_name(parameter list);
- 返回类型指定了函数返回值的类型,设为
void表示无返回值。从c++11开始,可以使用auto作为返回类型,编译器会自动推导返回值的类型 - 函数名必须以字母或下划线开头,不能包含空格。通常标准库函数名中的前缀下划线表示私有成员函数,或者表示不希望用户使用的非成员函数
- 参数列表是由零个或多个参数组成,用逗号分隔的集合。用于指定类型和可选的本地名称,通过该名称可以在函数体内部访问
可选说明符
还可以添加以下说明符,用于进一步说明函数的使用范围
constexpr:表明函数的返回值是一个常量,可以在编译时计算constexpr float exp(float x, int n);
extern或static:影响其链接规范。声明为extern表明其拥有外部链接;声明为static表明其拥有内部链接。参考链接inline:设置为内联函数。它指示编译器用函数代码本身替换对函数的每个调用。在函数执行速度快并且在性能关键的代码部分反复调用的情况下,内联可以帮助提高性能inline double Account::GetBalance() { return balance; }
noexcept:是否抛出异常,指定函数是否可以引发异常cv限定符:仅适用于成员函数,指定函数是否是const或者volatilevirtual,override和final:仅适用于成员函数。virtual指定函数可在派生类中重写;override指定函数是重写父类的virtual函数;final指定函数不能被后续的派生类重写static:仅适用于成员函数,表明该函数不与任一个对象相关联引用限定符:仅适用于非成员函数,它向编译器指定当隐式对象参数(
*this)是右值引用而不是左值引用时要选择的函数重载
函数定义
函数定义由函数声明加函数体组成:
return_type function_name(parameter list) {
。。。
。。。
}
在函数体内部声明的变量称为局部变量(local variables)。它们的作用域仅限于函数体;因此,函数不应返回对局部变量的引用!
const和constexpr
当声明类成员函数为const时,该函数不能修改类中任何数据成员的值,否则会出现编译错误
class CTest {
public:
int f(int a) const;
private:
int b = 4;
};
int CTest::f(int a) const {
b = a;
return a + b;
}
int main() {
CTest c;
cout << c.f(3) << endl;
}
编译结果:
/home/zj/CLionProjects/first/main.cpp: In member function ‘int CTest::f(int) const’:
/home/zj/CLionProjects/first/main.cpp:18:7: error: assignment of member ‘CTest::b’ in read-only object
b = a;
^
CMakeFiles/first.dir/build.make:62: recipe for target 'CMakeFiles/first.dir/main.cpp.o' failed
当函数生成的值在编译器确定时,赋值为constexpr,声明为constexpr的函数通常比常规函数执行更快
constexpr auto int f(int a) {
return a + 3;
}
函数重载
函数可以被重载(overloaded),即相同名称函数的不同版本可以在形参的数量和(或)类型上有所不同,下图显示可用于重载的函数元素

注意 1:默认参数不能区分重载函数
参数匹配
将选择当前作用域中的函数声明与函数调用中提供的参数最佳匹配的函数,最佳指的是以下一种:
- 找到完全匹配的参数列表
- 执行了一个简单的转换
- 实现了整数提升
- 存在到所需参数类型的标准转换
- 存在到所需参数类型的用户定义转换
- 找到省略号表示的参数
参数类型差异
重载函数采用不同初始值设定项的参数类型进行区分,所以如果输入初始值类型相同,则不能作为重载函数
- 给定类型的参数和对该类型的引用被认为是相同的
- 有
const或volatile声明的参数类型和原始参数类型被认为相同的
函数重载限制
重载函数集中任意两个函数都拥有不同的参数列表
重载具有相同类型参数列表的函数(仅基于返回类型)是错误的
成员函数不能仅基于一个静态函数和另一个非静态函数而重载
typedef声明不定义新类型;它们引入了现有类型的同义词。它们不影响重载机制枚举类型是不同的类型,可用于区分重载函数
为区分重载函数,类型
array of和pointer to被认为是相同的,但仅适用于单维数组void Print(char *szToPrint) { cout << szToPrint << endl; } // error, redefinition void Print(char szToPrint[]) { cout << szToPrint << endl; }
对于多维数组,从第二维开始的后续维度被认为是类型的一部分,所以可用于区分重载函数
void Print(char szToPrint[]) { cout << szToPrint << endl; } void Print(char szToPrint[][7]) { cout << szToPrint << endl; } void Print(char szToPrint[][9][42]) { cout << szToPrint << endl; }
函数模板
函数模板类似于类模板:它基于模板参数生成具体的函数。在许多情况下,模板能够推断类型参数,没有必要显式地指定它们
template<typename Lhs, typename Rhs>
auto Add2(const Lhs& lhs, const Rhs& rhs)
{
return lhs + rhs;
}
函数参数
函数参数列表由0个或多个类型组成,用逗号(comma)隔开
默认情况下函数的参数是输入数据的复制体,所以实参和形参不一致,并且复制过程有可能耗时且占内存
引用参数
要通过引用(特别是lvalue引用)传递参数,需向参数添加引用限定符
void DoSomething(std::string& input){...}
当函数修改通过引用传递的参数时,它将修改原始对象,而不是本地副本。要防止函数修改此类参数,需要将参数限定为const &:
void DoSomething(const std::string& input){...}
c++11规定:要显式处理由右值引用(rvalue-reference)或左值引用(lvalue-reference)传递的参数,请在参数上使用双和号(double-ampersand)来表示通用引用:
void DoSomething(const std::string&& input){...}
void
设置参数列表为空或者void表示没有输入参数,注意:仅能使用单个void
void f() # 正确
void f(void) # 正确
void f(void, void) # error
从void类型派生的类型(例如指向void的指针和void数组)可以出现在参数声明列表的任何位置
int dd(void *a) {
return *static_cast<int *>(a);
}
int main() {
int a = 3;
cout << dd(&a) << endl;
}
默认参数
参数列表中的最后一个或多个参数可以被分配一个默认参数,这意味着调用方在调用函数时可能会忽略该参数,除非他们想指定其他值
void def(int a, float b = 3.21, char c = '2') {
cout << a << " ";
cout << b << " ";
cout << c << endl;
}
int main() {
def(1);
def(1, 32.11);
def(1, 3.33, 'a');
}
结果:
1 3.21 2
1 32.11 2
1 3.33 a
注意:必须按顺序赋值参数列表,无法指定某个默认参数进行赋值
返回类型
默认函数返回类型由函数声明左侧的标签确定,还可以使用尾随返回类型(trailing return types)确定,使用方式如下:
auto def(int a, float b = 3.21, char c = '2') -> int {
return b;
}
int main() {
cout << def(1) << endl;
cout << def(1, 32.11) << endl;
cout << def(1, 3.33, 'a') << endl;
}
在函数声明右侧使用运算符->确定,此时左侧的auto说明符仅充当占位符,不执行类型推导。所以虽然return值的类型是float,但是返回类型是int
3
32
3
通常和decltype搭配使用,函数修改如下:
auto def(int a, float b = 3.21, char c = '2') -> decltype(a) {
函数局部变量
函数体内声明的变量称为局部变量,其作用域仅限于函数体
如果函数局部变量声明为static,那么其副本存在于该函数的所有实例中
auto def(float b) {
static float ff;
cout << ff << endl;
ff = b;
}
int main() {
def(3);
def(3.32);
def(3.2221);
}
结果
0
3
3.32
静态局部对象在atexit指定的终止期间被销毁。如果由于程序的控制流绕过了静态对象的声明而未构造该对象,则不会尝试销毁该对象
返回多个函数值
函数一次仅能返回一个函数值,如果要同时返回多个函数值,可以自定义类或者结构体,也可以调用标准库的std::tuple或者std::pair对象
Overloading,overriding和hiding
基类声明函数的作用域与派生类相同名称函数的作用域不同
- 如果派生类函数声明了基类
virtual函数,则进行了重写(override)操作 - 如果基类函数没有声明为
virtual,那么派生类函数隐藏(hide)了它。重写(overridding)和隐藏(hiding)操作不同于重载(overloaded)
局部函数
在函数内声明了和外部函数同名的局部函数,那么局部函数隐藏了外部同名函数,示例如下:
void func(int i) {
cout << "Called file-scoped func : " << i << endl;
}
void func(char *sz) {
cout << "Called locally declared func : " << sz << endl;
}
int main() {
// Declare func local to main.
extern void func(char *sz);
// func(3); // C2664 Error. func( int ) is hidden.
func("s");
}
main函数内部的func函数声明隐藏了外部func函数重载,所以只能支持输入字符数组的参数
同一类的成员函数在不同的访问权限(public/protect/private)下仍是重载函数
示例如下:
// declaration_matching2.cpp
class Account
{
public:
Account()
{
}
double Deposit( double dAmount, char *szPassword );
private:
double Deposit( double dAmount )
{
return 0.0;
}
int Validate( char *szPassword )
{
return 0;
}
};
int main()
{
// Allocate a new object of type Account.
Account *pAcct = new Account;
// Deposit $57.22. Error: calls a private function.
// pAcct->Deposit( 57.22 );
// Deposit $57.22 and supply a password. OK: calls a
// public function.
pAcct->Deposit( 52.77, "pswd" );
}
double Account::Deposit( double dAmount, char *szPassword )
{
if ( Validate( szPassword ) )
return Deposit( dAmount );
else
return 0.0;
}
内联函数
在类声明中定义的函数称为内联函数(inline function),不需要显示声明为inline;如果内联函数定义在外部,必须在定义时声明为inline。示例如下:
class Account
{
public:
Account(double initial_balance) { balance = initial_balance; }
double GetBalance();
private:
double balance;
};
inline double Account::GetBalance()
{
return balance;
}
构造器Account和函数GetBalance都是内联函数
[c++11]cv限定符
关键字const和volatile统称为cv限定符(cv qualifiers)
const
参考:const (C++)
语法如下:
const declaration ;
member-function const ;
声明值
用于数据声明时,const关键字指定对象或变量不可修改。c++使用const声明代替#define预处理器指令进行常量定义
int main() {
const int i = 5;
i = 10; // error: assignment of read-only variable ‘i’
i++; // error: assignment of read-only variable ‘i’
}
数组大小
在c++编程中,可使用const声明变量作为数组大小
const int maxarray = 255;
char store_char[maxarray]; // allowed in C++; not allowed in C
const指针
const指针就是常量指针,即指针指向的是常量,这个常量指的是指针的值(地址),而不是地址指向的值
- 指向
const常量的指针可以重新赋值,即指针能够指向另一个地址 - 指向
const常量的指针只能赋值给同样声明为const常量的指针,两者指向同一个地址 - 使用常量指针作为函数参数能够避免函数体中参数被修改
void f(const char *te) {
te = "asdfadsf";
cout << te << endl;
}
int main() {
const char *te = "asdfa";
const char *ttee = te;
te = "13414";
cout << ttee << endl;
f(te);
cout << te << endl;
}
结果:
asdfa // 两个指针指向同一个地址
asdfadsf // 指针地址可修改
13414 // 函数参数不可修改
const对象
如果对象声明为const,则只能调用const成员函数
class Cls {
public:
Cls(int a, char b) : a(a), b(b) {}
void setA(int a);
void setA(int a) const;
private:
int a;
char b;
};
void Cls::setA(int a) {
this->a = a;
cout << this->a << endl;
}
void Cls::setA(int a) const {
cout << "const " << a << endl;
}
int main() {
const Cls cls(1, 'c');
cls.setA(33);
Cls cls2(2, 'd');
cls2.setA(11);
}
声明成员函数
声明成员函数为const,表示该函数为只读函数(即常量成员函数),不会修改调用对象
常量成员函数(constant member function)无法修改任何非静态数据成员和调用任何非常量成员函数
示例如下:
class Cls {
public:
void setA(int a) const;
}
void Cls::setA(int a) const {
cout << "const " << a << endl;
}
c vs. c++
c语言中,const拥有外部链接,所以文件声明如下:
const int i=2; // 源文件初始化
extern const int i; // 其他模块使用
c++语言中,const拥有内部链接,所以必须显式添加extern关键字:
extern const int i=2; // 源文件初始化
extern const int i; // 其他模块使用
如果想要在c文件中调用c++ const变量,需要初始化如下:
extern “C” const int x=10;
所以c语言中,常量通常定义在源文件;c++语言中,常量也可定义在头文件中
constexpr
constexpr是c++11提出的关键字,意为常量表达式(constant expression)
constexpr除了const的功能外,还可用于函数和构造器声明,表示其值或返回值是常量
constexpr整数值可用于替代需要const整数的任何位置,例如模板参数和数组声明中。当一个值可以在编译时而不是在运行时计算时,它可以帮助您的程序更快地运行,并且使用更少的内存
constexpr变量
const变量和constexpr变量的主要区别在于前者的初始化可在运行时推导,而后者必须在编译时完成初始化
- 如果变量具有
literal类型并已初始化,则可以使用constexpr声明该变量。如果初始化是由构造函数执行的,则必须将该构造函数声明为constexpr - 如果引用的对象已由常量表达式初始化,并且在初始化期间调用的任何隐式转换也是常量表达式,则可以将引用声明为
constexpr constexpr变量或函数的所有声明都必须具有constexpr说明符
constexpr函数
constexpr函数可以在编译时计算其返回值。例如初始化constexpr变量或提供非类型模板参数。当其参数为constexpr值时,constexpr函数生成编译时常量。当使用非constexpr参数调用时,或者在编译时不需要它的值时,它在运行时像常规函数一样生成一个值(这种双重行为使您不必编写同一函数的constexpr和non constexpr版本)
constexpr函数或构造函数是隐式内联的
以下规则适用于constexpr函数:
constexpr函数必须只接受和返回literal类型constexpr函数可以是递归的- 它不能是
virtual的。如果封闭类具有任何virtual基类,则不能将构造函数定义为constexpr - 函数体可以定义为
=default或=delete - 函数体不能包含
goto语句或try块 - 非
constexpr模板的显式专用化可以声明为constexpr constexpr模板的显式专用化不必也是constexpr
const vs. constexpr
const未区分编译期常量和运行期常量,constexpr表示编译期可计算
在 C 里面,const 很明确只有「只读」一个语义,不会混淆。C++ 在此基础上增加了「常量」语义,也由 const 关键字来承担,引出来一些奇怪的问题。C++11 把「常量」语义拆出来,交给新引入的 constexpr 关键字
在 C++11 以后,建议凡是「常量」语义的场景都使用 constexpr,只对「只读」语义使用 const
示例如下:
// constexpr 声明factorial可以参与编译期的运算
constexpr int factorial(int n) {
return n <= 1 ? 1 : (n * factorial(n - 1));
}
int main() {
std::cout << "4! = " << factorial(4) << endl; // computed at compile time
volatile int k = 4; // disallow optimization using volatile
std::cout << k << "! = " << factorial(k) << '\n'; // computed at run time
}
volatile
参考:
C 和 C++ 的 volatile 关键字为什么给编程者造成了如此大的误解?
- 阻止编译器调整操作
volatile变量的指令顺序,提供对特殊地址的稳定访问 - 阻止编译器为了提高速度将一个变量缓存到寄存器内而不写回,生成对应代码直接存取原始内存地址
临时对象
参考:
临时对象的创建有如下原因:
要初始化一个
const引用,但是其初始化器的类型不同于引用的基础类型存储返回用户定义类型的函数返回值
只有当程序不会将返回值复制到对象时,才会创建这些临时文件
// 函数声明,使用自定义类型作为返回值 UDT Func1(); ... // 调用该函数,不接受返回值。此时编译器创建一个临时对象来保存返回值 Func1();
创建临时变量的更常见情况是在表达式的计算过程中,必须调用重载的运算符函数。这些重载的运算符函数返回一个用户定义的类型,该类型通常不会复制到另一个对象
class Complex { public: Complex(int num) : num(num) {} Complex operator+(Complex &other) { return Complex{this->getNum() + other.getNum()}; } int getNum() { return num; } private: int num; }; int main() { Complex complex1(1), complex2(2), complex3(3); // complex1和complex2的加法结果被存储在一个临时对象tmp中 // tmp再继续和complex3进行加法计算,将结果复制到result Complex result = complex1 + complex2 + complex3; cout << result.getNum() << endl; }
将强制转换的结果存储到用户定义的类型。当给定类型的对象显式转换为用户定义的类型时,该新对象将被构造为临时对象
初始化
参考:Initializers
初始化器指定了变量的初始值,c++提供了多种初始化方式:
- 零初始化(
zero initialization) - 默认初始化(
default initialization) - 值初始化(
value initialization) - 复制初始化(
copy initialization) - 直接初始化(
direct initialization) - 列表初始化(
list initialization) - 集合初始化(
aggregate initialization) - 引用初始化(
reference initialization) - 外部变量初始化(
Initialization of external variables)
零初始化
零初始化是将变量隐式转换为该类型的零值:
- 数值变量初始化为
0(或0.0) char变量初始化为'\0'- 指针变量初始化为
nullptr - 数组、结构体等对象的成员初始化为零值
示例
struct my_struct{
int i;
char c;
};
int i0; // zero-initialized to 0
int main() {
static float f1; // zero-initialized to 0.000000000
double d{}; // zero-initialized to 0.00000000000000000
int* ptr{}; // initialized to nullptr
char s_array[3]{'a', 'b'}; // the third char is initialized to '\0'
int int_array[5] = { 8, 9, 10 }; // the fourth and fifth ints are initialized to 0
my_struct a_struct{}; // i = 0, c = '\0'
}
默认初始化
- 对于类、结构体和共同体而言,其默认初始化是使用默认构造函数初始化,没有初始化表达式或使用
new关键字时会调用默认初始化 - 对于标量变量而言,在没有初始化表达式定义时执行默认初始化,此时它们有不确定的值
- 对数组而言,在没有初始化表达式的情况下定义时是默认初始化的。当数组默认初始化时,其成员默认初始化并具有不确定的值
常量变量的默认初始化
常量变量必须和初始化器同时声明。否则,对于标量类型而言会造成编译错误;对有默认构造器的类类型而言,编译器会抛出warning
静态变量的默认初始化
未使用初始值设定项声明的静态变量初始化为0(隐式转换)
示例
class MyClass {
private:
int m_int;
char m_char;
};
int main() {
// 标量类型的默认初始化,不缺定值
int i1;
float f;
char c;
// 数组的默认初始化,不缺定值
int int_arr[3];
// 常量变量的初始化,必须加上初始化器
// error
// const MyClass mc1;
// 静态变量的初始化,默认为0
}
值初始化
- 对于至少有一个
public构造器,默认构造器被调用 - 对于没有构造器声明的非共同体类,对象是零初始化,默认呢构造器被调用
- 对于数组,每个元素都是值初始化
- 其他情况下,变量是零初始化
使用场景
- 使用空大括号初始化命名值
- 使用空括号或大括号初始化匿名临时对象
- 使用
new关键字加上空括号或大括号初始化对象
示例
class BaseClass {
private:
int m_int;
};
int main() {
BaseClass bc{}; // class is initialized
BaseClass* bc2 = new BaseClass(); // class is initialized, m_int value is 0
int int_arr[3]{}; // value of all members is 0
int a{}; // value of a is 0
double b{}; // value of b is 0.00000000000000000
}
复制初始化
复制初始化是使用另一个对象初始化当前对象
使用场景
- 使用等号初始化变量
- 输入参数到函数
- 函数返回对象
- 被抛出或不捕获的异常
- 使用等号初始化的非
static数据成员 - 类、结构体和共同体成员在聚合初始化期间通过复制初始化进行初始化
示例
#include <iostream>
using namespace std;
class MyClass{
public:
MyClass(int myInt) {}
void set_int(int myInt) { m_int = myInt; }
int get_int() const { return m_int; }
private:
int m_int = 7; // copy initialization of m_int
};
class MyException : public exception{};
int main() {
int i = 5; // copy initialization of i
MyClass mc1{ i };
MyClass mc2 = mc1; // copy initialization of mc2 from mc1
MyClass mc1.set_int(i); // copy initialization of parameter from i
int i2 = mc2.get_int(); // copy initialization of i2 from return value of get_int()
try{
throw MyException();
}
catch (MyException ex){ // copy initialization of ex
cout << ex.what();
}
}
复制初始化无法调用显式构造器。某些情况下,如果类的复制构造器被删除或无法访问,复制初始化会造成编译器错误
直接初始化
直接初始化是使用(非空)大括号或圆括号进行初始化。与复制初始化不同,它可以调用显式构造函数
使用场景
- 使用非空大括号或圆括号初始化变量
- 用
new关键字加上非空大括号或圆括号初始化变量 - 用
static_cast初始化变量 - 在构造函数中,使用初始值列表初始化基类和非静态成员
- 在
lambda表达式中捕获变量的副本
示例
class BaseClass{
public:
BaseClass(int n) :m_int(n){} // m_int is direct initialized
private:
int m_int;
};
class DerivedClass : public BaseClass{
public:
// BaseClass and m_char are direct initialized
DerivedClass(int n, char c) : BaseClass(n), m_char(c) {}
private:
char m_char;
};
int main(){
BaseClass bc1(5);
DerivedClass dc1{ 1, 'c' };
BaseClass* bc2 = new BaseClass(7);
BaseClass bc3 = static_cast<BaseClass>(dc1);
int a = 1;
function<int()> func = [a](){ return a + 1; }; // a is direct initialized
int n = func();
}
列表初始化
当使用带括号的初始值列表初始化变量时,会发生列表初始化
使用场景
- 变量初始化
- 类使用
new关键字初始化 - 函数返回的对象
- 输入到函数的参数
- 直接初始化的其中一个参数
- 非静态成员初始化器
- 构造器初始化列表
示例
class MyClass {
public:
MyClass(int myInt, char myChar) {}
private:
int m_int[]{ 3 };
char m_char;
};
class MyClassConsumer{
public:
void set_class(MyClass c) {}
MyClass get_class() { return MyClass{ 0, '\0' }; }
};
struct MyStruct{
int my_int;
char my_char;
MyClass my_class;
};
int main() {
MyClass mc1{ 1, 'a' };
MyClass* mc2 = new MyClass{ 2, 'b' };
MyClass mc3 = { 3, 'c' };
MyClassConsumer mcc;
mcc.set_class(MyClass{ 3, 'c' });
mcc.set_class({ 4, 'd' });
MyStruct ms1{ 1, 'a', { 2, 'b' } };
}
集合初始化
集合初始化是数组或类类型(通常是结构体或共同体)的列表初始化形式,这些类型具有
- 没有
private或protected成员 - 除了显式
defaulted或deleted的构造函数,没有用户提供的构造器 - 没有基类
- 没有虚拟成员函数
示例
struct MyAggregate {
int myInt;
char myChar;
};
struct MyAggregate2 {
int myInt;
char myChar = 'Z'; // member-initializer OK in C++14
};
int main() {
MyAggregate agg1{1, 'c'};
MyAggregate2 agg2{2};
cout << "agg1: " << agg1.myChar << ": " << agg1.myInt << endl;
cout << "agg2: " << agg2.myChar << ": " << agg2.myInt << endl;
int myArr1[]{1, 2, 3, 4};
int myArr2[3] = {5, 6, 7};
int myArr3[5] = {8, 9, 10};
cout << "myArr1: ";
for (int i : myArr1) {
cout << i << " ";
}
cout << endl;
cout << "myArr3: ";
for (auto const &i : myArr3) {
cout << i << " ";
}
cout << endl;
}
初始化共同体/结构体
- 如果共同体没有构造器,你可以用单个值初始化它(或者另一个共同体),该值将用于初始化第一个非静态成员
- 对于结果体而言,按序初始化成员,其后的成员置为
0
struct MyStruct {
int myInt;
char myChar;
};
union MyUnion {
int my_int;
char my_char;
bool my_bool;
MyStruct my_struct;
};
int main() {
MyUnion mu1{'a'}; // my_int = 97, my_char = 'a', my_bool = true, {myInt = 97, myChar = '\0'}
MyUnion mu2{1}; // my_int = 1, my_char = 'x1', my_bool = true, {myInt = 1, myChar = '\0'}
MyUnion mu3{}; // my_int = 0, my_char = '\0', my_bool = false, {myInt = 0, myChar = '\0'}
MyUnion mu4 = mu3; // my_int = 0, my_char = '\0', my_bool = false, {myInt = 0, myChar = '\0'}
//MyUnion mu5{ 1, 'a', true }; // compiler error: C2078: too many initializers
//MyUnion mu6 = 'a'; // compiler error: C2440: cannot convert from 'char' to 'MyUnion'
//MyUnion mu7 = 1; // compiler error: C2440: cannot convert from 'int' to 'MyUnion'
MyStruct ms1{'a'}; // myInt = 97, myChar = '\0'
MyStruct ms2{1}; // myInt = 1, myChar = '\0'
MyStruct ms3{}; // myInt = 0, myChar = '\0'
MyStruct ms4{1, 'a'}; // myInt = 1, myChar = 'a'
MyStruct ms5 = {2, 'b'}; // myInt = 2, myChar = 'b'
}
初始化包含集合的集合
聚合类型可以包含其他聚合类型,例如数组数组、结构数组等。这些类型是通过使用嵌套的大括号集初始化的
struct MyStruct {
int myInt;
char myChar;
};
int main() {
int intArr1[2][2]{{ 1, 2 }, { 3, 4 }};
int intArr3[2][2] = {1, 2, 3, 4};
MyStruct structArr[]{ { 1, 'a' }, { 2, 'b' }, {3, 'c'} };
}
引用初始化
引用类型的变量必须用派生引用类型的对象初始化,或者用可转换为派生引用类型的对象初始化
int iVar;
long lVar;
int main() {
long &LongRef1 = lVar; // No conversion required.
// long &LongRef2 = iVar; // Error C2440
const long &LongRef3 = iVar; // OK
LongRef1 = 23L; // Change lVar through a reference.
LongRef2 = 11L; // Change iVar through a reference.
// LongRef3 = 11L; // Error C3892
}
使用临时对象初始化
使用临时对象初始化引用的唯一方法是初始化常量临时对象。一旦初始化,引用类型变量总是指向同一个对象;不能修改为指向另一个对象
const int &i = 3;
// int &i2 = 4; // error
引用初始化 vs. 引用赋值
尽管语法可以相同,但是引用类型变量的初始化(initialize)和对引用类型变量的赋值(assign)在语义上是不同的。在前面的示例中,更改ivar和lvar的赋值看起来与初始化类似,但具有不同的效果。初始化指定引用类型变量指向的对象;赋值通过引用分配给引用的对象
没有初始化
引用类型变量仅在以下情况可以没有初始化:
- 函数声明(原型)
- 返回返回值类型声明
- 引用类型的类成员声明
- 显式声明为
extern的变量引用
int func( int& );
int& func( int& );
class c {public: int& i;};
extern int& iVal;
外部变量初始化
automatic、static和external变量的声明可以包含初始值设定项。但是,只有在变量未声明为external变量时,外部变量的声明才能包含初始值设定项
// name.cpp
int iii = 333;
// main.cpp
extern int iii;
extern int iii = 3; // warning: ‘iii’ initialized and declared ‘extern’
数组
参考:Arrays (C++)
数组是相似对象的集合
声明
数组声明语法有以下四种方式:
decl-specifier identifier [ constant-expression ]
decl-specifier identifier []
decl-specifier identifer [][ constant-expression ] ...
decl-specifier identifier [ constant-expression ] [ constant-expression ] ...
- 声明说明符
- 可选的存储类说明符
- 可选的
cv限定符 - 数组元素的类名
- 声明符
- 标识符
- 括在方括号内的整型常量表达式。如果使用附加括号声明多个维度,则在第一组括号上可以省略常量表达式
- 包含常量表达式的可选附加括号
- 可选的初始化器
数组中的元素数量由常量表达式给出。数组中的第一个元素是第0个元素,最后一个元素是(n-1)元素,其中n是数组可以包含的元素数。常量表达式必须是整型,并且必须大于0
多维数组声明
多维数组是通过按顺序放置多个带括号的常量表达式来指定的。在具有初始值列表的多维数组声明中,可以省略指定第一个维度边界的常量表达式
const int cMarkets = 4;
// Declare a float that represents the transportation costs.
double TransportCosts[][cMarkets] = {
{32.19, 47.29, 31.99, 19.11},
{11.29, 22.49, 33.47, 17.29},
{41.97, 22.09, 9.76, 22.55}
};
初始化
类数组初始化
如果类有构造函数,则该类的数组由构造函数初始化。如果初始值列表中的项少于数组中的元素,则对其余元素使用默认构造函数。如果没有为类定义默认构造函数,则初始值设定项列表必须完整 - 即数组中的每个元素都必须有一个初始值设定项
// initializing_arrays1.cpp
class Point {
public:
Point() {} // Default constructor.
Point(int, int) {} // Construct from two ints
};
// An array of Point objects can be declared as follows:
Point aPoint[3] = {
Point(3, 3) // Use int, int constructor.
};
数组aPoint的第一个元素使用构造器Point(int, int),后续的元素使用默认构造器
静态成员数组初始化
静态成员数组(无论是否const)都可以在其定义中初始化(在类声明之外)
class WindowColors {
public:
static const char *rgszWindowPartList[7];
};
const char *WindowColors::rgszWindowPartList[7] = {
"Active Title Bar", "Inactive Title Bar", "Title Bar Text",
"Menu Bar", "Menu Bar Text", "Window Background", "Frame"};
int main() {
WindowColors colors[3];
for (int i = 0; i < 7; i++) {
cout << colors[0].rgszWindowPartList[i] << endl;
}
}
取值操作
参考:
Interpretation of Subscript Operator
有两种方式获取数组指定位置的值
- 使用下标运算符
- 使用间接取值运算符
const int Max1 = 3;
const int Max2 = 4;
int a[Max1][Max2];
for (int i = 0; i < Max1; i++) {
for (int j = 0; j < Max2; j++) {
a[i][j] = i + j;
}
}
// 创建指针数组指向a
int (*b)[Max2] = a;
// 打印第一行元素值
for (int i = 0; i < Max2; i++) {
cout << *(*(b + 0) + i) << endl;
}
// 取第2行第1列的元素值和地址
cout << *(*(b + 2) + 1) << endl;
cout << (*(b + 2) + 1) << endl;
cout << b[2][1] << endl;
cout << &b[2][1] << endl;
结果:
0
1
2
3
3
0x7ffff9bfae54
3
0x7ffff9bfae54
[c++11]类型概述
参考:Type Conversions and Type Safety (Modern C++)
c++是强类型编程语言,每个变量、函数参数、函数返回值都必须拥有一个类型
类型的作用如下:
- 指定变量(或表达式结果)分配的内存
- 指定可能存储的值的类型
- 指定编译器如何解释这些值(在位模式下)
- 指定可以对其进行的操作
c++的类型分为以下几种:
- 基本类型
void类型string类型- 用户自定义类型
- 指针类型
另外也经常使用const类型限定符
基本类型
参考:
C++中的基本类型(fundamental types,也称为built-in types)分为三类:
- 整数
- 浮点数
void
整数和浮点数
常用的整数和浮点数如下:
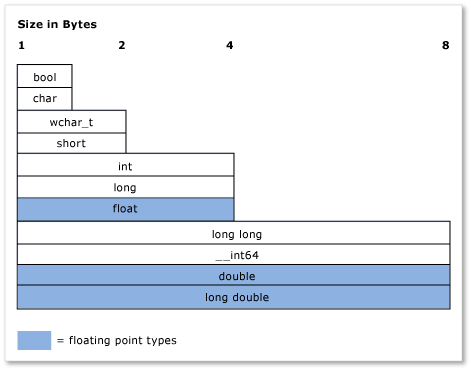
其所占字节大小以及类型作用如下所示:
bool:1字节大小,表示true或者falsechar:1字节大小,作用于之前C风格字符串的字符,目前作用于std::stringunsigned char:1字节大小,C++没有内置的字节类型,使用无符号字符表示字节值wchar_t:2字节大小,以UNICODE格式编码的宽字符,这个字符类型作用于字符串类型std::wstringint:4字节大小,默认整数类型unsigned int:4字节大小,位标志的默认选择double:8字节大小,默认浮点数类型long long:8字节大小,用于大整数值表示
int类型还可以定义为占不同大小的类型:__int8_t/__int16_t/__int32_t/__int64_t
大多数基本类型(bool、double、wchar_t和相关类型除外)都有无符号版本
取值范围
参考:
基本类型的最大最小取值可从以下两个头文件中获得:
<climits>:用于整数类型<cfloat>:用于浮点数类型
整数的最大最小值,参考:Integer Limits
#include <iostream>
#include <climits>
using std::cout;
using std::endl;
int main() {
// 最小变量所占位数
cout << CHAR_BIT << endl;
// 字符的最大最小值
cout << CHAR_MIN << endl;
cout << CHAR_MAX << endl;
// 字节的最大值
cout << UCHAR_MAX << endl;
// 整数的最大最小值
cout << INT_MIN << endl;
cout << INT_MAX << endl;
return 0;
}
结果
8
-128
127
255
-2147483648
2147483647
浮点数的最大最小值参考Floating Limits
void类型
void类型
参考:
void类型有两个用处
- 作为函数返回值类型,表示不返回一个值
- 定义在函数参数列表,表示该函数没有任何参数
- 使用
void *作为指针,可以指向任何类型的变量
#include <iostream>
using std::cout;
using std::endl;
void f(void *a) {
int *b = (int *) a;
cout << sizeof(b) << endl;
cout << sizeof(*b) << endl;
cout << *b << endl;
}
int main() {
int a = 3;
f(&a);
return 0;
}
结果
8
4
3
void *可以指向任何类型的指针(除了const和volatile声明的),但是如果想要使用具体的变量值必须重新经过转换
void指针同样可以指向函数,但是不能是类成员
C++规范
- 尽量避免使用
void指针,其涉及到类型安全 - 设置函数无参数,使用
f()代替f(void)
[c++11]字符串类型
参考:std::string
字符串是表示字符序列的对象
标准字符串类提供对此类对象的支持,其接口类似于标准字节容器的接口,但添加了专门设计用于操作单字节字符的字符串的功能
头文件
#include <string>
使用
int main() {
// 创建
std::string str;
str = "abcde";
// 查询
// 长度
std::cout << str.length() << std::endl;
// 指定位置字符 第3个字符
std::cout << str.at(2) << std::endl;
// 使用find*方法查询
std::cout << str.find('c') << std::endl;
// 修改
// 连接另一个字符串
str += "fg";
str.append("hij");
// 连接一个字符
str.push_back('k');
std::cout << str << std::endl;
// 修改其中的字符 修改第3个字符为z
str.replace(2, 1, "z");
std::cout << str << std::endl;
// 删除
// 删除第2-4个位置的字符
str.erase(1, 3);
std::cout << str << std::endl;
// 复制
// 复制子字符串"ijk"到字符数组
char buffer[20];
std::size_t length = str.copy(buffer, 3, 5);
buffer[length] = '\0';
std::cout << "buffer contains: " << buffer << '\n';
// 转换
// 转换字符串为字符数组
const char *arrs = str.c_str();
std::cout << arrs << std::endl;
// 转换字符数组为字符串
std::cout << std::string(buffer) << std::endl;
}
优缺点
参考:
为什么大多数的 C++ 的开源库都喜欢自己实现 string?
在网上看了很多关于c++ std::string的介绍,优缺点如下:
优点:
- 相较于之前的字符操作,封装了更多的实现
- 能够手动指定分配器,适配不同的内存资源
缺点:
- 性能不够高,没有基于不同的应用场景进行内存管理适配
- 还缺少很多字符串的操作,比如字符分离
关于替代std::string的实现库,有如下参考:
- facebook/folly实现的
FBString - Google abseil/abseil-cpp实现的
StringPiece
指针类型
指针是c/c++相对于其他语言来说最不同的内容之一。通过指针的使用,c/c++可以更加自由的操作内存地址,下面学习指针的相关概念和用法
语法
通用语法如下:
[storage-class-specifiers] [cv-qualifiers] type-specifiers declarator ;
简化版本如下:
* [cv-qualifiers] identifier [= expression]
- 声明说明符
- 可选的存储类说明符
- 可选的
cv限定符,应用于要指向的对象的类型 - 类型说明符:表示要指向的对象类型的类型的名称
- 声明符
*运算符- 可选的
cv限定符,应用于指针本身 - 标识符
- 可选的初始化器
函数指针
指向函数的指针的声明符如下所示:
(* [cv-qualifiers] identifier )( argument-list ) [cv-qualifers] [exception-specification] [= expression] ;
const和volatile指针
参考:const and volatile Pointers
const
const可用于指针的两方面,一是指针所指对象值,二是指针存储地址值
常量指针
声明指针所指对象为const,即为常量指针,语法如下:
const char *p;
声明指针指针后可以赋值指针另一个对象地址,但是无法通过指针修改对象值(可以通过对象本身进行修改),比如
char a = 'A';
const char *p = &a;
// *p = 'D'; // error, *p只读
cout << (void *) &a << endl;
cout << (void *) p << endl;
a = 'B';
cout << (void *) &a << endl;
cout << (void *) p << endl;
char b = 'C';
p = &b;
cout << (void *) &a << endl;
cout << (void *) p << endl;
cout << (void *) &b << endl;
指针常量
声明指针值(即指针存储地址)为const,即为指针常量,语法如下:
char const *p;
声明指针常量后可以通过指针修改对象值,但是无法赋值指针另一个对象地址。示例如下
char a = 'A';
char *const p = &a;
cout << (void *) &a << endl;
cout << (void *) p << endl;
a = 'B';
cout << (void *) &a << endl;
cout << (void *) p << endl;
cout << a << endl;
cout << *p << endl;
char b = 'C';
// p = &b; // error,指针p存储的地址固定为a
常量指针 vs. 指针常量
- 常量指针可看成对象的
const类型,只能读取对象值而不能修改 - 指针常量可看成对象的别名,其存储地址固定为初始对象地址
可同时声明指针为常量指针和指针常量
const char *const p = &a;
此时指针p可看成对象a的别名,同时不能通过p修改对象值
volatile
volatile关键字的语法和const一样,可作用于所指对象或者指针存储地址
// 作用于对象
volatile char *vpch;
// 作用于指针地址
char * volatile pchv;
volatile关键字指定了可以通过用户应用程序中的操作以外的操作进行修改,对于在共享内存中声明可由多个进程或用于与中断服务例程通信的全局数据区域访问的对象非常有用
当对象声明为volatile时,每次程序访问编译器都将从存储器中获取对象值。这极大地减少了可能的优化。如果对象的状态无法预期时,这是确保可预测的程序性能的唯一途径
[c++11]智能指针类型
参考:Smart Pointers (Modern C++)
使用原始指针需要手动操作内存分配和删除,同时需要密切关注指针引用。在现代C++编程中,标准库包括智能指针(smart pointer),用于确保程序不受内存(free of memory)和资源泄漏(resource leaks)的影响,并且是异常安全(exception-safe)的
头文件
智能指针的声明位于头文件<memory>
原理
C++没有单独的垃圾收集器(garbage collector)在后台运行,是通过标准C++范围规则(scoping rule)来管理内存,以便运行时环境更快、更高效
智能指针是在栈上声明的类模板,通过使用指向堆分配对象的原始指针进行初始化。智能指针初始化后,它拥有原始指针。这意味着智能指针负责删除原始指针指定的内存。智能指针析构函数包含对delete的调用,并且由于智能指针在栈上声明,因此当智能指针超出作用域时将调用其析构函数,即使在栈上的某个位置引发异常
使用熟悉的指针运算符->和*访问封装的指针,智能指针类重载这些运算符以返回封装的原始指针
编程规范
智能指针对原始指针进行了封装,能够保证其安全使用,与此同时也造成了效率的小小降低
- 大多数情况下,当初始化原始指针或资源句柄以指向实际资源时,立即将指针传递给智能指针
- 原始指针只用于有限范围、循环或辅助函数的小代码块中。在这些代码块中,性能至关重要,并且不可能混淆所有权
- 始终在单独的代码行上创建智能指针,而不是在参数列表中,这样就不会由于某些参数列表分配规则而发生细微的资源泄漏
使用智能指针的基本步骤如下:
- 声明智能指针作为自动(
automatic)或局部(local)变量(不要对智能指针使用new或malloc表达式) - 在类型参数中,指定封装指针的指向类型
- 在智能指针构造函数中传递原始指针(已指向对象)(一些实用程序函数或智能指针构造函数可以辅助执行此操作)
- 使用重载的
*或->运算符访问对象 - 让智能指针删除对象
示例
创建结构体S,分别使用原始指针rptr和智能智能sptr创建对象,输入函数print进行打印
struct S {
S(char a, int b) : a(a), b(b) {}
char a;
int b;
};
void print(const struct S &ptr) {
cout << ptr.a << " " << ptr.b << endl;
}
int main(int argc, char *argv[]) {
std::unique_ptr<struct S> sptr(new struct S('b', 3));
auto *rptr = new struct S('b', 3);
print(*sptr);
print(*rptr);
delete (rptr);
}
[c++11]unique_ptr
参考:How to: Create and Use unique_ptr Instances
规范
每个unique_ptr对象都是独立的,无法共享其保存的原始指针,这样能够简化程序逻辑的复杂度。其遵循以下规范:
- 它不能复制到另一个
unique_ptr对象,或者传递值到函数,或者任何需要复制操作的C++标准库算法 unique_ptr对象保存的指针可以被移动,即内存资源的所有权可以转移到另一个unique_ptr对象,原来的对象就不再拥有
下图演示了两个unique_ptr对象之间的资源转移

将unique_ptr实例添加到C++标准库容器是有效的,因为unique_ptr的移动构造器(move constructor)消除了复制操作的需要
成员函数
参考:
unique_ptr常用的成员函数包括:
- get:返回存储指针,如果为空返回
nullptr - release:释放存储指针的所有权。返回存储指针且在对象中使用
nullptr代替 - reset:删除当前对象管理的内存资源,并在对象中用
nullptr代替存储指针 - swap:交换两个
unique_ptr对象保存的指针 - operator bool:当前
unique_ptr对象是否为空。等价于get() != nullptr
示例1
struct S {
S(char a, int b) : a(a), b(b) {}
char a;
int b;
};
/**
* @param ptr : lvalue引用方式
*/
void print(const struct S &ptr) {
cout << ptr.a << " " << ptr.b << endl;
}
int main(int argc, char *argv[]) {
std::unique_ptr<struct S> uptr(new struct S('c', 3));
std::unique_ptr<struct S> uptr2(new struct S('d', 4));
// 打印
print(*uptr);
print(*uptr2);
// 转换信息
uptr.swap(uptr2);
// 调用原始指针打印
struct S *ptr = uptr.get();
struct S *ptr2 = uptr2.get();
print(*ptr);
print(*ptr2);
// 重置智能指针
uptr.reset();
if (!uptr) {
cout << "ptr is null" << endl;
}
// 释放智能指针
ptr2 = uptr2.release();
if (!uptr2) {
cout << "ptr2 is null" << endl;
print(*ptr2);
delete (ptr2);
}
}
结果:
c 3
d 4
d 4
c 3
ptr is null
ptr2 is null
c 3
辅助函数
c++11提供了以下函数来进行unique_ptr的操作
- std::make_unique:使用
make_unique辅助函数创建unique_ptr对象 std::move:移动一个unique_ptr保存的指针到另一个空的unique_ptr
示例2
struct S {
S() : a(0), b(0) {}
S(char a, int b) : a(a), b(b) {}
char a;
int b;
};
/**
* @param ptr : lvalue引用方式
*/
void print(const struct S &ptr) {
cout << ptr.a << " " << ptr.b << endl;
}
bool isNull(const struct S *ptr) {
return ptr == nullptr;
}
int main(int argc, char *argv[]) {
auto uptr = std::make_unique<struct S>('a', 2);
std::unique_ptr<struct S> uptr2;
// 打印
print(*uptr);
// 转移指针
uptr2 = std::move(uptr);
print(*uptr2);
// 判空
cout << isNull(uptr.get()) << endl;
cout << isNull(uptr2.get()) << endl;
// 创建数组,使用make_unique没有进行初始化
auto arr = std::make_unique<struct S[]>(5);
// 初始化
for (int i = 0; i < 5; i++) {
arr[i].a = i + '0';
arr[i].b = i;
print(arr[i]);
}
}
[c++11]shared_ptr
参考:How to: Create and Use shared_ptr Instances
多个shared_ptr实例可以同时拥有同一个原始指针。初始化一个shared_ptr对象后,可以复制它,通过函数值参数进行传递,也可以将它分配给其他shared_ptr对象。所有实例都指向同一个对象,并共享对一个控制块的访问,该控制块在添加实例、实例超出范围或重置实例时递增和递减引用计数(reference count)。当引用计数达到零时,控制块删除内存资源和自身。示例图如下:

创建
有两种方式进行创建,一是使用shared_ptr构造器,二是使用辅助函数make_shared(推荐)
auto sp = std::shared_ptr<Example>(new Example(argument));
auto msp = std::make_shared<Example>(argument);
示例1
struct S {
S() : a(0), b(0) {}
S(char a, int b) : a(a), b(b) {}
char a;
int b;
};
/**
* @param ptr : lvalue引用方式
*/
void print(const struct S &ptr) {
cout << ptr.a << " " << ptr.b << endl;
}
int main(int argc, char *argv[]) {
auto sptr = std::make_shared<struct S>('a', 33);
std::shared_ptr<struct S> sptr2(sptr);
// 计数
cout << sptr.use_count() << endl;
// 修改对象信息
sptr2->a = '3';
print(*sptr);
print(*sptr2);
// 是否唯一拥有
cout << sptr.unique() << endl;
}
函数调用
将shared_ptr输入到另一个函数需要注意以下信息:
- 通过值传递。这将调用复制构造函数,增加引用计数,使得被调用方拥有
shared_ptr实例。在这个操作中会有少量的开销,取决于传递的shared_ptr对象的数量。当调用方和被调用方之间的隐含或显式代码协定要求被调用方是所有者时,使用此选项 - 通过引用或
const引用传递。在这种情况下,引用计数不会递增,只要调用方不超出范围,被调用方就可以访问指针。或者,被调用方可以在代码内基于引用创建shared_ptr,成为共享所有者。当调用者不了解被调用者时,或者必须传递一个shared_ptr并且出于性能原因希望避免复制操作时,使用此选项 - 将基础指针或引用传递给基础对象。这使被调用方能够使用该对象,但不能使其共享所有权或延长生存期。如果被调用者从原始指针创建一个
shared_ptr,则新的shared_ptr独立于原始指针,并且不控制底层资源。当调用方和被调用方之间的约定明确指定调用方保留shared_ptr生存期的所有权时,使用此选项
当决定如何传递shared_ptr时,请确定被调用者是否必须共享基础资源的所有权。owner是一个对象或函数,它可以保持底层资源的活动状态。如果调用者必须保证被调用者可以将指针的寿命延长到其(函数)寿命之外,请使用第一个选项;如果不关心被调用者是否延长了生存期,那么通过引用传递并让被调用者复制它
如果必须让辅助函数访问底层指针,并且知道辅助函数将只使用指针并在调用函数返回之前返回,则该函数不必共享底层指针的所有权。它只需要在调用者的shared_ptr的生命周期内访问指针。在这种情况下,可以通过引用传递shared_ptr,或者将原始指针或引用传递给基础对象。通过这种方式提供了一个小的性能优势,也可以帮助您表达您的编程意图
有时,例如在std::vector<shared_ptr<T>>,可能必须将每个shared_ptr传递给lambda表达式体或命名函数对象。如果lambda或函数不存储指针,则通过引用传递shared_ptr,以避免为每个元素调用复制构造函数
数组
使用shared_ptr创建动态数组需要自定义删除程序:
template<typename T>
struct array_deleter {
void operator()(T const *p) {
cout << "delete" << endl;
delete[] p;
}
};
使用如下:
int main() {
// 创建整型数组
std::shared_ptr<int> ints(new int[10], array_deleter<int>());
for (int i = 0; i < 5; i++) {
ints.get()[i] = i;
cout << ints.get()[i] << endl;
}
ints.reset();
cout << "end" << endl;
}
结果:
0
1
2
3
4
delete
end
[c++11]weak_ptr
参考:How to: Create and Use weak_ptr Instances
weak_ptr是为了避免shared_ptr出现循环引用(cyclic reference)问题而设计的
weak_ptr实例本身不拥有内存资源,它只能指向shared_ptr实例保存的共享资源,所以本身不参与引用计数,因此它不能防止引用计数变为零。使用weak_ptr实例时,需要先转换成shared_ptr实例,再进行访问;当引用计数为0时,内存会被删除,此时调用weak_ptr有可能会引发bad_weak_ptr异常
weak_ptr类似于Java的弱引用,一方面能够保证避免循环引用问题,另一方面能够保证资源及时销毁,避免内存泄漏
成员函数
创建
template<typename T>
struct array_deleter {
void operator()(T const *p) {
delete[] p;
}
};
int main() {
// 创建整型数组
std::shared_ptr<int> ints(new int[10], array_deleter<int>());
for (int i = 0; i < 5; i++) {
ints.get()[i] = i;
}
// 创建weak_ptr
std::weak_ptr<int> wints(ints);
cout << wints.use_count() << endl;
cout << wints.expired() << endl;
auto sptr = wints.lock();
for (int i = 0; i < 5; i++) {
cout << sptr.get()[i] << endl;
}
}
指针和数组
从C++11开始,除了提供原始数组形式外,STL容器库还提供了std::array;与此同时,除了提供原始指针形式外,C++还提供了智能指针操作
- 原始指针
- 原始数组
- 指针名和数组名的区别
- 指针数组
- 数组指针
一维/二维/三维数组
实现原始数组和std::array的一维/二维/三维创建
const int LENGTH = 3;
const int WIDTH = 10;
const int HEIGHT = 5;
int a1[LENGTH] = {1, 2, 3};
int a2[LENGTH][WIDTH]{};
int a3[LENGTH][WIDTH][HEIGHT]{};
using std::array;
array<int, LENGTH> aa1 = {1, 2, 3};
array<array<int, LENGTH>, WIDTH> aa2{};
array<array<array<int, LENGTH>, WIDTH>, HEIGHT> aa3{};
使用大括号进行列表初始化,std::array的存储形式是第3维->第2维->第1维(从外到里)
数组大小
打印第一维/第二维/第三维大小
cout << aa1.size() << endl;
cout << aa2[0].size() << endl;
cout << aa3[0][0].size() << endl;
结果如下
3
3
3
数组遍历
通过迭代器方式可以快速遍历std::array
for (auto it = aa1.begin(); it != aa1.end(); ++it) {
cout << *it << " ";
}
结果如下:
1 2 3
或者直接使用for循环
int i = 0;
for (auto &items: aa2) {
for (auto &x: items) {
x = i + 1;
i++;
cout << x << " ";
}
cout << endl;
}
外边的for循环遍历了二维数组aa2的第二维,里面的for循环遍历了第一维。结果如下:
1 2 3
4 5 6
7 8 9
10 11 12
13 14 15
16 17 18
19 20 21
22 23 24
25 26 27
28 29 30
原始数组
const int LENGTH = 3;
const int WIDTH = 10;
const int HEIGHT = 5;
int a1[LENGTH] = {1, 2, 3};
int a2[LENGTH][WIDTH]{};
int a3[LENGTH][WIDTH][HEIGHT]{};
通过列表进行初始化
原始指针
参考:
C/C++指针详解之基础篇(史上最全最易懂指针学习指南!!!!)
指针存储的是什么?
指针存储的是所指向对象的地址值,如下所示
template<typename T, typename U>
void func(T t, U u) {
cout << (void *) t << endl;
cout << *t << endl;
cout << u << endl;
cout << sizeof(t) << endl;
cout << sizeof(u) << endl;
}
int main() {
int a = 3;
int *pa = &a;
char c = '3';
char *pc = &c;
func(pa, a);
func(pc, c);
}
输出如下:
0x7ffeca32df24
3
3
8
4
0x7ffeca32df23
3
3
8
1
从结果可知
- 指针
pa指向整型变量a,保存的是a的地址 - 指针
pc指向字符变量c,保存的是c的地址 - 指针
pa和pc的内存大小均为8字节
一维指针
一维指针可以指向单个对象或者一维数组对象
int main() {
const int LENGTH = 10;
int *p = new int[LENGTH];
for (int i = 0; i < LENGTH; i++) {
p[i] = i + i;
cout << p[i] << " ";
}
cout << endl;
delete[] p;
}
通过new关键字得到一组连续的内存空间,所以指针可以通过数组方式进行访问
二维指针
二维指针是指向指针的指针,所以二维指针的每个变量指向一个一维指针
const int WIDTH = 3;
int *p1 = new int[WIDTH];
for (int i = 0; i < WIDTH; i++) {
p1[i] = i + 1;
cout << p1[i] << " ";
}
cout << endl;
int **p2 = &p1;
cout << p1 << endl;
cout << p2 << endl;
cout << *p1 << endl;
cout << *p2 << endl;
delete[] p1;
在上面实现中,一维指针p1新建长度为WIDTH的整型数组,二维指针p2指向了一维指针p1
p1保存的是第一个整型变量的内存地址- 二维指针
p2保存的是一维指针p1的内存地址 *p1得到的是第一个整型变量值*p2得到的是第一个一维指针的内存地址,也就是*p2=p1
结果如下:
1 2 3
0xd04c20
0x7ffc769c22e8
1
0xd04c20
上面的二维指针p2长度为1,下面使用p2实现长为5,宽为3的整型数组
const int LENGTH = 5;
const int WIDTH = 3;
int **p2 = new int *[WIDTH];
for (int i = 0; i < WIDTH; i++) {
*(p2 + i) = new int[LENGTH];
for (int j = 0; j < LENGTH; j++) {
*(*(p2 + i) + j) = i + j + 1;
cout << *(*(p2 + i) + j) << " ";
}
cout << endl;
}
for (int i = 0; i < WIDTH; i++) {
delete[] *(p2 + i);
}
delete[] p2;
结果如下:
1 2 3 4 5
2 3 4 5 6
3 4 5 6 7
- 为二维指针
p2新建一维指针数组,上式等同于int *(*p2) = new int*)[WIDTH] - 依次为一维指针
p1 = *(p2+i)新建一维数组 - 赋值每个位置并打印
- 依次删除每个一维指针
- 删除二维指针
三维指针
同理,三维指针是指向二维指针的指针,每个三维指针保存的是二维指针的地址值
const int LENGTH = 5;
const int WIDTH = 3;
const int HEIGHT = 4;
int ***p3 = new int **[HEIGHT];
for (int i = 0; i < HEIGHT; i++) {
*(p3 + i) = new int *[WIDTH];
for (int j = 0; j < WIDTH; j++) {
*(*(p3 + i) + j) = new int[LENGTH];
for (int k = 0; k < LENGTH; k++) {
*(*(*(p3 + i) + j) + k) = i + j + k + 1;
cout << *(*(*(p3 + i) + j) + k) << " ";
}
cout << endl;
}
cout << endl;
}
for (int i = 0; i < HEIGHT; i++) {
for (int j = 0; j < WIDTH; j++) {
delete[] *(*(p3 + i) + j);
}
delete[] *(p3 + i);
}
delete[] p3;
- 为
3维数组p3新建二维指针数组 - 依次为
p3每个位置新建一维指针数组 - 依次为每个一维指针数组新建一维数组
- 赋值并打印
- 以相反顺序删除内存空间
结果如下:
1 2 3 4 5
2 3 4 5 6
3 4 5 6 7
2 3 4 5 6
3 4 5 6 7
4 5 6 7 8
3 4 5 6 7
4 5 6 7 8
5 6 7 8 9
4 5 6 7 8
5 6 7 8 9
6 7 8 9 10
指针名和数组名的区别
参考:
有如下区别:
- 可以用数组名初始化指针,但是数组名必须用列表进行初始化
- 数组名指向固定内存地址,不能修改,而指针名可以指向其他地址
- 使用
sizeof计算两者所占的内存字节数,数组名返回整个数组所占字节数,而指针名返回单个地址的字节大小(当前CPU的最大位数:8字节)
测试代码如下:
int arr[3] = {1, 2, 3};
int *p = arr;
cout << arr << endl;
cout << p << endl;
cout << arr[1] << endl;
cout << *(p + 1) << endl;
cout << sizeof(arr) << endl;
cout << sizeof(p) << endl;
- 新建整型数组
arr并初始化 - 新建整型指针
p,指向数组arr - 打印数组名和指针名,此时两者均指向数组首地址
- 通过数组方式和指针方式访问第二个元素
- 打印数组名和指针名所占内存字节数
结果如下:
0x7fff2b649180
0x7fff2b649180
2
2
12
8
总的来说,数组名就是指针常量,而指针名是指针变量
二维数组和二级指针
- 二维数组是指向数组的数组
- 二级指针是指向指针的指针
一维数组名可以赋值给一级指针,但是二级数组名不可以赋值给二级指针
const int LENGTH = 3;
const int WIDTH = 2;
int arr[LENGTH][WIDTH]={};
int **p;
p = arr; // Assigning to 'int **' from incompatible type 'int [3][2]'
- 对于二维指针
p而言,其声明为int*类型的一维指针 - 对于二维数组
arr而言,其声明为int[4]类型的一维数组
因为两者声明类型不一致,所以无法兼容。如果将p定义为数组指针即可操作
char (*p2)[WIDTH] = arr;
指针数组和数组指针
参考:C语言指针数组和数组指针
- 指针数组是数组,数组中的每个成员是指针,其所占内存字节数由数组大小决定
- 数组指针是指针,即指向数组的指针,其所占内存字节数固定(
64位系统下为8字节)
声明
指针数组声明:长度为LENGTH的保存int类型指针的数组
int *p[LENGTH];
数组指针声明:指向长度为LENGTH的数组的指针
int (*p)[LENGTH];
由于运算符的优先级,所以先执行p[],再执行*p
- 对于指针数组而言,声明了
int*类型的p[LENGTH]数组 - 对于数组指针而言,声明了
int[]类型的*p指针
所占内存
const int LENGTH = 3;
const int WIDTH = 2;
int arr[LENGTH] = {1, 2, 3};
int *p[LENGTH];
int (*p2)[LENGTH];
cout << sizeof(p) << endl;
cout << sizeof(p2) << endl;
}
数组长度为3,所以指针数组p的内存大小为8*3=24,数组指针p2的内存大小为8
赋值
指针数组
const int LENGTH = 3;
const int WIDTH = 2;
int *p[WIDTH];
for (int i = 0; i < WIDTH; i++) {
p[i] = new int[LENGTH];
for (int j = 0; j < LENGTH; j++) {
p[i][j] = i + j + 1;
cout << p[i][j] << " ";
}
cout << endl;
}
for (int i = 0; i < WIDTH; i++) {
delete[] p[i];
}
指针数组p的长度为WIDTH,
- 首先为每个成员指针新建内存空间,长度为
LENGTH - 再进行赋值/取值操作
- 最后遍历整个数组,依次销毁内存空间
数组指针
const int LENGTH = 3;
const int WIDTH = 2;
int (*p)[LENGTH][WIDTH]={};
int arr[LENGTH][WIDTH]={};
cout << p << endl;
p = &arr;
for (int i = 0; i < LENGTH; i++) {
for (int j = 0; j < WIDTH; j++) {
arr[i][j] = i + j + 1;
}
}
for (int i = 0; i < LENGTH; i++) {
for (int j = 0; j < WIDTH; j++) {
cout << (*p)[i][j] << " ";
}
cout << endl;
}
数组指针p声明为int[LENGTH][WIDTH]类型,声明后其地址为0,所以需要将二维数组arr的地址赋值给p
0
1 2
2 3
3 4
指针常量和常量指针
解析
- 指针常量:指针指向的地址为常量,不能修改指针保存的地址,但可以修改地址保存的值。类似于数组
- 常量指针:指针指向的对象为常量,可以修改指针保存的地址,但不能修改地址保存的值
使用原始指针还是智能指针
智能指针能够自动操作内存分配和删除,所以相比较于指针而言,其更能够确保内存和资源不被泄漏
不过由于智能指针额外增加了对内存和引用的操作,所以性能上会弱于原始指针操作
使用关键在于是否需要关心指针内存:
- 如果指向已有数组和对象,不需要指针进行内存管理,那么应该使用原始指针
- 对于使用
new关键字进行显式内存分配的指针而言,因为需要指针自己完成内存新建和删除操作,所以使用智能指针更加安全
[c++11][c++17]lvalue和rvalue
参考:
Lvalue Reference Declarator: &
Rvalue Reference Declarator: &&
每个C++表达式都有一个类型,并且属于一个值类别。值类别是编译器在表达式计算期间创建、复制和移动临时对象时必须遵循的规则的基础
C++17标准定义表达式值类别如下:
glvalue是一个表达式,其计算结果确定对象、位字段或函数的标识prvalue是一个表达式,它的计算初始化对象或位字段,或计算运算符的操作数的值,由其出现的上下文指定xvalue是一个glvalue,它表示一个对象或位字段,其资源可以重用(通常是因为它接近其生命周期的末尾)。示例:涉及rvalue(8.3.2)的某些类型的表达式生成xvalue,例如对返回类型为右值引用的函数的调用或对右值引用类型的强制转换lvalue不是xvalue,是glvaluervalue是prvalue或者xvalue
lvalue有一个程序可以访问的地址。lvalue表达式的示例包含变量名,包括常量变量、数组元素、返回左值引用的函数调用、位字段、联合和类成员
prvalue表达式没有程序可以访问的地址。prvalue表达式的示例包括文本、返回非引用类型的函数调用以及在表达式计算期间创建但只能由编译器访问的临时对象
xvalue表达式有一个地址,该地址不再可被程序访问,但可用于初始化提供对表达式访问的右值引用。示例包括返回rvalue的函数调用,以及数组或对象是rvalue的数组下标、成员和指向成员表达式的指针
lvalue引用声明符
左值引用用于获取对象地址,但其操作和对象一样,可看成对象的另一个名称。语法如下:
type-id & cast-expression
左值引用声明由可选的说明符列表和引用声明符组成。引用必须初始化且不能更改
其地址可以转换为给定指针类型的任何对象也可以转换为类似的引用类型,比如char类型对象地址可以转换成char *,同样的也可转换成char &
左值引用声明符和取地址符有差别,当&前面是一个类型名时,其作为左值引用;否则,作为取地址符
示例
声明一个Person类对象myFriend,声明一个左值引用rFriend。对象的操作会影响rFriend,同样rFriend的操作会改变对象
struct Person {
char *Name;
short Age;
};
int main() {
// Declare a Person object.
Person myFriend;
// Declare a reference to the Person object.
Person &rFriend = myFriend;
// Set the fields of the Person object.
// Updating either variable changes the same object.
myFriend.Name = "Bill";
rFriend.Age = 40;
// Print the fields of the Person object to the console.
cout << rFriend.Name << " is " << myFriend.Age << endl;
}
rvalue引用声明符
右值引用(&&)是对右值表达式的引用,语法如下:
type-id && cast-expression
左值引用和右值引用在语法和语义上相似,但它们遵循的规则有所不同
移动语义
移动语义(move semantics)允许通过代码实现对象之间的资源转移(比如动态分配的内存)。移动语义起作用的原因是因为它能够使用其他地方不能引用的临时对象进行资源传输
在类中实现移动语义,通常要提供一个移动构造器(编译器不自动提供,必须自定义),以及一个移动赋值构造器(operator=,可选)。如果输入对象为rvalue,那么复制和赋值操作将自动利用移动语义
之前对operator+的每个调用都会分配并返回一个新的临时字符串对象(右值)。operator+不能将一个字符串附加到另一个字符串,因为它不知道源字符串是lvalue还是rvalue。如果源字符串都是lvalue,那么它们可能在程序的其他地方被引用,因此不能修改。通过使用右值引用,可以修改operator+以获取右值,而右值不能在程序中的其他地方引用。因此,operator+现在可以将一个字符串附加到另一个字符串。这可以显著减少字符串类必须执行的动态内存分配的数量
为了更好地理解移动语义,请考虑将元素插入vector。如果超出了vector对象的容量,则vector对象必须为其元素重新分配内存,然后将每个元素复制到另一个内存位置,为插入的元素腾出空间。当插入操作复制一个元素时,它会创建一个新元素,调用复制构造函数将数据从上一个元素复制到新元素,然后销毁上一个元素。移动语义使您能够直接移动对象,而不必执行昂贵的内存分配和复制操作
为了利用向量示例中的移动语义,可以编写一个移动构造函数来将数据从一个对象移动到另一个对象
完美转发
完美转发(perfect forwarding)减少了对重载(overloaded)函数的需要,并有助于避免转发问题。当编写一个以引用为参数的通用函数,并将这些参数传递(或转发)给另一个函数时,可能会发生转发问题。例如,如果泛型函数采用const&类型的参数,则被调用函数无法修改该参数的值。如果泛型函数接受类型为T&的参数,则不能使用右值(例如临时对象或整型文本)调用该函数。通常,为了解决这个问题,您必须提供通用函数的重载版本,它为每个参数同时使用T&和const&。因此,重载函数的数量随着参数数量呈指数增长。右值引用使得一个版本即可接受任意参数,并将其转发给另一个函数,就像直接调用了另一个函数一样
示例
声明了四种类型(W、X、Y和Z)。每种类型的构造函数都采用const和非const lvalue引用的不同组合作为其参数
struct W
{
W(int&, int&) {}
};
struct X
{
X(const int&, int&) {}
};
struct Y
{
Y(int&, const int&) {}
};
struct Z
{
Z(const int&, const int&) {}
};
使用模板创建通用的对象构造函数
// 指定对象类型,参数类型
template <typename T, typename A1, typename A2>
T* factory(A1& a1, A2& a2)
{
return new T(a1, a2);
}
// 调用一
int a = 4, b = 5;
W* pw = factory<W>(a, b);
// 调用二
Z* pz = factory<Z>(2, 2);
使用调用二会出错,因为不匹配模板定义,函数factory将可修改的lvalue引用作为其参数,但使用rvalues调用它
以往解决方式是写一个重载版本,使用const A&作为参数。而使用右值引用作为模板参数可以实现一个模板函数即可
template <typename T, typename A1, typename A2>
T* factory(A1&& a1, A2&& a2)
{
// std::forward函数的目的是将工厂函数的参数转发给模板类的构造函数
return new T(std::forward<A1>(a1), std::forward<A2>(a2));
}
引用概述
语法
通用语法如下:
[storage-class-specifiers] [cv-qualifiers] type-specifiers declarator [= expression];
简化语法如下:
[storage-class-specifiers] [cv-qualifiers] type-specifiers [& or &&] [cv-qualifiers] identifier [= expression];
引用声明顺序如下:
- 说明符
- 可选的存储类说明符
- 可选的
cv限定符 - 类说明符:类名
- 声明符
&或者&&运算符- 可选的
cv限定符 - 标识符
- 可选的初始化器
引用类型的声明必须包含初始化器,以下情况除外:
- 显式
extern声明 - 类成员的声明
- 类内声明
- 函数的参数或函数的返回类型声明
示例
引用对象拥有对象的地址,但其操作和对象一样,可看成是对象的别名
struct S {
short i;
};
int main() {
S s; // Declare the object.
S &SRef = s; // Declare the reference.
cout << (void *) &s << endl;
cout << (void *) &SRef << endl;
// 已初始化的引用不能引用其他对象
S ss;
SRef = ss;
cout << (void *) &s << endl;
cout << (void *) &ss << endl;
cout << (void *) &SRef << endl;
}
结果:
0x7ffc568084d0
0x7ffc568084d0
0x7ffc568084d0 // s
0x7ffc568084e0 // ss
0x7ffc568084d0 // SRef
引用类型函数操作
引用可作用于函数参数和函数返回值
引用类型函数参数
参考:Reference-Type Function Arguments
将引用作为函数参数,通过传递对象地址的方式进行对象访问,避免对象复制带来的额外开销,通常比直接输入对象更有效
语法
分两种情况,一是函数能够修改对象信息,而是函数能够访问对象信息
// 可修改
ret-type func(type& declarator);
// 可访问
ret-type func(const type& declarator);
引用类型函数返回值
参考:Reference-Type Function Returns
正如通过引用将大对象传递给函数更有效一样,通过引用从函数返回大对象也更有效。引用返回协议消除了在返回之前将对象复制到临时位置的必要性
将引用作为函数返回值有以下要求:
- 函数返回类型一定是
lvalue - 当函数返回时,引用的对象不能超出其作用域范围
示例
struct S {
short i;
};
S &f(S &s) {
// S s;
s.i = 333;
cout << (void *) &s << endl;
return s;
}
int main() {
S a;
S &s = f(a);
cout << (void *) &s << endl;
}
在main函数内将结构体对象a输入函数f,再返回其引用到main函数,赋值给引用对象s
注意:此时对象a的作用域是main函数,所以函数返回时没有超出其作用域
指针引用
对指针的引用(Reference to pointer)可以用与对对象的引用(reference to object)几乎相同的方式声明。指针的引用是一个可修改的值,可以像普通指针一样使用
示例
void f(int *&b) {
for (int i = 0; i < 10; i++) {
cout << b[i] << " ";
b[i] = 10 - i;
}
cout << endl;
}
int main(int argc, char *argv[]) {
int *a;
// 指针引用b和指针a指向同一个地址
int *&b = a;
b = new int[10];
for (int i = 0; i < 10; i++) {
b[i] = i;
}
cout << (void *) a << endl;
cout << (void *) b << endl;
f(b);
for (int i = 0; i < 10; i++) {
cout << a[i] << " ";
}
}
标准转换
C++定义了基本类型之间的转换,也定义了指针、引用和成员指针派生类型之间的转换,这些统称为标准转换(standard conversion)
共分为8个部分:
- 整型提升(
integral promotions) - 整型转换(
integral conversions) - 浮点型转换(
floating conversions) - 浮点和整数转换(
floating and integral conversions) - 数值型间的转换(
arithmetic conversions) - 指针转换(
pointer conversions) - 引用转换(
reference conversions) - 成员指针的转换(
pointer-to-member conversions)
隐式类型转换
当表达式包含不同内置类型的操作数且不存在显式强制转换时,编译器执行隐式转换
加宽转换
在加宽转换(Widening conversions,也称为提升,promotion)中,较小变量中的值被分配给较大变量,而不会丢失数据。因为扩大转换总是安全的,编译器会静默地执行它们,不会发出警告。以下转换是加宽转换。

变窄转换
如果将精度较大变量分配给精度较小的变量,有可能发生数据损失情况,编译器会因为这个情况报出一个警告(warn)
- 对于明确知道不会发生数据损失的情况,可以执行强制类型转换以消除警告
- 如果不明确是否会发生数据损失,可以增加一些运行时检查
有符号-无符号转换
signed-unsigned转换不会改变变量位数,但是因为其位模式发生了变化导致数据的大小发生了变化。编译器不警告有符号和无符号整数类型之间的隐式转换,但是建议完全避免有符号到无符号的转换
如果不能避免它们,那么在代码中添加一个运行时检查,以检测正在转换的值是否大于或等于零,并且小于或等于已签名类型的最大值。此范围内的值将从有符号转换为无符号,或从无符号转换为有符号,而不需要重新解释
[c++11][cast]现代类型转换
参考:
现代C++编程更推荐使用C++风格转换方式,因为其在某些情况下类型安全性显著提高,并且更明确地表达编程意图
常用的有以下3种:
dynamic_caststatic_castconst_cast
dynamic_cast
dynamic_cast < type-id > ( expression )
其作用是将操作数expression转换成type-id类型
new_type:是一个类的指针或者引用,或者指向void的指针expression:其类型必须是指针(如果new_type是指针的话),否则是一个l_value(如果new_type是引用的话)
如果强制转换成功,dynamic_cast将返回一个新类型的值;如果强制转换失败,并且new_type是指针类型,则返回该类型的空指针(也就是0);如果强制转换失败,new_type是引用类型,则返回0
dynamic_cast执行编译时检查和运行时检查,适用于多态类型的数据转换,比如基类和派生类之间的转换
static_cast
static_cast <type-id> ( expression )
static_cast没有运行时类型检查,出现错误时会返回原指针,好像没有错一样,所以不像dynamic_cast那样安全
typedef unsigned char BYTE;
enum scast {
AA,
BB,
CC
};
void f() {
char ch;
int i = 65;
float f = 2.5;
double dbl;
// int to char
ch = static_cast<char>(i);
// float to double
dbl = static_cast<double>(f);
// char to unsigned char
i = static_cast<BYTE>(ch);
scast s = AA;
// enum to int
cout << static_cast<int>(s) << endl;
// int to enum
s = static_cast<scast >(2);
cout << s << endl;
}
static_cast vs. dynamic_cast
dynamic_cast转换更安全,但dynamic_cast只对指针或引用有效,同时运行时类型检查是一个开销static_cast不执行运行时检查,其安全性弱于dynamic_cast,适用于非多态类型的数据转换,比如整数和浮点数的转换,以及整数和枚举值的转换
class B {};
class D : public B {};
void f(B* pb, D* pd) {
D* pd2 = static_cast<D*>(pb); // Not safe, D can have fields
// and methods that are not in B.
B* pb2 = static_cast<B*>(pd); // Safe conversion, D always
// contains all of B.
}
const_cast
const_cast <type-id> (expression)
其作用是移除对象的const/volatile/__unaligned属性。比如将const常量转换成常量
class CCTest {
public:
void setNumber(int);
void printNumber() const;
private:
int number;
};
void CCTest::setNumber(int num) { number = num; }
void CCTest::printNumber() const {
std::cout << "\nBefore: " << number;
const_cast< CCTest * >( this )->number--;
std::cout << "\nAfter: " << number;
}
int main() {
CCTest X;
X.setNumber(8);
X.printNumber();
}
本来在类CCTest中,设置printNumber为const函数,不能在其中修改对象值
通过const_cast的使用,将this的类型从const CCTest *修改为CCTest *,这样就能够修改对象值了。结果如下
Before: 8
After: 7
[c++11]用户定义的类型转换
参考:User-Defined Type Conversions (C++)
用户定义的类型转换(user-defined type conversation)可作用于用户定义类型之间,或者用户定义类型和基本类型之间
转换使用
转换过程可通过显式(使用转换运算符)或者隐式完成。隐式转换场景如下:
- 输入函数的参数值不匹配参数类型
- 函数返回值不符合函数返回值类型
- 初始化表达式不符合对象类型
- 控制条件语句、循环构造或开关的表达式没有控制它所需的结果类型
- 提供给运算符的操作数与匹配的操作数参数的类型不同。对于内置运算符,两个操作数必须具有相同的类型,并且转换为可以表示这两个操作数的公共类型。对于用户定义的运算符,每个操作数必须与匹配的操作数参数具有相同的类型
首先进行标准转换,如果不行再选择合适的用户定义的类型转换
转换构造器
声明转换构造器:
- 转换的目标类型是正在构造的用户定义类型
- 转换构造函数通常只接受一个源类型的参数。但是,如果每个附加参数都有默认值,则转换构造函数可以指定附加参数。源类型仍然是第一个参数的类型
- 转换构造函数与所有构造函数一样,不指定返回类型。在声明中指定返回类型是错误的
- 转换构造函数可以使用关键字
explicit标识
class Money {
public:
Money() : amount{0.0} {};
Money(double _amount) : amount{_amount} {};
double amount;
};
void display_balance(const Money balance) {
std::cout << "The balance is: " << balance.amount << std::endl;
}
int main(int argc, char *argv[]) {
Money payable{79.99};
display_balance(payable);
display_balance(49.95);
display_balance(9.99f);
return 0;
}
声明为explicit的转换构造器,必须通过显式方式调用
class Money {
public:
Money() : amount{0.0} {};
explicit Money(double _amount) : amount{_amount} {};
double amount;
};
void display_balance(const Money balance) {
std::cout << "The balance is: " << balance.amount << std::endl;
}
int main(int argc, char *argv[]) {
Money payable{79.99}; // Legal: direct initialization is explicit.
display_balance(payable); // Legal: no conversion required
display_balance(49.95); // Error: no suitable conversion exists to convert from double to Money.
display_balance((Money) 9.99f); // Legal: explicit cast to Money
return 0;
}
转换函数
转换函数定义从用户定义类型到其他类型的转换
- 转换的目标类型必须在声明转换函数之前声明。类、结构、枚举和typedef不能在转换函数的声明中声明
- 转换函数不带参数。在声明中指定任何参数都是错误的
- 转换函数的返回类型由转换函数的名称指定,该名称也是转换的目标类型的名称。在声明中指定返回类型是错误的
- 转换函数可以声明为
virtual - 转换函数可以声明为
explicit
class Money {
public:
Money() : amount{0.0} {};
Money(double _amount) : amount{_amount} {};
operator double() const { return amount; }
private:
double amount;
};
void display_balance(const Money balance) {
std::cout << "The balance is: " << balance << std::endl;
}
同样的,声明为explicit的转换函数必须显式使用
...
explicit operator double() const { return amount; }
...
void display_balance(const Money balance) {
std::cout << "The balance is: " << static_cast<double>(balance) << std::endl;
}
[c++11]auto
参考:
关键字auto是c++11新增的,其目的是用于自动类型推断。语法如下:
auto declarator initializer;
auto本身不是类型,它是一个类型占位符。它能够指导编译器根据声明变量的初始化表达式或lambda表达式参数进行类型推断
使用auto代替固定类型声明有以下优点:
- 鲁棒性:即使表达式的类型会更改也能工作,比如函数返回不同类型
- 高性能:能够保证不会发生类型转换
- 易用性:不需要关心拼写困难或打字错误
- 高效率:使得编码更有效率
以下情况可能需要使用固定类型:
- 只有某一类型能够起作用
- 表达式模板辅助类型,比如
(valarray+valarray)
网上也有关于auto的讨论:如何评价 C++ 11 auto 关键字?
[c++11]decltype
参考:
decltype类型说明符是c++11新增的特性,能够生成指定表达式的类型。语法如下:
decltype( expression )
推导规则
编译器使用以下规则推导参数expression的类型
- 如果参数
expression是一个标识符(identifier)或者类成员访问(class member access),那么decltype(expression)是该实体(entity)的类型 - 如果参数
expression是一个函数或者重载操作符的调用,那么decltype(expression)返回函数值类型。忽略重载运算符周围的括号 - 如果参数
expression是一个rvalue,那么decltype(expression)是expression的类型;如果是一个lvalue,那么结果是对expression类型的lvalue引用

操作符重载概述
使用关键字operator声明函数,可以指定当应用于类实例时该运算符符号(operator-symbol)的含义。可以为运算符设置多个含义(也可以称为重载),编译器通过检查操作数的类型来区分运算符的不同含义
语法
可以在类内或全局作用域内重定义大多数运算符,运算符重载声明如下:
type operator operator-symbol ( parameter-list )
重载的运算符被看成函数,比如重载加法运算符,相当于调用函数operator+;重载加法赋值运算符,相当于调用函数operator+=
可被重定义的运算符列表参考:Redefinable Operators
不可被重定义的运算符列表参考:Nonredefinable Operators
分类
按操作数和作用方式的不同可分类重载运算符如下:
- 一元运算符(
unary operatiors) - 二元运算符(
binary operations) - 赋值运算符(
assignment) - 函数调用(
function call) - 下标(
subscripting) - 类成员访问(
class-member access) - 递增和递减(
increment and decrement) - 用户自定义类型转换(
user-defined type conversion)
使用
重载后的运算符函数可以隐式通过运算符号进行调用,也可以显式调用运算符函数进行操作。定义类Complex并重载加法运算符
struct Complex {
Complex(double r, double i) : re(r), im(i) {}
Complex operator+(Complex &other);
void Display() { cout << re << ", " << im << endl; }
private:
double re, im;
};
// Operator overloaded using a member function
Complex Complex::operator+(Complex &other) {
return Complex{re + other.re, im + other.im};
}
int main() {
Complex a = Complex(1.2, 3.4);
Complex b = Complex(5.6, 7.8);
Complex c = Complex(0.0, 0.0);
// 隐式调用
Complex d = a + b;
// 隐式调用
Complex e = c.operator+(d);
e.Display();
}
通用规则
参考:General Rules for Operator Overloading
以下规则约束如何实现重载运算符。但是它们不适用于new和delete,这两个操作符将分别介绍
- 不能定义新运算符
- 当应用于内置数据类型时,不能重定义运算符的含义
- 重载运算符只能是全局函数或者非静态成员函数
- 如果全局函数需要访问类
private或protected成员,必须声明为该类的友元函数 - 全局函数至少有一个参数是类或枚举类型,或者是它们的引用类型
- 如果全局函数需要访问类
- 运算符遵循由内置类型的典型使用决定的优先级、分组和操作数数量。因此,无法实现
向Point类型的对象添加2和3的概念,除非将2添加到X坐标,将3添加到Y坐标 - 一元运算符如果声明为成员函数,没有参数;如果声明为全局函数,需要一个参数
- 二元运算符如果声明为成员函数,需要一个参数;如果声明为全局函数,需要二个参数
- 如果运算符既可以声明为一元,也可以声明为二元,比如
&/*/+/-,可以分别重载 - 重载运算符没有默认参数
- 所有重载运算符(除了赋值运算符
operator=以外)都可以被继承 - 成员函数重载运算符的第一个参数始终是调用该运算符的对象的类类型(声明该运算符的类或从该类派生的类),不能为第一个参数提供转换
一元运算符重载
参考:Overloading Unary Operators
学习一元运算符(unary operator)重载
格式
除了递增和递减运算符外,其他一元运算符重载的格式如下:
// 非静态成员函数
ret-type operator op ()
// 全局函数
ret-type operator op ( arg )
ret-type表示返回值op表示运算符号arg表示参数,全局函数需要有一个参数
示例一
定义类Point,重载一元正运算符
// increment_and_decrement1.cpp
class Point {
public:
friend Point &operator+(Point &point);
// Define default constructor.
Point() { _x = _y = 3; }
// Define accessor functions.
int x() { return _x; }
int y() { return _y; }
void print() {
cout << "x = " << _x << " y = " << _y << endl;
}
private:
int _x, _y;
};
Point &operator+(Point &point) {
point._x = -point._x;
point._y = -point._y;
return point;
}
int main() {
Point point;
point.print();
Point tmp = +point;
tmp.print();
tmp = +point;
tmp.print();
// 返回对象是否相同
cout << &tmp << endl;
cout << &point << endl;
}
递增和递减
参考:Increment and Decrement Operator Overloading (C++)
有两种类别的递增和递减运算符:
- 前增(
preincrement)和前减(predecrement) - 后增(
postincrement)和后减(postdecrement)
当重载运算符函数时,可以为这些运算符的前缀和后缀版本实现单独的版本。为了区分这两者,遵循以下规则:运算符的前缀形式的声明方式与任何其他一元运算符完全相同;后缀形式接受int类型的附加参数
注意:为递增或递减运算符的后缀形式指定重载运算符时,附加参数的类型必须为int,指定任何其他类型都会生成错误
int参数仅为了区分前缀和后缀的区别,通常不对该参数进行操作,不过也可以自定义
示例二
定义类Point,实现前增/前减/后增/后减运算符的重载
// increment_and_decrement1.cpp
class Point {
public:
// Declare prefix and postfix increment operators.
Point &operator++(); // Prefix increment operator.
Point operator++(int); // Postfix increment operator.
// Declare prefix and postfix decrement operators.
Point &operator--(); // Prefix decrement operator.
Point operator--(int); // Postfix decrement operator.
// Define default constructor.
Point() { _x = _y = 0; }
// Define accessor functions.
int x() { return _x; }
int y() { return _y; }
void print() {
cout << "x = " << _x << " y = " << _y << endl;
}
private:
int _x, _y;
};
// Define prefix increment operator.
Point &Point::operator++() {
_x++;
_y++;
return *this;
}
// Define postfix increment operator.
Point Point::operator++(int) {
Point temp = *this;
// 调用前增
++*this;
return temp;
}
// Define prefix decrement operator.
Point &Point::operator--() {
_x--;
_y--;
return *this;
}
// Define postfix decrement operator.
Point Point::operator--(int) {
Point temp = *this;
// 调用后增
--*this;
return temp;
}
int main() {
Point point;
point.operator++();
point.print();
point.operator++(2);
point.print();
Point tmp = point.operator++();
tmp.print();
// 返回对象是否相同
cout << &tmp << endl;
cout << &point << endl;
}
如果设置为全局函数重载,格式如下:
friend Point& operator++( Point& ) // Prefix increment
friend Point& operator++( Point&, int ) // Postfix increment
friend Point& operator--( Point& ) // Prefix decrement
friend Point& operator--( Point&, int ) // Postfix decrement
二元运算符重载
二元运算符重载和一元运算符重载类似,区别仅在于参数个数
二元运算符
可被重定义的二元运算符:Redefinable Binary Operators
语法
// 非静态成员函数
ret-type operator op(arg)
// 全局函数
ret-type operator op(arg1, arg2)
ret-type表示返回值op表示运算符号arg_表示参数
对二元运算符的返回类型没有限制,通常返回类类型或对类类型的引用
赋值运算符重载
参考:Assignment
赋值 vs. 复制
赋值(copy assignment)运算和复制(copy)操作有区别,后者在新对象构造期间调用
// Copy constructor is called--not overloaded copy assignment operator!
Point pt3 = pt1;
// The previous initialization is similar to the following:
Point pt4(pt1); // Copy constructor call.
最佳实践:定义赋值运算的同时定义复制构造器和析构器
示例
定义类Point,重载赋值运算符,重载复制构造器和析构器
class Point {
public:
Point(int x, int y) : _x{x}, _y{y} {}
Point() : _x(0), _y(0) {}
Point(const Point &point) : _x{point._x}, _y{point._y} {}
// Right side of copy assignment is the argument.
Point &operator=(const Point &);
inline void print() {
cout << "x = " << _x << " y = " << _y << endl;
}
private:
int _x, _y;
};
// Define copy assignment operator.
Point &Point::operator=(const Point &otherPoint) {
_x = otherPoint._x;
_y = otherPoint._y;
// Assignment operator returns left side of assignment.
return *this;
}
int main() {
Point pt1{2, 3}, pt2{3, 5};
// 使用复制构造器
Point pt3(pt2);
pt3.print();
// 使用赋值运算符
pt1 = pt2;
pt1.print();
}
函数调用运算符重载
语法
函数调用运算符operator()是一个二元运算符,语法如下:
primary-expression ( expression-list )
primary-expression是第一个操作数expression-list是第二个操作数,有可能为空的参数列表
注意 1:函数调用运算符重载必须是非静态成员函数
注意 2:函数调用运算符是应用于对象,而不是函数
示例
定义类Point,重定义函数调用运算符
class Point {
public:
Point() { _x = _y = 0; }
Point &operator()(int dx, int dy) {
_x += dx;
_y += dy;
return *this;
}
inline void print() {
cout << "_x = " << _x << " _y = " << _y << endl;
}
private:
int _x, _y;
};
int main() {
Point pt;
pt.print();
pt(3, 2);
pt.print();
}
下标运算符重载
下标运算符operator[]和函数调用运算符类似,也是二元运算符。除了二元运算符的规范外,下标运算符必须是非静态成员函数
示例
class IntVector {
public:
IntVector(int cElements);
~IntVector() { delete[] _iElements; }
int &operator[](int nSubscript);
private:
int *_iElements;
int _iUpperBound;
};
// Construct an IntVector.
IntVector::IntVector(int cElements) {
_iElements = new int[cElements];
_iUpperBound = cElements;
}
// Subscript operator for IntVector.
int &IntVector::operator[](int nSubscript) {
static int iErr = -1;
if (nSubscript >= 0 && nSubscript < _iUpperBound)
return _iElements[nSubscript];
else {
cout << "Array bounds violation." << endl;
return iErr;
}
}
// Test the IntVector class.
int main() {
IntVector v(10);
int i;
for (i = 0; i <= 10; ++i)
v[i] = i;
v[3] = v[9];
for (i = 0; i <= 10; ++i)
cout << "Element: [" << i << "] = " << v[i] << endl;
}
结果
Array bounds violation.
Array bounds violation.
Element: [0] = 0
Element: [1] = 1
Element: [2] = 2
Element: [3] = 9
Element: [4] = 4
Element: [5] = 5
Element: [6] = 6
Element: [7] = 7
Element: [8] = 8
Element: [9] = 9
Array bounds violation.
Element: [10] = 10
- 重载下标运算符函数返回的是左值引用,所以可用于等号左右侧
- 当下标值为
10时,超出了数组界限,返回静态int值引用并赋值为10,所以之后调用过程中超出数组界限的返回值为10
类、结构体和共同体
类、结构体和共同体是3种类的类型,分别通过关键字class、struct和union定义
类 vs. 结构体
这两个构造在C++中是相同的,除了在结构中默认的可访问性是公共的,而在类中默认是私有的
类和结构体是用于自定义类型的构造。类和结构体都可以包含数据成员和成员函数,能够描述类型的状态和行为
访问控制和限制
类、结构体和共同体的访问控制(access control)和限制(constraint)有所差异。如下图所示:

- 就访问控制而言,结构体和共同体默认访问权限是
public,而类的访问权限是private - 就访问限制而言,结构体和类没有任何限制,而共同体每次只能使用一个成员
类定义
参考:class (C++)
class关键字用于声明类类型或定义类类型的对象。基本语法如下:
[template-spec]
class [tag [: base-list ]]
{
member-list
} [declarators];
[ class ] tag declarators;
参数解析
template-spec:模板规范(可选)class:关键字tag:给定类名。类名将成为类范围内的保留字。如果不给定类名,则定义一个匿名类base-list:继承的类或结构体列表member-list:类成员列表declarators:声明符列表,指定类类型的一个或多个实例名。如果类的所有数据成员都是公共的,则声明符可以包括初始值设定项列表。这在数据成员默认为公共的结构体中比在类中更常见
示例
- 定义类
dog,数据成员设置为私有,成员函数设置为公有内联,并设置函数setEars为virtual - 定义类
breed,继承自dog,重写virtual函数setEars
#include <iostream>
#include <string>
#define TRUE = 1
using namespace std;
class dog
{
public:
dog()
{
_legs = 4;
_bark = true;
}
void setDogSize(string dogSize)
{
_dogSize = dogSize;
}
virtual void setEars(string type) // virtual function
{
_earType = type;
}
private:
string _dogSize, _earType;
int _legs;
bool _bark;
};
class breed : public dog
{
public:
breed( string color, string size)
{
_color = color;
setDogSize(size);
}
string getColor()
{
return _color;
}
// virtual function redefined
void setEars(string length, string type)
{
_earLength = length;
_earType = type;
}
protected:
string _color, _earLength, _earType;
};
int main()
{
dog mongrel;
breed labrador("yellow", "large");
mongrel.setEars("pointy");
labrador.setEars("long", "floppy");
cout << "Cody is a " << labrador.getColor() << " labrador" << endl;
}
基本类结构
新建类BaseClass,头文件BaseClass.h如下
//
// Created by zj on 19-2-28.
//
#ifndef FIRST_BASECLASS_H
#define FIRST_BASECLASS_H
#include <iostream>
using namespace std;
class BaseClass {
public:
BaseClass();
virtual ~BaseClass();
public:
string publicFunc();
private:
string privateFunc();
};
#endif //FIRST_BASECLASS_H
类文件BaseClass.cpp如下:
//
// Created by zj on 19-2-28.
//
#include "BaseClass.h"
/***
* 构造器
*/
BaseClass::BaseClass() {
cout << "BaseClass Constructor" << endl;
}
/**
* 析构函数
*/
BaseClass::~BaseClass() {
cout << "BaseClass Destructor" << endl;
}
/**
* 公有函数
* @return
*/
string BaseClass::publicFunc() {
cout << "public func" << endl;
privateFunc();
return std::__cxx11::string();
}
/**
* 私有函数
* @return
*/
string BaseClass::privateFunc() {
cout << "private func" << endl;
return std::__cxx11::string();
}
实现如下:
#include <iostream>
#include "BaseClass.h"
using namespace std;
int main() {
BaseClass *baseClass = new BaseClass();
baseClass->publicFunc();
delete (baseClass);
return 0;
}
结果如下:
BaseClass Constructor
public func
private func
BaseClass Destructor
结构体
结构体类型是用户定义的复合类型,它由可以具有不同类型的字段或成员组成。在C++中,一个结构体和一个类相同,只是它的成员在默认情况下是公共的
关键字struct用于定义结构体类型和(或)结构体类型的变量,基本语法如下:
[template-spec] struct [tag [: base-list ]]
{
member-list
} [declarators];
[struct] tag declarators;
参数解析
template-spec:模板规范(可选)struct:关键字tag:结构体名。在结构体范围内该tag变成保留字。如果被忽略,则定义为匿名结构体base-list:继承的类或结构体列表member-list:结构体成员列表declarators:声明符列表,声明了一个或多个该结构体类型的实例。如果结构体的所有数据成员都是公共的,则声明符可以包括初始值列表。初始值列表在结构体中很常见,因为默认情况下数据成员是公共的
示例
struct PERSON { // Declare PERSON struct type
PERSON() {}
PERSON(int age, long ss, float weight, char *name) : age(age), ss(ss), weight(weight) {
memcpy(this->name, name, strlen(name) * sizeof(char));
}
int age; // Declare member types
long ss;
float weight;
char name[25];
} family_member(1, 2, 3, "asdfa"); // Define object of type PERSON
struct CELL { // Declare CELL bit field
unsigned short character : 8; // 00000000 ????????
unsigned short foreground : 3; // 00000??? 00000000
unsigned short intensity : 1; // 0000?000 00000000
unsigned short background : 3; // 0???0000 00000000
unsigned short blink : 1; // ?0000000 00000000
} screen[25][80]; // Array of bit fields
int main() {
struct PERSON sister; // C style structure declaration
PERSON brother; // C++ style structure declaration
sister.age = 13; // assign values to members
brother.age = 7;
cout << "sister.age = " << sister.age << '\n';
cout << "brother.age = " << brother.age << '\n';
CELL my_cell;
my_cell.character = 1;
cout << "my_cell.character = " << my_cell.character;
cout << family_member.age << " " << family_member.ss << " " << family_member.weight << " " << family_member.name
<< endl;
}
C风格的结构体变量声明必须显式使用关键字struct,而C++风格的结构体变量声明不需要
[c++11]成员访问控制
参考:Member Access Control (C++)
类的访问控制能够有效分离公共接口和私有实现细节,以及派生类可访问成员
访问类型
有3种访问类型:
private:私有函数,仅对类的成员函数和友元(friend)函数可见protected:受保护函数,除了对类的成员函数和友元函数可见外,还对派生类可见public:公共函数,没有访问限制
class默认的访问权限是private;struct和union默认的访问权限是public
派生类的访问控制
对于派生类的成员来说,其对于基类成员的访问权限取决于两个因素:
- 是否派生类使用
public访问说明符声明基类 - 基类成员的访问权限
下图显示了派生类对于基类成员的访问控制

- 对于基类中声明为
private的成员而言,派生类均不能访问 - 对于基类中声明为
protected的成员而言- 如果派生类使用
private声明基类,可看成派生类中的private成员 - 如果派生类使用
protected声明基类,可看成派生类的protected成员 - 如果派生类使用
public声明基类,可看成派生类的protected成员
- 如果派生类使用
- 对于基类中声明为
public的成员而言- 如果派生类使用
private声明基类,可看成派生类的private成员 - 如果派生类使用
protected声明基类,可看成派生类的protected成员 - 如果派生类使用
public声明基类,可看成派生类的public成员
- 如果派生类使用
如果没有显式声明基类访问符,
- 对于
class而言,默认是private声明 - 对于
struct而言,默认是public声明
virtual函数
对virtual函数的使用不影响访问控制。示例如下:
class Base {
public:
virtual int show();
};
int Base::show() {
return 1;
}
class Drived : public Base {
private:
int show() override;
};
int Drived::show() {
// Base::show();
return 2;
}
int main() {
Drived drived;
drived.show(); // error
Base base;
base.show(); // correct
}
基类中的virtual函数是public访问权限,所以可以被对象调用;而派生类中的重写函数是private访问权限,所以不能被调用
多继承访问控制
c++支持多继承,就可能会发生派生类经过多个路径抵达同一基类,如下图所示

因为可以沿着这些不同的路径应用不同的访问控制,所以编译器选择提供最大访问权限的路径
上图中通过RightPath能够更多的访问基类VBase
友元
参考:friend (C++)
友元(friend)的作用是单独为外部或派生类提供访问权限
友元声明
从c++11开始,有两种声明友元类的方式:
friend class F;
friend F;
- 如果在最内部的命名空间中找不到同名类,第一种方式将引入新的类F
- 第二种方式不介绍新的类,它在类声明后使用,或者在将模板类型参数或
typedef声明为友元时使用
namespace NS
{
class M
{
class friend F; // 未声明类F时使用第一种方式
friend F; // error C2433: 'NS::F': 'friend' not permitted on data declarations
};
}
// 声明模板参数为friend
template <typename T>
class my_class
{
friend T;
//...
};
// 声明typedef重命名类为friend
class Foo {};
typedef Foo F;
class G
{
friend F; // OK
friend class F // Error C2371 -- redefinition
};
如果要声明两个类互为友元,则必须将第二个类声明为第一个类的友元。同时可以选择第一个类中哪些函数是第二个类的友元
友元函数
友元函数不是类的成员,不能使用成员选择算子(.或者->)来访问它(除非它是另一个类的函数),但是被授予权限访问类的private和protected成员
友元函数声明可以放置在类声明的任意位置,不影响其访问权限。示例如下:
class Point {
friend void ChangePrivate(Point &);
public:
Point(void) : m_i(0) {}
void PrintPrivate(void) { cout << m_i << endl; }
private:
int m_i;
};
void ChangePrivate(Point &i) { i.m_i++; }
int main() {
Point sPoint;
sPoint.PrintPrivate();
ChangePrivate(sPoint);
sPoint.PrintPrivate();
// Output: 0
// 1
}
创建友元函数ChangePrivate和类Point,友元函数能够改变类Point的私有变量m_i
友元类
友元类是指其整个类的成员函数均是另一个类的友元函数。示例如下:
class YourClass {
friend class YourOtherClass; // Declare a friend class
public:
YourClass() : topSecret(0) {}
void printMember() { cout << topSecret << endl; }
private:
int topSecret;
};
class YourOtherClass {
public:
void change(YourClass &yc, int x) { yc.topSecret = x; }
};
int main() {
YourClass yc1;
YourOtherClass yoc1;
yc1.printMember();
yoc1.change(yc1, 5);
yc1.printMember();
}
类YourOtherClass是类YourClass的友元类,所以YourOtherClass的所有函数均能访问类YouClass的私有成员
注意 1:友元关系无法继承(inherited),所以YourOtherClass的派生类无法访问YourClass
注意 2:友元关系无法传递(transitive),所以YourOtherClass的友元类无法访问YourClass
内联友元函数
友元函数可以在类声明内定义(给定函数体)。这些函数是内联函数,与成员内联函数一样,其作用域在整个类内
static成员
类可以包含静态成员数据和成员函数。当一个数据成员声明为静态时,该类的所有对象只维护一个数据副本
静态数据成员不是给定类类型的对象的一部分。因此,静态数据成员的声明不被视为定义。数据成员在类作用域中声明,但定义在文件作用域中执行。这些静态成员具有外部链接。以下示例说明了这一点:
使用
可以引用静态数据成员而不引用类类型的对象
long nBytes = BufferedOutput::bytecount;
也可以通过类对象引用
BufferedOutput Console;
long nBytes = Console.bytecount;
访问规则
静态数据成员受类成员访问规则的约束。对于私有定义的静态数据成员而言,只允许类成员函数和友元函数进行私有访问。例外情况是,不管静态数据成员的访问限制如何,都必须在文件作用域中定义它们。如果要显式初始化数据成员,则必须为该定义提供初始值设定项
构造器概述
构造函数(constructor)用于自定义如何初始化类成员,或在创建类的对象时调用函数。构造函数与类同名,没有返回值。可以根据需要定义任意多个重载构造函数,以各种方式自定义初始化。通常定义构造函数访问权限为public,以便类定义或继承层次结构之外的代码可以创建类对象。但也可以将构造函数声明为protected或private
- 构造器可以声明为
inline、explicit、friend或constexpr - 构造器可以初始化声明为
const/volatile/const volatile的对象。这些对象在构造器完成后成为const(举例) - 在源文件中定义构造器,给它一个与任何其他成员函数一样的限定名,比如
Box::Box(){...}
当声明类实例时,编译器根据重载解析规则(the rules of overload resolution)选择要调用的构造函数
int main()
{
Box b; // Calls Box()
// Using uniform initialization (preferred):
Box b2 {5}; // Calls Box(int)
Box b3 {5, 8, 12}; // Calls Box(int, int, int)
// Using function-style notation:
Box b4(2, 4, 6); // Calls Box(int, int, int)
}
成员初始化列表
构造函数可以设置成员初始化列表(member initializer list),在执行构造函数体之前初始化类成员,这是一种更有效的初始化类成员的方法
class Box {
public:
Box(int width, int height, int length) : m_width(width), m_height(height) {
this->m_length = length;
}
private:
int m_width;
int m_height;
int m_length;
};
注意:const和引用类型成员必须在成员初始化列表中初始化
应该在初始值列表中调用参数化基类构造函数,以确保在执行派生构造函数之前基类已完全初始化
class Base {
public:
Base(int length) : length(length) {}
private:
const int length;
};
class Box : public Base {
public:
Box(int width, int height, int length) : Base(length), m_width(width), m_height(height) {}
private:
int m_width;
int m_height;
};
默认构造器
默认构造器通常指的是没有参数的构造器,或者所有参数都有默认值的构造器
如果定义类时没有声明构造器,那么编译器会提供一个隐式inline默认构造器,也可以自定义默认构造器
Box() { /*perform any required default initialization steps*/}
# 或者设置默认值
// All params have default values
Box (int w = 1, int l = 1, int h = 1): m_width(w), m_height(h), m_length(l){}
只要类声明了构造器,那么编译器不会再提供了默认构造器了
可以删除默认构造器,
- 如果没有其他构造器,那么定义类对象时会报错
- 如果一个类没有默认的构造函数,则不能使用方括号语法单独构造该类的对象数组
Box() = delete;
# 调用报错
Box box; # error: use of deleted function ‘Box::Box()’
# 无法使用方括号语法定义类数组
Box box[3]; # error: use of deleted function ‘Box::Box()’
复制构造器
。。。
移动构造器
。。。
显式默认和删除的构造函数
。。。
构造器执行顺序
- 按顺序调用基类和成员构造函数
- 如果类派生自虚拟基类,初始化对象的虚拟基指针
- 如果类具有或继承虚拟函数,则初始化对象的虚拟函数指针。虚拟函数指针指向类的虚拟函数表,以启用对代码的虚拟函数调用的正确绑定
- 执行函数体代码
测试代码如下:
#include <iostream>
using namespace std;
class Contained1 {
public:
Contained1() { cout << "Contained1 ctor\n"; }
};
class Contained2 {
public:
Contained2() { cout << "Contained2 ctor\n"; }
};
class Contained3 {
public:
Contained3() { cout << "Contained3 ctor\n"; }
};
class BaseContainer {
public:
BaseContainer() { cout << "BaseContainer ctor\n"; }
private:
Contained1 c1;
Contained2 c2;
};
class DerivedContainer : public BaseContainer {
public:
DerivedContainer() : BaseContainer() { cout << "DerivedContainer ctor\n"; }
private:
Contained3 c3;
};
int main() {
DerivedContainer dc;
}
- 调用类
DerivedContainer的基类BaseContainer的构造器 - 调用类
BaseContainer的成员构造器Contained1和Contained2 - 执行类
Contained1和类Contained2的构造器函数体 - 执行类
BaseContainer的构造器函数体 - 调用类
DerivedContainer的成员构造器Container3 - 执行类
Contained3的构造器函数体 - 执行类
DerivedContainer的构造器函数体
Contained1 ctor
Contained2 ctor
BaseContainer ctor
Contained3 ctor
DerivedContainer ctor
继承构造器
这是c++11的新特性,使用using关键字即可从基类继承构造器
class Base
{
public:
Base() { cout << "Base()" << endl; }
Base(const Base& other) { cout << "Base(Base&)" << endl; }
explicit Base(int i) : num(i) { cout << "Base(int)" << endl; }
explicit Base(char c) : letter(c) { cout << "Base(char)" << endl; }
private:
int num;
char letter;
};
class Derived : Base
{
public:
// Inherit all constructors from Base
using Base::Base;
private:
// Can't initialize newMember from Base constructors.
int newMember{ 0 };
};
[c++11]复制和移动操作
参考:
Copy Constructors and Copy Assignment Operators (C++)
Move Constructors and Move Assignment Operators (C++)
复制和移动操作是c++11新增的特性
- 复制指的是将一个对象的值复制给另一个对象
- 移动指的是将右值对象的资源通过移动方式(而不是复制)赋值给一个左值对象
每种操作最好同时实现构造器和运算符方式
复制构造器和复制赋值运算符
语法如下:
class Copy {
public:
// 声明复制构造器
Copy(const Copy &);
// 声明复制赋值构造器
Copy &operator=(const Copy &other);
};
设置参数为const以避免操作过程中意外修改原对象的值
示例如下:创建类MemoryBlock,设置字符数组_data和数组长度_length
class MemoryBlock {
public:
// Simple constructor that initializes the resource.
MemoryBlock(int length, const char *data);
// Destructor.
~MemoryBlock();
// Copy constructor.
MemoryBlock(const MemoryBlock &other);
// Copy assignment operator.
MemoryBlock &operator=(const MemoryBlock &other);
// Retrieves the length of the data resource.
size_t Length() const;
// print _data
void print();
private:
size_t _length; // The length of the resource.
char *_data; // The resource.
};
创建了复制构造器和复制赋值构造器,实现如下:
MemoryBlock::MemoryBlock(int length, const char *data) {
_length = length;
_data = (char *) malloc(_length * sizeof(char));
std::copy(data, data + _length, _data);
std::cout << "In MemoryBlock: length = " << _length << " _data = " << _data << std::endl;
}
MemoryBlock::~MemoryBlock() {
std::cout << "In ~MemoryBlock(). length = " << _length << ".";
if (_data != nullptr) {
std::cout << " Deleting resource.";
// Delete the resource.
delete[] _data;
}
std::cout << std::endl;
}
MemoryBlock::MemoryBlock(const MemoryBlock &other) : _length(other._length), _data(new char[other._length]) {
std::cout << "In MemoryBlock(const MemoryBlock&). length = "
<< other._length << ". Copying resource." << std::endl;
std::copy(other._data, other._data + _length, _data);
}
MemoryBlock &MemoryBlock::operator=(const MemoryBlock &other) {
std::cout << "In operator=(const MemoryBlock&). length = "
<< other._length << ". Copying resource." << std::endl;
if (this != &other) {
// Free the existing resource.
delete[] _data;
_length = other._length;
_data = new char[_length];
std::copy(other._data, other._data + _length, _data);
}
return *this;
}
size_t MemoryBlock::Length() const {
return _length;
}
void MemoryBlock::print() {
std::cout << "Print MemoryBlock: length = " << _length << " _data = " << _data << std::endl;
}
使用函数std::copy复制数组值
移动构造器和移动赋值运算符
移动操作用于将右值对象的内容移动到当前对象中,操作过程不需要复制,避免了额外的内存分配和解析操作,更加有效率
语法如下:
class Move {
public:
// 声明移动构造器
Move(Move &&);
// 声明移动赋值构造器
Move &operator=(Move &&other);
};
参数为Move类型的右值引用,使用过程中去除const关键字,能够修改参数对象的值以避免资源的重复释放
同上面一样,创建类MemoryBlock,设置字符数组_data和数组长度_length
class MemoryBlock2 {
public:
// Simple constructor that initializes the resource.
MemoryBlock2(int length, const char *data);
// Destructor.
~MemoryBlock2();
// Copy constructor.
MemoryBlock2(MemoryBlock2 &&other);
// Copy assignment operator.
MemoryBlock2 &operator=(MemoryBlock2 &&other);
// Retrieves the length of the data resource.
size_t Length() const;
// print _data
void print();
private:
size_t _length; // The length of the resource.
char *_data; // The resource.
};
实现如下:
MemoryBlock2::MemoryBlock2(int length, const char *data) {
_length = length, ;
_data = (char *) malloc(_length * sizeof(char));
std::copy(data, data + _length, _data);
std::cout << "In MemoryBlock2: length = " << _length << " _data = " << _data << std::endl;
}
MemoryBlock2::~MemoryBlock2() {
std::cout << "In ~MemoryBlock2(). length = " << _length << ".";
if (_data != nullptr) {
std::cout << " Deleting resource.";
// Delete the resource.
delete[] _data;
}
std::cout << std::endl;
}
MemoryBlock2::MemoryBlock2(MemoryBlock2 &&other) : _data(nullptr), _length(0) {
std::cout << "In MemoryBlock2(MemoryBlock2 &&). length = "
<< other._length << ". Moving resource." << std::endl;
// Copy the data pointer and its length from the
// source object.
_data = other._data;
_length = other._length;
// Release the data pointer from the source object so that
// the destructor does not free the memory multiple times.
other._data = nullptr;
other._length = 0;
}
MemoryBlock2 &MemoryBlock2::operator=(MemoryBlock2 &&other) {
std::cout << "In operator=(MemoryBlock2 &&). length = "
<< other._length << "." << std::endl;
if (this != &other) {
// Free the existing resource.
delete[] _data;
// Copy the data pointer and its length from the
// source object.
_data = other._data;
_length = other._length;
// Release the data pointer from the source object so that
// the destructor does not free the memory multiple times.
other._data = nullptr;
other._length = 0;
}
return *this;
}
size_t MemoryBlock2::Length() const {
return _length;
}
void MemoryBlock2::print() {
std::cout << "Print MemoryBlock2: length = " << _length << " _data = " << _data << std::endl;
}
移动操作如下:
- 释放当前对象的已有资源
- 复制移动对象的指针和长度
- 释放移动对象对资源的引用
- 对于移动赋值运算符而言,还应该考虑赋值操作是否指向自身
测试
在向量中插入对象时,移动操作能够提高性能,测试如下:
int main() {
// Create a vector object and add a few elements to it.
std::vector<MemoryBlock> v;
v.emplace_back(MemoryBlock(3, "123"));
v.emplace_back(MemoryBlock(5, "12345"));
// Insert a new element into the second position of the vector.
v.insert(v.begin() + 1, MemoryBlock(2, "45"));
更加有效率
// std::vector<MemoryBlock2> v2;
// v2.emplace_back(MemoryBlock2(3, "123"));
// v2.emplace_back(MemoryBlock2(5, "12345"));
//
// // Insert a new element into the second position of the vector.
// v2.insert(v2.begin() + 1, MemoryBlock2(2, "45"));
}
相比较于复制操作,移动操作不需要重新分配字符数组内存,更加有效率
优化
同时实现了移动构造器和移动赋值运算符后,可以在构造器中调用赋值运算符进行优化,使用函数std::move修改如下:
// Move constructor.
MemoryBlock(MemoryBlock&& other): _data(nullptr), _length(0)
{
*this = std::move(other);
}
[c++11]显式默认和删除函数
参考:
Explicitly Defaulted and Deleted Functions
特定成员函数
编译器会自动生成以下特定成员函数:
- 默认构造器
- 复制构造器
- 复制赋值运算符
- 析构器
从c++11开始,将移动构造器和移动赋值运算符也指定了特定成员函数
在实际操作过程中,遵循以下规则:
- 如果任何构造器被显式声明了,那么不会自动生成默认构造器
- 如果声明了虚拟析构器,那么不会自动生成默认析构器
- 如果移动构造器或者移动赋值运算符被声明了,那么
- 不会自动生成复制构造器
- 不会自动生成复制赋值运算符
- 如果声明了复制构造器、复制赋值运算符、移动构造器、移动赋值运算符和析构器,那么
- 不会自动生成移动构造器
- 不会自动生成移动赋值运算符
从c++11开始,还遵循以下规则:
- 如果复制构造器或析构器被显式声明了,那么不会自动生成复制赋值运算符
- 如果复制赋值运算符或析构器被显式声明了,那么不会自动生成复制构造器
=default和=delete
在c++11之前,声明对象不可复制,必须显式在私有域内声明复制构造器和复制赋值运算符
struct noncopyable
{
noncopyable() {};
private:
noncopyable(const noncopyable&);
noncopyable& operator=(const noncopyable&);
};
而由于复制构造器的声明,编译器不会再自动生成默认构造器,必须显式声明
而使用默认和删除函数,直接指定即可,修改如下:
struct noncopyable
{
noncopyable() =default;
noncopyable(const noncopyable&) =delete;
noncopyable& operator=(const noncopyable&) =delete;
};
将复制构造器和复制赋值运算符删除,同时保留了默认构造器
使用这种方式还可以实现对象不可移动的定义
struct nonmoveable
{
nonmoveable() =default;
nonmoveable(nonmoveable&) =delete;
nonmoveable& operator=(nonmoveable&&) =delete;
};
删除函数进一步使用
=delete可以进一步作用于普通的成员函数和运算符
# 删除new运算符
void* operator new(std::size_t) = delete;
# 避免调用浮点数
void call_with_true_double_only(float) =delete;
void call_with_true_double_only(double param) { return; }
# 通过删除模板函数,仅能调用双精度
template < typename T >
void call_with_true_double_only(T) =delete; //prevent call through type promotion of any T to double from succeeding.
void call_with_true_double_only(double param) { return; } // also define for const double, double&, etc. as needed.
析构器
当对象超出作用域时,自动调用析构器进行删除
声明
- 不接受参数
- 不返回值
- 无法声明为
const,volatile或static - 可以声明为
virtual。使用虚拟析构函数,可以在不知道对象类型的情况下销毁对象 - 使用虚拟函数机制调用对象的正确析构函数。注意,析构函数也可以声明为抽象类的纯虚拟函数
使用
当以下事件发生时调用析构器:
- 具有块作用域的本地(自动)对象超出作用域
- 使用
new运算符分配的对象使用delete显式释放 - 临时对象的生存期结束
- 程序结束后为全局或静态对象调用析构器
- 使用析构函数的完全限定名显式调用
使用限制如下:
- 无法获取析构器地址
- 派生类无法继承基类的析构器
调用顺序
- 首先调用对象类的析构器,执行函数体
nonstatic成员对象的析构器以声明的相反顺序调用- 以声明的相反顺序调用非虚拟基类的析构器
- 以声明的相反顺序调用虚拟基类的析构器
虚拟基类
虚拟基类的析构函数的调用顺序与它们在有向无环图中的出现顺序相反(深度优先、从左到右、后序遍历)。下图描述了继承关系图
class A
class B
class C : virtual public A, virtual public B
class D : virtual public A, virtual public B
class E : public C, public D, virtual public B
首先C/D是非虚拟基类调用,非虚拟基类的析构函数的调用顺序与基类名称的声明顺序相反;然后才是虚拟基类的析构器调用。销毁顺序为E->D->C->B->A
显式析构调用
s.String::~String(); // non-virtual call
ps->String::~String(); // non-virtual call
s.~String(); // Virtual call
ps->~String(); // Virtual call
对未定义析构函数的显式调用没有任何效果
继承
新类派生自已存在的类的机制称为继承(inheritance)
语法
class Derived : [virtual] [access-specifier] Base
{
// member list
};
class Derived : [virtual] [access-specifier] Base1,
[virtual] [access-specifier] Base2, . . .
{
// member list
};
access-specifier可分为private/protected/public,默认是private- virtual关键字可选,如果存在,表示基类引用为虚拟基类
virtual函数
虚函数是期望在派生类中重新定义的成员函数。当使用指针或对基类的引用引用派生类对象时,可以为该对象调用虚拟函数并执行派生类的函数版本
- 虚函数可以有函数体实现,也可以仅声明而已
- 如果基类非虚函数和派生类函数同名,那么调用时通过对象声明类型指向基类还是派生类决定调用的函数实现
- 对于虚函数实现,可以在调用时使用域名解析运算符显式指定基类的虚函数
。。。
。。。
int main() {
// Declare an object of type Derived.
Derived aDerived;
// Declare two pointers, one of type Derived * and the other
// of type Base *, and initialize them to point to aDerived.
Derived *pDerived = &aDerived;
Base *pBase = &aDerived;
// Call the functions.
pBase->NameOf(); // Call virtual function.
pBase->InvokingClass(); // Call nonvirtual function.
pDerived->NameOf(); // Call virtual function.
pDerived->InvokingClass(); // Call nonvirtual function.
CheckingAccount *pChecking = new CheckingAccount( 100.00 );
pChecking->Account::PrintBalance(); // Explicit qualification.
Account *pAccount = pChecking; // Call Account::PrintBalance
pAccount->Account::PrintBalance(); // Explicit qualification.
}
多继承
多继承模式指的是派送类可以继承自多个基类。基类的排列顺序指定了构造器和析构器的调用顺序
每个派生类都包含在基类中定义的数据成员的副本。在多继承模式下,一个基类可能间接多次被继承,那么会有多个副本被使用,浪费内存空间。将基类声明为virtual表示派生类共享同一个基类副本
与非虚拟继承相比,虚拟继承具有显著的规模优势。但是,它会带来额外的处理开销
命名歧义
多继承模式下,使用派生类对象调用基类函数,可能会造成命名歧义:即在不同基类中出现多个同名函数
编译器遵循如下规则:
- 如果对名称的访问不明确(如前所述),将生成错误消息
- 如果重载函数是明确的,则会解决它们
- 如果对名称的访问违反了成员访问权限,则会生成错误消息
对于出现命名歧义时,需要通过访问限定符明确使用方法
// Declare two base classes, A and B.
class A {
public:
unsigned a;
unsigned b();
};
class B {
public:
unsigned a(); // Note that class A also has a member "a"
int b(); // and a member "b".
char c;
};
// Define class C as derived from A and B.
class C : public A, public B {};
int main() {
C *pc = new C;
pc->b(); # 错误
pc->B::a(); # 正确
}
抽象类
抽象类充当一般概念的表达式,从中可以派生出更具体的类。不能创建抽象类类型的对象;但是可以使用指向抽象类类型的指针和引用
包含至少一个纯虚函数的类被视为抽象类。从抽象类派生的类必须实现纯虚函数,否则它们也是抽象类。
class Account {
public:
Account( double d ); // Constructor.
virtual double GetBalance(); // Obtain balance.
virtual void PrintBalance() = 0; // Pure virtual function.
private:
double _balance;
};
纯虚说明符是=0,所以PrintBalance是纯虚函数,类Account是一个抽象类
抽象类无法作用于以下场景:
- 变量或成员数据
- 参数类型
- 函数返回类型
- 显式转换类型
纯虚函数可以有函数定义
class base {
public:
base() {}
// 纯虚函数
virtual ~base()=0;
};
// Provide a definition for destructor.
base::~base() {}
嵌套类定义
声明
一个类可以在另一个类的范围内声明,这样的类称为嵌套类。嵌套类被视为在封闭类的范围内,并可在该范围内使用。若要从其直接封闭作用域以外的作用域引用嵌套类,必须使用完全限定名
class Cls {
public:
class NestA {
public:
void print() {
std::cout << "NestA" << std::endl;
}
};
class NestB {
public:
void print() {
std::cout << "NestB" << std::endl;
}
};
void print() {
NestA nestA;
NestB nestB;
nestA.print();
nestB.print();
std::cout << "Cls" << std::endl;
}
};
int main() {
Cls cls;
cls.print();
Cls::NestA nestA;
nestA.print();
Cls::NestB nestB;
nestB.print();
}
使用
- 对于封闭类中的成员/函数,嵌套类可以直接使用
- 对于其他类的成员/函数,必须通过指针、引用或对象名来使用
- 对于嵌套类的友元函数,其仅能访问嵌套类,不能访问封闭类
模板概述
模板定义和使用
模板定义示例如下:
template <typename T>
T minimum(const T& lhs, const T& rhs)
{
return lhs < rhs ? lhs : rhs;
}
- 类型参数定义:通常使用单个大写字母,比如T
- 关键字:使用
typename作为类型占位符 - 模板实例化(
template instantiation):编译器从模板中生成类或函数的过程
类型参数
可同时定义多个类型参数
template <typename T, typename U, typename V> class Foo{};
关键字class也可作为类型占位符,其作用和typename一样
template <class T, class U, class V> class Foo{};
使用椭圆运算符(...)可以定义一个模板,其可以操作零个或多个类型参数
template<typename... Arguments> class vtclass;
vtclass< > vtinstance1;
vtclass<int> vtinstance2;
vtclass<float, bool> vtinstance3;
非类型参数
可以在模板中使用非类型参数,也称为值参数
template<typename T, size_t L>
class MyArray
{
T arr[L];
public:
MyArray() { ... }
};
模板作为模板参数
模板可以作为模板参数,示例如下:
template<typename T, template<typename U, int I> class Arr>
class MyClass
{
T t; //OK
Arr<T, 10> a;
U u; //Error. U not in scope
};
其中,能够在类MyClass中使用模板参数T和Arr,不能使用U和I
默认模板参数
可以在模板定义中设置默认参数,必须将默认参数放置在最后
template <class T, class Allocator = allocator<T>> class vector;
在使用过程中可以忽略默认参数位置
vector<int> myvector;
vector<int, MyAllocator> myvector;
如果所有模板参数都有默认值,那么可以不输入任何值,只使用空的尖括号
template<typename A = int, typename B = double>
class Bar
{
//...
};
...
int main()
{
Bar<> bar; // use all default type arguments
}
模板专门化
模板专门化:使用通用模板和一个或多个专用模板,专用模板指定特殊类型下的操作方式,其他类型使用通用模板完成
template <typename K, typename V>
class MyMap{/*...*/};
// partial specialization for string keys
template<typename V>
class MyMap<string, V> {/*...*/};
...
MyMap<int, MyClass> classes; // uses original template
MyMap<string, MyClass> classes2; // uses the partial specialization
- 完全专业化(
complete specialization):指的是模板所有类型参数均被指定 - 部分专业化(
partial specialization):指的是模板部分类型参数被指定
函数模板
函数模板定义示例如下:
template< class T >
void MySwap( T& a, T& b ) {
T c(a);
a = b;
b = c;
}
实例化示例如下:
// function_template_instantiation.cpp
template<class T> void f(T) { }
// Instantiate f with the explicitly specified template.
// argument 'int'
//
template void f<int> (int);
// Instantiate f with the deduced template argument 'char'.
template void f(char);
int main()
{
}
显式实例化
在创建使用模板进行分发的库(.lib)文件时,未实例化的模板定义不会放入对象(.obj)文件中
# 显式实例化模板MyStack
template class MyStack<int, 6>;
可使用关键字extern阻止模板的实例化
extern template class MyStack<int, 6>;
模板专门化中的extern关键字仅适用于在类主体外部定义的成员函数。类声明中定义的函数被视为内联函数,总是被实例化
成员函数模板
成员模板指的是成员函数模板和嵌套类模板
成员函数模板指的是类或类模板的成员的函数模板
struct X
{
template <class T> void mf(T* t) {}
};
template<typename T>
class X
{
public:
template<typename U>
void mf(const U &u)
{
}
};
template<typename T>
class X
{
public:
template<typename U>
void mf(const U &u);
};
template<typename T> template <typename U>
void X<T>::mf(const U &u)
{
}
STL概述
C++ STL(standard template library,标准模板库)提供了许多高效的容器、算法和迭代器
容器
参考:
C++ Standard Library Containers
容器是用来管理某一类对象的集合。它们被实现为类模板,这允许在元素支持的类型中具有很大的灵活性。完整容器列表参考Container class templates
容器可以分为三类:序列容器、关联容器和容器适配器
- 对于序列容器(
sequential container),推荐使用vector - 对于关联容器(
associate container),推荐使用map
序列容器
序列容器能够维护指定的插入元素的顺序
vector:其操作类似于数组,它是随机存取和连续存储的,长度是高度灵活的array:array容器具有vector的一些优点,但是长度不是灵活的deque:双端队列(double-ended queue)允许在容器开头和结尾的快速插入和删除。它具有向量的随机访问和柔性长度的优点,但不是连续的list:是一个双链接列表,它允许在容器中的任何位置进行双向访问、快速插入和快速删除,但不能随机访问容器中的元素forward_list:单链表,list的前向访问版本
关联容器
在关联容器中,元素以预定义的顺序插入,例如按升序排序。也可以使用无序的关联容器。关联容器可以分为两个子集:map和set
map:也称为字典(dictionary),由键/值对(key/value pair)组成。键用于对序列排序,值与该键关联。例如,map可能包含表示文本中每个唯一单词的键和表示每个单词在文本中出现的次数的相应值。map的无序版本是unordered_mapset:单元素的升序排列容器,其值也是键。未排序版本称为unordered_set
map和set都只允许将键或元素的一个实例插入到容器中。如果需要元素的多个实例,使用multimap和multiset。它们的未排序版本就是unordered_multimap和unordered_multiset
有序映射和集合支持双向迭代器(bi-directional iterators),它们的无序对应项支持正向迭代器(forward iterators)
容器适配器
容器适配器是序列容器和关联容器的变体,其简化了接口。容器适配器不支持迭代器
queue:先进先出(FIFO)操作stack:后进先出(LIFO)操作priority_queue:最高值元素始终位于队列第一位
容器元素要求
- 通用要求是容器元素是可复制的。但是只要在操作中不涉及复制操作,也可以工作
- 析构函数不允许引发异常
- 对于有序关联容器而言,其对象必须定义了
public比较运算符(opeator<) - 容器上的某些操作可能还需要公共默认构造函数和公共等价运算符。例如,无序关联容器需要支持相等和散列
容器比较
所有容器均重载了operator==,可用于保存相同类型元素的相同类型容器之间的比较,比如vector<string>和vector<string>之间的比较
算法
C++实现了许多算法,常用的有以下几项:
- 遍历算法:
for_each - 搜索算法:
find_if/count_if/remove_if - 排序算法:
sort/lower_bound/upper_bound
[c++11][stl]vector
参考:std::vector
vector是序列容器,它是可以改变大小的数组
头文件
#include <vector>
把一个vector追加到另一个vector
参考:Vector 把一个vector追加到另一个vector
std::vector<int> src;
std::vector<int> dest;
dest.insert(dest.end(), src.begin(), src.end());
使用
#include <vector>
void forward_print(std::vector<int> vecs) {
// for (auto it = vecs.cbegin(); it != vecs.cend(); ++it) {
// std::cout << " " << *it;
// }
// std::cout << std::endl;
for (auto &x: vecs) {
std::cout << " " << x;
}
std::cout << std::endl;
}
void backward_print(std::vector<int> vecs) {
for (auto it = vecs.crbegin(); it != vecs.crend(); ++it) {
std::cout << " " << *it;
}
std::cout << std::endl;
}
int main() {
// 创建
std::vector<int> vectors;
// 添加
for (int i = 0; i < 10; i++) {
vectors.emplace_back(i + 1);
}
forward_print(vectors);
// 插入
// 第二个位置
vectors.emplace(vectors.begin() + 1, 333);
forward_print(vectors);
// 修改
// 第二个位置,从0开始
vectors.at(1) = 444;
forward_print(vectors);
// 删除
// 最后一个位置
vectors.pop_back();
forward_print(vectors);
// 删除第3个
vectors.erase(vectors.begin() + 2);
forward_print(vectors);
// 删除所有
vectors.clear();
std::cout << "size: " << vectors.size() << std::endl;
}
[c++11][stl]map
参考:std::map
map是存储键/值对的关联容器
头文件
#include <map>
使用
#include <map>
template<typename T, typename U>
void forward_print(std::map<T, U> maps) {
// for (auto it = maps.begin(); it != maps.end(); ++it)
// std::cout << it->first << " => " << it->second << ' ';
for (auto &x:maps) {
std::cout << x.first << " => " << x.second << ' ';
}
std::cout << std::endl;
}
int main() {
// 创建
std::map<int, int> maps;
// 添加
for (int i = 0; i < 10; i++) {
maps.emplace(i, i + 1);
}
forward_print(maps);
// 修改
// 第二个位置,从0开始
maps[1] = 444;
forward_print(maps);
// 删除
// 先查找再删除
std::map<int, int>::iterator it = maps.find(3);
maps.erase(it);
// 按键删除
maps.erase(4);
forward_print(maps);
// 删除所有
maps.clear();
std::cout << "size: " << maps.size() << std::endl;
std::cout << "isEmpty: " << maps.empty() << std::endl;
}
[c++11][stl]queue
c++提供了队列的实现:queue,实现先进先出(first-in first-out, FIFO)功能
队列功能
queue提供了如下常用功能实现:
- empty():判断队列是否问空,为空返回
true,不为空返回false - size():返回队列长度
- front():返回队头(第一个出队)数据
- back():返回队尾(第一个入队)数据
- push(value_type&& __x):添加数据到队尾
- pop():移除队头数据。注意,返回值为空
c++11提供了两个新特性:
参考:C++11中emplace的使用:emplace能通过参数构造对象,不需要拷贝或者移动内存,相比push能更好地避免内存的拷贝与移动,使容器插入元素的性能得到进一步提升
实现
#include <iostream>
#include <queue>
using namespace std;
int main() {
queue<int> q;
// 队列大小
cout << q.size() << endl;
// 队列是否为空
cout << q.empty() << endl;
q.push(3);
q.push(4);
q.emplace(5);
// 队头元素
cout << q.front() << endl;
// 队尾元素
cout << q.back() << endl;
queue<int> s;
s.push(3232);
q.swap(s);
cout << q.size() << endl;
cout << q.empty() << endl;
}
[c++11][stl]stack
c++提供了栈的实现:queue,实现后进先出(last-in first-out, LIFO)功能
栈功能
stack提供了如下常用功能实现:
- empty():判断栈是否问空,为空返回
true,不为空返回false - size():返回栈长度
- top():返回栈顶数据
- push(value_type&& __x):插入数据到栈顶
- pop():移除栈顶数据。注意,返回值为空
c++11提供了两个新特性:
参考:C++11中emplace的使用:emplace能通过参数构造对象,不需要拷贝或者移动内存,相比push能更好地避免内存的拷贝与移动,使容器插入元素的性能得到进一步提升
实现
stack<int> s;
// 栈大小
cout << s.size() << endl;
// 栈是否为空
cout << s.empty() << endl;
s.push(3);
s.push(4);
s.emplace(5);
// 栈顶元素
cout << s.top() << endl;
stack<int> s2;
s2.push(3232);
s2.swap(s);
cout << s.size() << endl;
cout << s.empty() << endl;
cout << s.top() << endl;
}
[c++11][stl]array
从c++11开始stl库新增了一个容器std::array,它实现的是数组功能,同时集成了一些通用的容器操作
概述
array是固定大小的序列容器:它们按严格线性序列排列持有特定数量的元素
在array内部不保留除其包含的元素以外的任何数据(甚至不保留其大小,这是一个模板参数,在编译时固定)。它在存储大小方面与用括号语法([])声明的普通数组一样有效。这个类只向它添加一个成员和全局函数层,这样数组就可以用作标准容器
与其他标准容器不同,数组具有固定的大小,并且不通过分配器管理其元素的分配:它们是封装固定大小元素数组的聚合类型。因此,它们不能动态地展开或收缩(有关可以展开的类似容器,请参见vector)
零大小的数组是有效的,但不应取消对它们的引用(成员的front、back和data)
与标准库中的其他容器不同,交换两个数组容器是一种线性操作,涉及单独交换范围中的所有元素,这通常是一种效率较低的操作。另一方面,这允许迭代器到两个容器中的元素保持其原始容器关联
数组容器的另一个独特特征是,它们可以被视为tuple对象:<array> header重载了get函数,就像它是一个元组一样访问数组的元素,以及专用的tuple-size和tuple-element类型
创建数组
# include <array>
std::array<int,5> myarray = { 2, 16, 77, 34, 50 };
元素访问
和原来的括号语法定义的数组一样,可以进行取值赋值操作
int main() {
std::array<int, 10> myarray;
std::cout << myarray.empty() << std::endl;
for (int i = 0; i < 3; i++) {
myarray[i] = i * i;
}
for (int i = 0; i < 3; i++) {
std::cout << myarray[i] << " ";
}
std::cout << std::endl;
std::cout << myarray.size() << std::endl;
std::cout << myarray.empty() << std::endl;
return 0;
}
结果
0
0 1 4
10
0
- 函数
empty用于判断数组大小是否为0 - 函数
size用于计算数组大小
array还提供了以下函数用于访问元素:
- at:返回指定位置元素的引用, 可以取值也可以赋值
- front:返回对数组容器中第一个元素的引用,可以取值也可以赋值
- back:返回数组容器中最后一个元素的引用,可以取值也可以赋值
- data:获取数据指针,可用于数组赋值操作
#include <iostream>
#include <array>
#include <cstring>
int main() {
const char *cstr = "Test string.";
std::array<char, 12> charray;
std::memcpy(charray.data(), cstr, 12);
std::cout << charray.data() << '\n';
std::cout << charray.at(3) << std::endl;
std::cout << charray.front() << std::endl;
std::cout << charray.back() << std::endl;
return 0;
}
结果:
Test string.
t
T
.
迭代器功能
array对象除了正常的取值赋值操作外,还支持迭代器功能(这也表明可以调用stl sort函数)
// sort algorithm example
#include <iostream> // std::cout
#include <algorithm> // std::sort
#include <array>
bool myfunction(int i, int j) { return (i < j); }
bool greater_than(int i, int j) {
return i > j;
}
struct myclass {
bool operator()(int i, int j) { return (i < j); }
} myobject;
template<size_t SIZE>
void zprint(std::array<int, SIZE> myarray) {
for (auto it = myarray.begin(); it != myarray.end(); ++it)
std::cout << ' ' << *it;
// for (int n:myarray) {
// std::cout << ' ' << n;
// }
std::cout << '\n';
}
int main() {
std::array<int, 8> myarray = {32, 71, 12, 45, 26, 80, 53, 33};
// using default comparison (operator <):
std::sort(myarray.begin(), myarray.begin() + 4); //(12 32 45 71)26 80 53 33
zprint(myarray);
// using function as comp
std::sort(myarray.begin() + 4, myarray.end(), myfunction); // 12 32 45 71(26 33 53 80)
zprint(myarray);
// using object as comp
std::sort(myarray.begin(), myarray.end(), myobject); //(12 26 32 33 45 53 71 80)
zprint(myarray);
std::sort(myarray.begin(), myarray.end(), greater_than);
zprint(myarray);
return 0;
}
注意:array对象作为函数参数时需要设置模板参数
修改器
- std::array::swap:交换两个相同类型,相同大小的数组内容
- std::array::fill:使用指定值赋值array所有位置
int main() {
std::array<int, 5> first = {10, 20, 30, 40, 50};
std::array<int, 5> second = {11, 22, 33, 44, 55};
first.swap(second);
std::cout << "first:";
for (int &x : first) std::cout << ' ' << x;
std::cout << '\n';
std::cout << "second:";
for (int &x : second) std::cout << ' ' << x;
std::cout << '\n';
first.fill(1);
std::cout << "fill:";
for (int &x:first) std::cout << ' ' << x;
std::cout << std::endl;
return 0;
}
结果
first: 11 22 33 44 55
second: 10 20 30 40 50
fill: 1 1 1 1 1
二维数组
二维数组定义比较繁琐,参考【C++ STL应用与实现】5: 如何使用std::array (since C++11) ,给出了二维数组定义以及2种初始化方式
初始化方式
有两种初始化方式,一是直接输入数据进行初始化,二是创建一维数组进行初始化
实现
#include <iostream>
#include <array>
using std::cout;
using std::endl;
using std::array;
template<size_t COLS, size_t ROWS>
void PrintMatrix(std::array<std::array<int, COLS>, ROWS> arr) {
for (const auto &ary : arr) {
for (const auto &item : ary) {
cout << item << " ";
}
cout << endl;
}
}
int main() {
// like plain 2D array
array<array<int, 5>, 5> mat1 = {
1, 2, 3, 4, 5,
1, 2, 3, 4, 5,
1, 2, 3, 4, 5,
1, 2, 3, 4, 5,
1, 2, 3, 4, 5,
};
// construct with 1D arys.
array<int, 3> ary = {1, 2, 3};
array<array<int, 3>, 5> mat2 = {ary, ary, ary, ary, ary};
// just like plain 2D array, but can commit some value some each div.
array<array<int, 5>, 5> mat3 = {
array<int, 5>{1, 2, 3, 4, 5},
array<int, 5>{1, 2, 3, 4},
array<int, 5>{1, 2, 3},
array<int, 5>{1, 2,},
array<int, 5>{1,}
};
cout << "mat1" << endl;
PrintMatrix(mat1);
cout << "mat2" << endl;
PrintMatrix(mat2);
cout << "mat3" << endl;
PrintMatrix(mat3);
}
指针赋值
利用指针对二维数组进行赋值操作
#include <iostream>
#include <cstring>
#include <array>
using std::cout;
using std::endl;
using std::array;
typedef int TYPE;
#define NUM 9
int main() {
TYPE arcs[NUM][NUM] = {
{0, 10, -1, -1, -1, 11, -1, -1, -1},
{10, 0, 18, -1, -1, -1, 16, -1, 12},
{-1, 18, 0, 22, -1, -1, -1, -1, 8},
{-1, -1, 22, 0, 20, -1, 24, 16, 21},
{-1, -1, -1, 20, 0, 26, -1, 7, 9},
{11, -1, -1, -1, 26, 0, 17, -1, -1},
{-1, 16, -1, 24, -1, 17, 0, 19, -1},
{-1, -1, -1, 16, 7, -1, 19, 0, -1},
{-1, 12, 8, 21, -1, -1, -1, -1, 0}
};
int i = 0;
array<array<TYPE, NUM>, NUM> arrs = {};
for (auto &ary:arrs) {
memcpy(&ary, arcs[i], sizeof(TYPE) * 9);
i++;
}
for (auto ary:arrs) {
for (auto item : ary) {
cout << " " << item;
}
cout << endl;
}
}
[c++11][stl]for_each
使用for_each函数对指定范围内的数值逐个进行函数操作
最常用的就是遍历操作
#include <iostream> // std::cout
#include <algorithm> // std::for_each
#include <vector> // std::vector
void myfunction(int i) { // function:
std::cout << ' ' << i;
}
struct myclass { // function object type:
void operator()(int i) { std::cout << ' ' << i; }
} myobject;
int main() {
std::vector<int> myvector;
myvector.emplace_back(10);
myvector.emplace_back(20);
myvector.emplace_back(30);
std::cout << "myvector contains:";
for_each(myvector.begin(), myvector.end(), myfunction);
std::cout << '\n';
// or:
std::cout << "myvector contains:";
for_each(myvector.begin(), myvector.end(), myobject);
std::cout << '\n';
return 0;
}
[c++11][stl]find
参考:std::find
C++提供了丰富的查询函数
findfind_endfind_first_offind_iffind_if_not
find_if
参考:std::find_if
函数find_if发现指定范围内(不包含最后一个位置)是否存在数值符合条件
如果存在,返回第一个符合条件的迭代器;如果不存在,返回最后一个值的迭代器
// find_if example
#include <iostream> // std::cout
#include <algorithm> // std::find_if
#include <vector> // std::vector
bool IsOdd(int i) {
return ((i % 2) == 1);
}
int main() {
std::vector<int> myvector;
myvector.push_back(10);
myvector.push_back(25);
myvector.push_back(40);
myvector.push_back(55);
std::vector<int>::iterator it = std::find_if(myvector.begin(), myvector.end(), IsOdd);
std::cout << "The first odd value is " << *it << '\n';
return 0;
}
[stl]sort
STL库提供了排序算法的实现,其中一个就是std::sort
函数sort默认按升序进行排序,也可以自定义比较算子
头文件
#include <algorithm>
熟悉
// sort algorithm example
#include <iostream> // std::cout
#include <algorithm> // std::sort
#include <vector> // std::vector
bool myfunction(int i, int j) { return (i < j); }
bool greater_than(int i, int j) {
return i > j;
}
struct myclass {
bool operator()(int i, int j) { return (i < j); }
} myobject;
void zprint(std::vector<int> myvector) {
for (int n:myvector) {
std::cout << ' ' << n;
}
std::cout << '\n';
}
int main() {
int myints[] = {32, 71, 12, 45, 26, 80, 53, 33};
c++/multiple definition of
std::vector<int> myvector(myints, myints + 8); // 32 71 12 45 26 80 53 33
// using default comparison (operator <):
std::sort(myvector.begin(), myvector.begin() + 4); //(12 32 45 71)26 80 53 33
zprint(myvector);
// using function as comp
std::sort(myvector.begin() + 4, myvector.end(), myfunction); // 12 32 45 71(26 33 53 80)
zprint(myvector);
// using object as comp
std::sort(myvector.begin(), myvector.end(), myobject); //(12 26 32 33 45 53 71 80)
zprint(myvector);
sort(myvector.begin(), myvector.end(), greater_than);
zprint(myvector);
return 0;
}
结果
12 32 45 71 26 80 53 33
12 32 45 71 26 33 53 80
12 26 32 33 45 53 71 80
80 71 53 45 33 32 26 12
[c++11][stl][shuffle]随机重排列
参考:std::shuffle
c++实现了shuffle函数用于随机重新排列指定范围内的元素,使用均匀随机数发生器
// shuffle algorithm example
#include <iostream> // std::cout
#include <algorithm> // std::shuffle
#include <array> // std::array
#include <random> // std::default_random_engine
#include <chrono> // std::chrono::system_clock
int main() {
std::array<int, 5> foo{1, 2, 3, 4, 5};
// obtain a time-based seed:
long seed = std::chrono::system_clock::now().time_since_epoch().count();
shuffle(foo.begin(), foo.end(), std::default_random_engine(seed));
std::cout << "shuffled elements:";
for (int &x: foo) std::cout << ' ' << x;
std::cout << '\n';
return 0;
}
multiple definition of
问题描述
新建头文件macro.h,添加全局变量
#ifndef C_MACRO_H
#define C_MACRO_H
#include <iostream>
using namespace std;
// 人脸检测模型路径
string FACE_CASCADE_PATH = "../../models/haarcascade_frontalface_default.xml";
#endif //C_MACRO_H
编译时出错
CMakeFiles/c__.dir/OpencvDetect.cpp.o:(.bss+0x0): multiple definition of `WINDOWS_NAME[abi:cxx11]'
CMakeFiles/c__.dir/main.cpp.o:(.bss+0x0): first defined here
问题解析
头文件被多次引用,导致重复定义
解决:设置成常量,添加const关键字
const string FACE_CASCADE_PATH = "../../models/haarcascade_frontalface_default.xml";
warning: ISO C++ forbids converting a string constant to ‘char*’ [-Wwrite-strings]
测试如下代码时遇到上述问题
char *pArray[] = {"apple", "pear", "banana", "orange", "pineApple"};
for (int i = 0; i < sizeof(pArray) / sizeof(*pArray); i++) {
std::cout << pArray[i] << std::endl;
}
warning: ISO C++ forbids converting a string constant to ‘char*’ [-Wwrite-strings]
参考warning: ISO C++ forbids converting a string constant to ‘char*’ [-Wwrite-strings]
C++11禁止将字符串常量赋值给char*类型,解决方式之一就是将char*设置为const char*
Python
类操作
参考:9. 类
类定义
定义一个新类ClassA
class ClassA:
"""
定义一个测试类
"""
__version__ = '0.1'
__author__ = "zhujian"
def __init__(self):
print("__init__")
def func1(self, x, y):
# 打印类名
print(self.__class__.__name__)
# 打印日志
print(self.__doc__)
# 打印版本号
print(self.__version__)
# 打印作者
print(self.__author__)
print(x, y)
if __name__ == '__main__':
a = ClassA()
a.func1(1, 2)
输出如下:
__init__
定义一个测试类
0.1
zhujian
1 2
__init__
每次创建类实例都会调用函数__init__(就是构造器)
self
类方法的第一个参数代表类实例,通常命名为self,在调用函数时不用输入该参数值
类继承
python支持多重继承机制
定义派生类ClassB
class ClassB(ClassA):
"""
派生类ClassB
"""
__version__ = '0.2'
__author__ = "zj"
def __init__(self):
super().__init__()
print("__init__ ClassB")
def func1(self, x, y):
super().func1(x, y)
# 打印类名
print(self.__class__.__name__)
# 打印日志
print(self.__doc__)
# 打印版本号
print(self.__version__)
# 打印作者
print(self.__author__)
print(x, y)
if __name__ == '__main__':
b = ClassB()
b.func1(3, 4)
重载
可以重载父类所有的方法和属性
调用父类
调用父类方法和属性用super()开头
检测继承关系
使用函数isinstance()检查实例类型,是类实例还是派生类实例
使用函数issubclass()检查类的继承关系,是父类还是同一个类
if __name__ == '__main__':
a = ClassA()
b = ClassB()
# 检查实例类型
print(isinstance(a, ClassA))
print(isinstance(b, ClassA))
# 检查继承关系
print(issubclass(b.__class__, ClassA))
print(issubclass(b.__class__, ClassB))
True
True
True
True
装饰器
参考:《大话设计模式》第六章 穿什么有这么重要? - 装饰模式
装饰模式(Decorator Pattern)能够动态的给对象添加额外功能,其目的是分离核心和装饰功能
python不仅支持面向对象的装饰模式实现,还提供了高阶函数装饰器(decorator),从语法层面支持装饰模式
面向对象实现
需要向旧的类添加新功能时,使用装饰模式能够在不改变原有类功能的情况下新增功能

实现方式:
- 定义抽象类
Component,定义装饰方法operation - 原有类
ConcreteComponent实现该抽象类以及装饰方法 - 定义装饰类
Decorator,实现赋值抽象类对象方法set_component,实现装饰方法operation - 定义具体装饰类
ConcreteDecoratorA和ConcreteDecoratorB,实现装饰方法operation - 定义原有类对象以及具体装饰类对象,使用方法
set_component进行对象赋值 - 最后执行装饰方法
# -*- coding: utf-8 -*-
# @Time : 19-6-11 下午4:20
# @Author : zj
from abc import ABCMeta, abstractmethod
class Component(metaclass=ABCMeta):
@abstractmethod
def operation(self):
pass
class ConcreteComponent(Component):
def __init__(self):
super(ConcreteComponent, self).__init__()
def operation(self):
print('concrete component')
class Decorator(Component):
def __init__(self):
super(Decorator, self).__init__()
self.component = None
def set_component(self, component):
assert isinstance(component, Component)
self.component = component
def operation(self):
if self.component is not None:
self.component.operation()
class ConcreteDecoratorA(Decorator):
def __init__(self):
super(ConcreteDecoratorA, self).__init__()
self.addedState = None
def operation(self):
super(ConcreteDecoratorA, self).operation()
self.addedState = 'New State'
print('concrete decorator a')
class ConcreteDecoratorB(Decorator):
def __init__(self):
super(ConcreteDecoratorB, self).__init__()
def operation(self):
super(ConcreteDecoratorB, self).operation()
self.added_behavior()
def added_behavior(self):
print('concrete decorator b')
if __name__ == '__main__':
cc = ConcreteComponent()
cda = ConcreteDecoratorA()
cdb = ConcreteDecoratorB()
cda.set_component(cc)
cdb.set_component(cda)
cdb.operation()
实现如下:
concrete component
concrete decorator a
concrete decorator b
上述实现中,首先执行原有类,然后按顺序执行具体装饰类,实际情况中可灵活进行调整
python装饰器
参考:
python提供了decorator – 装饰器用于装饰模式的实现
语法糖@wrapper
简单实现如下:
def log(func):
print('hello world')
return func
@log
def concrete_thing():
print("concrete thing")
if __name__ == '__main__':
concrete_thing()
执行方法concrete_thing()输出如下
hello world
concrete thing
等同于执行方法log(concrete_thing)(),其中语法@wrapper是python提供的语法糖
元信息变化
另一种实现是在装饰方法中新建内部函数并返回内部函数,实现如下:
def log(func):
def wrapper(*args, **kw):
print('before func')
func(*args, **kw)
print('after func')
return wrapper
@log
def concrete_thing(i, j):
z = i + j
print("concrete thing: %d" % z)
if __name__ == '__main__':
concrete_thing(1, 2)
print(concrete_thing.__name__)
上述代码执行具体方法concrete_thing并打印其函数名
before func
concrete thing: 3
after func
wrapper
函数名__name__发生了变化,可通过方法functools.wrap进行校正
from functools import wraps
def log(func):
@wraps(func)
def wrapper(*args, **kw):
print('before func')
func(*args, **kw)
print('after func')
return wrapper
@log
def concrete_thing(i, j):
z = i + j
print("concrete thing: %d" % z)
if __name__ == '__main__':
print(concrete_thing.__name__)
输出如下:
concrete_thing
装饰器参数
可以添加参数到装饰器,需要再包装一个函数到之前的装饰器函数
from functools import wraps
def use_logging(level):
def log(func):
@wraps(func)
def wrapper(*args, **kw):
if level == 'warn':
print('warn')
else:
print('nothing')
print('before func')
func(*args, **kw)
print('after func')
return wrapper
return log
@use_logging('warn')
def concrete_thing(i, j):
z = i + j
print("concrete thing: %d" % z)
if __name__ == '__main__':
concrete_thing(1, 2)
print(concrete_thing.__name__)
其实先等同于use_logging(3)(concrete_thing)(3, 2),输出结果如下:
warn
before func
concrete thing: 3
after func
concrete_thing
添加多个装饰器
可以分别进行多个装饰器的操作
from functools import wraps
def use_logging(level='verbose'):
def log(func):
@wraps(func)
def wrapper(*args, **kw):
if level == 'warn':
print('warn')
else:
print('nothing')
print('before func')
func(*args, **kw)
print('after func')
return func
return wrapper
return log
@use_logging('warn')
@use_logging()
def concrete_thing(i, j):
z = i + j
print("concrete thing: %d" % z)
if __name__ == '__main__':
concrete_thing(2, 3)
输出如下:
warn
before func
nothing
before func
concrete thing: 5
after func
after func
从上到下顺序执行装饰器,运行第一个装饰器use_logging('warn'),依次进入log->wrapper->func,执行func时触发第二个装饰器use_logging(),先执行log->wrapper,再执行func,然后依次退出(func仅执行一次)
装饰器类
之前的装饰器操作在函数上,同样可以定义包装器类
from functools import wraps
class Foo(object):
def __init__(self, level='verbose'):
self._level = level
def __call__(self, func):
@wraps(func)
def wrapper(*args, **kw):
print('before class')
func(*args, **kw)
print('after class')
self.notify()
return wrapper
def notify(self):
if self._level == 'verbose':
pass
else:
pass
@Foo()
def concrete_thing(i, j):
z = i + j
print("concrete thing: %d" % z)
if __name__ == '__main__':
concrete_thing(2, 3)
模拟上一节面向对象实现如下:
from functools import wraps
class Decorator(object):
def __init__(self, info):
self._info = info
def __call__(self, func):
@wraps(func)
def wrapper(*args, **kw):
self.notify()
func(*args, **kw)
return wrapper
def notify(self):
print(self._info)
class ConcreteComponent:
def __init__(self):
pass
@Decorator('concrete decorator a')
@Decorator('concrete decorator b')
def operation(self):
print('concrete component')
if __name__ == '__main__':
cc = ConcreteComponent()
cc.operation()
或者
from functools import wraps
class Decorator(object):
def __init__(self, info):
self._info = info
def __call__(self, cls):
@wraps(cls)
def wrapper(*args, **kw):
self.notify()
return cls()
return wrapper
def notify(self):
print(self._info)
@Decorator('concrete decorator a')
@Decorator('concrete decorator b')
class ConcreteComponent:
def __init__(self):
pass
def operation(self):
print('concrete component')
if __name__ == '__main__':
cc = ConcreteComponent()
cc.operation()
concrete decorator a
concrete decorator b
concrete component
[抽象基类]abc
python提供了abc模块用于抽象基类的创建
简单实现
- 创建一个抽象基类
Person,定义抽象方法print - 创建子类
Men和Women,实现抽象方法print
# -*- coding: utf-8 -*-
# @Time : 19-6-12 上午11:02
# @Author : zj
from abc import ABCMeta
from abc import abstractmethod
class Person(metaclass=ABCMeta):
@abstractmethod
def print(self):
pass
class Men(Person):
def print(self):
print("men")
class Women(Person):
def print(self):
print('women')
if __name__ == '__main__':
b = Men()
c = Women()
print(type(Person))
print(type(b))
print(type(c))
在上面代码中,使用abc.ABCMeta作为抽象基类的元类,使用装饰器@abstractmethod声明抽象方法
ABC
类ABC是abc模块中定义的类,其继承了元类ABCMeta,可以作为辅助类使用标准方式进行类定义,上面的抽象基类可改写成
class Person(ABC):
@abstractmethod
def print(self):
pass
抽象基类特性
无法实例化抽象基类
TypeError: Can't instantiate abstract class Person with abstract methods print
无法实例化未重写抽象方法的子类
TypeError: Can't instantiate abstract class Men with abstract methods print
模块和包
参考:
每个.py文件都是一个模块,包则是多个模块的组合
模块加载
使用import语句加载并初始化模块,也可以使用from ... import ...语句仅加载模块中的某个变量、函数、类、子模块
import a
import a.b.c
import a.b.c as c
from a.b import c
使用as关键字后,其模块名重定义为c
模块信息
获取模块名
可以在模块内部通过全局变量__name__获取
# 定义fibo.py
def print_module_name():
print(__name__)
# 定义main.py
import module.fibo as fibo
if __name__ == '__main__':
print(__name__)
fibo.print_module_name()
输出如下:
__main__
module.fibo
当前调用模块(主模块)的模块名变成__main__
全局符号表/本地符号表
每个模块都有自己私有的全局符号表以及本地符号表,使用函数globals()和locals()获取
import module.fibo as fibo
a = 3
def func():
c = 5
print(locals())
if __name__ == '__main__':
b = 4
print(globals())
func()
全局/本地符号表都是一个字典
{'__name__': '__main__', '__doc__': None, '__package__': None, '__loader__': <_frozen_importlib_external.SourceFileLoader object at 0x7fc805108f60>, '__spec__': None, '__annotations__': {}, '__builtins__': <module 'builtins' (built-in)>, '__file__': '/home/zj/pythonProjects/first/module/main.py', '__cached__': None, 'fibo': <module 'module.fibo' from '/home/zj/pythonProjects/first/module/fibo.py'>, 'a': 3, 'func': <function func at 0x7fc8051421e0>, 'b': 4}
{'c': 5}
注意 1:全局符号表包括全局变量、函数、模块信息
注意 2:本地符号表包括函数局部变量、方法等信息
如果在全局路径下调用方法locals,其作用和globals一样
模块搜索路径
加载import module时,解释器首先寻找内置模块是否匹配,然后按sys.path给出的目录列表进行搜索
import sys
print(sys.path)
在模块sys的属性path中按顺序保存有
- 包含输入脚本的目录(或未指定文件时的当前目录)
- 全局变量PYTHONPATH
python安装的默认设置
['/home/zj/pythonProjects/first/module',
'/home/zj/pythonProjects/first',
'/home/zj/software/anaconda/anaconda3/lib/python37.zip',
'/home/zj/software/anaconda/anaconda3/lib/python3.7',
'/home/zj/software/anaconda/anaconda3/lib/python3.7/lib-dynload',
'/home/zj/software/anaconda/anaconda3/lib/python3.7/site-packages',
'/home/zj/software/jetbrains/pycharm-2018.3.3/helpers/pycharm_matplotlib_backend']
同时还可以在运行过程中添加搜索路径
sys.path.append('../../adfa')
搜索名称列表
使用函数dir能够获取当前模块或指定模块的属性列表
def dir(p_object=None):
import module.fibo as fiboooo
import sys
a = 3
def func():
c = 5
print(locals())
if __name__ == '__main__':
print(dir())
print(dir(fiboooo))
如果没有输入参数,则返回当前模块的属性列表,包括定义的变量、函数、类、模块等信息
['__annotations__', '__builtins__', '__cached__', '__doc__', '__file__', '__loader__', '__name__', '__package__', '__spec__', 'a', 'fiboooo', 'func', 'sys']
['__builtins__', '__cached__', '__doc__', '__file__', '__loader__', '__name__', '__package__', '__spec__', 'fib', 'fib2', 'print_module_name']
标准模块属性
python内置函数和属性可通过检索模块builtins获取
import builtins
print(dir(builtins))
['ArithmeticError', 'AssertionError', 'AttributeError', 'BaseException', 'BlockingIOError', 'BrokenPipeError', 'BufferError', 'BytesWarning', 'ChildProcessError', 'ConnectionAbortedError', 'ConnectionError', 'ConnectionRefusedError', 'ConnectionResetError', 'DeprecationWarning', 'EOFError', 'Ellipsis', 'EnvironmentError', 'Exception', 'False', 'FileExistsError', 'FileNotFoundError', 'FloatingPointError', 'FutureWarning', 'GeneratorExit', 'IOError', 'ImportError', 'ImportWarning', 'IndentationError', 'IndexError', 'InterruptedError', 'IsADirectoryError', 'KeyError', 'KeyboardInterrupt', 'LookupError', 'MemoryError', 'ModuleNotFoundError', 'NameError', 'None', 'NotADirectoryError', 'NotImplemented', 'NotImplementedError', 'OSError', 'OverflowError', 'PendingDeprecationWarning', 'PermissionError', 'ProcessLookupError', 'RecursionError', 'ReferenceError', 'ResourceWarning', 'RuntimeError', 'RuntimeWarning', 'StopAsyncIteration', 'StopIteration', 'SyntaxError', 'SyntaxWarning', 'SystemError', 'SystemExit', 'TabError', 'TimeoutError', 'True', 'TypeError', 'UnboundLocalError', 'UnicodeDecodeError', 'UnicodeEncodeError', 'UnicodeError', 'UnicodeTranslateError', 'UnicodeWarning', 'UserWarning', 'ValueError', 'Warning', 'ZeroDivisionError', '__build_class__', '__debug__', '__doc__', '__import__', '__loader__', '__name__', '__package__', '__spec__', 'abs', 'all', 'any', 'ascii', 'bin', 'bool', 'breakpoint', 'bytearray', 'bytes', 'callable', 'chr', 'classmethod', 'compile', 'complex', 'copyright', 'credits', 'delattr', 'dict', 'dir', 'divmod', 'enumerate', 'eval', 'exec', 'exit', 'filter', 'float', 'format', 'frozenset', 'getattr', 'globals', 'hasattr', 'hash', 'help', 'hex', 'id', 'input', 'int', 'isinstance', 'issubclass', 'iter', 'len', 'license', 'list', 'locals', 'map', 'max', 'memoryview', 'min', 'next', 'object', 'oct', 'open', 'ord', 'pow', 'print', 'property', 'quit', 'range', 'repr', 'reversed', 'round', 'set', 'setattr', 'slice', 'sorted', 'staticmethod', 'str', 'sum', 'super', 'tuple', 'type', 'vars', 'zip']
包
当同一目录下有多个模块,甚至其子目录下还有模块,可以在每层目录下创建文件__init__.py,解释器会将该层目录视为包,使用包能够更有效的管理模块
.
├── main.py
└── module
├── fibo.py
├── __init__.py
└── test.py
module是一个包
加载包
可以使用import语句加载包中的模块
import module.fibo as fibo
import module.test as test
if __name__ == '__main__':
fibo.fib(3)
test.test()
在__init__.py上实现模块加载,在其他模块上使用
import module.test
import module.fibo
上面实现代码等价如下
from module import *
if __name__ == '__main__':
fibo.fib(3)
test.test()
加载部分模块
如果只想一次性加载部分的模块,在__init__.py中使用变量__all__
__all__ = ['test']
如果执行加载语句from module import *仅能载入模块test
from module import *
if __name__ == '__main__':
# fibo.fib(3)
test.test()
子模块导入
当子包下的模块要引用另一个子包模块时,推荐使用绝对路径进行导入
├── main.py
└── module
├── fibo.py
├── __init__.py
├── sub1
│ ├── __init__.py
│ └── sub1_test.py
├── sub2
│ ├── __init__.py
│ └── sub2_test.py
└── test.py
模块sub1_test引入模块sub2_test
# sub1_test
import module.sub2.sub2_test as test
def operation():
test.operation()
if __name__ == '__main__':
operation()
# sub2_test
def operation():
print(__name__)
运行模块sub1_test.py,输出如下:
module.sub2.sub2_test
在main.py中引入sub1_test.py,并执行opeation方法
import module.sub1.sub1_test as test
if __name__ == '__main__':
test.operation()
输出如下:
module.sub2.sub2_test
__pychache__
运行完成后,在每个模块的路径下生成文件夹__pychache__,用于缓存模块编译版本,其命名格式为
module_name.python_version.pyc
缓存文件由python解释器自动生成,根据修改日期决定是否重编译,其目的是加快载入速度
└── module
├── fibo.py
├── __init__.py
├── __pycache__
│ ├── fibo.cpython-37.pyc
│ ├── __init__.cpython-37.pyc
│ └── test.cpython-37.pyc
├── sub1
│ ├── __init__.py
│ ├── __pycache__
│ │ ├── __init__.cpython-37.pyc
│ │ └── sub1_test.cpython-37.pyc
│ └── sub1_test.py
├── sub2
│ ├── __init__.py
│ ├── __pycache__
│ │ ├── __init__.cpython-37.pyc
│ │ └── sub2_test.cpython-37.pyc
│ └── sub2_test.py
└── test.py
pytest
pytest是一个测试工具
安装
参考:Installation
# anaconda套件里好像自带了
$ pip install -U pytest
$ pytest --version
This is pytest version 4.0.2, imported from /home/zj/software/anaconda/anaconda3/lib/python3.7/site-packages/pytest.py
setuptools registered plugins:
pytest-remotedata-0.3.1 at /home/zj/software/anaconda/anaconda3/lib/python3.7/site-packages/pytest_remotedata/plugin.py
pytest-openfiles-0.3.1 at /home/zj/software/anaconda/anaconda3/lib/python3.7/site-packages/pytest_openfiles/plugin.py
pytest-doctestplus-0.2.0 at /home/zj/software/anaconda/anaconda3/lib/python3.7/site-packages/pytest_doctestplus/plugin.py
pytest-arraydiff-0.3 at /home/zj/software/anaconda/anaconda3/lib/python3.7/site-packages/pytest_arraydiff/plugin.py
测试命令
参考:The writing and reporting of assertions in tests
不同于unittest,pytest仅需使用assert语句就可以完成测试表达式,检测过程中pytest的高级断言反省(advanced assertion introspection)机制会处理中间过程
测试值
# 测试返回值是否正确
# content of test_assert1.py
def f():
return 3
def test_function():
assert f() == 4
也可以指定assert命令返回的信息:
$ assert a % 2 == 0, "value was odd, should be even"
测试异常
使用pytest.raise作为上下文管理器进行异常的验证
# 最简单的方式
import pytest
def test_zero_division():
with pytest.raises(ZeroDivisionError):
1 / 0
使用关键字message指定一个自定义失败信息
>>> with raises(ZeroDivisionError, message="Expecting ZeroDivisionError"):
pass
使用关键字match配置指定异常,可以使用正则表达式
import pytest
def myfunc():
raise ValueError("Exception 123 raised")
def test_match():
with pytest.raises(ValueError, match=r".* 123 .*"):
myfunc()
同时可以将捕获异常设置为对象,常用属性包括.type/.value/.traceback
def test_recursion_depth():
with pytest.raises(RuntimeError) as excinfo:
def f():
f()
f()
assert "maximum recursion" in str(excinfo.value)
# 打印
print(excinfo.type)
print(excinfo.value)
# 结果
<class 'RecursionError'>
maximum recursion depth exceeded
测试文件
搜索路径规范
参考:Conventions for Python test discovery
pytest会依据以下规范进行测试文件搜索:
- 如果没有参数指定,会搜索testpaths(如果有配置)和当前目录。另外,可以使用命令行参数组合任意的目录、文件名和节点
- 递归到目录,除非它们匹配norecursedirs
- 在这些目录中搜索
test_*.py或*_test.py文件,通过它们的测试包名导入(参考pytest导入机制) - 从测试文件中搜索以下测试项:
- 类定义以外带
test前缀的测试函数或方法 - 带
Test前缀的类定义(没有__init__函数)中带test前缀的测试函数或方法
- 类定义以外带
同时可以自定义测试路径,参考Changing standard (Python) test discovery
在python模块中,pytest也会使用标准的unittest.testcase子类化技术发现测试文件
pytest导入机制
参考:pytest import mechanisms and sys.path/PYTHONPATH
不同的文件布局下导入的测试模块不一致
文件和目录布局一
root/
|- foo/
|- __init__.py
|- conftest.py
|- bar/
|- __init__.py
|- tests/
|- __init__.py
|- test_foo.py
文件和目录布局二
root/
|- foo/
|- conftest.py
|- bar/
|- tests/
|- test_foo.py
执行测试命令
$ pytest root/
对于布局一而言,因为foo/bar/tests目录均包含__init__.py文件,所以它们都是python模块,所以对于测试文件test_foo.py而言,其模块名为foo.bar.tests.test_foo;对于conftest.py而言,其模块名为foo.conftest
对于布局二而言,没有一个目录包含__init__.py文件,所以对于测试文件test_foo.py,其模块名为test_foo;对于测试文件conftest.py,其模块名为conftest
所以布局二的测试文件名不能相同,否则会出错
文件布局
参考:Choosing a test layout / import rules
pytest支持两种常见布局
应用和测试分离
如果有许多测试文件,可以将应用文件和测试文件分离在不同目录下:
setup.py
mypkg/
__init__.py
app.py
view.py
tests/
test_app.py
test_view.py
...
这种布局有如下优势:
- 在执行
pip install ...之后,可以对已安装应用进行测试 - 在执行
pip install --editable ..之后,可以在本地副本上进行测试(Your tests can run against the local copy with an editable install after executing pip install --editable ..) - 如果根路径没有
setup.py文件,执行python -m pytest同样能将根路径导入sys.path,对本地副本进行直接测试
改进一
上述文件布局有一个缺陷在于测试文件都作为顶级模块进行导入(因为没有包),所以要求所有测试文件的文件名都不相同,或者可以修改如下:
setup.py
mypkg/
...
tests/
__init__.py
foo/
__init__.py
test_view.py
bar/
__init__.py
test_view.py
改进二
经过改进一后,模块名包含了包名:tests.foo.test_view/tests.bar.test_view,此时存在另一个问题,因为将根目录导入了sys.path,所以顺带把应用文件也载入了内存,所以无法测试已安装版本,在应用目录外加一个src包即可解决问题,修改如下:
setup.py
src/
mypkg/
__init__.py
app.py
view.py
tests/
__init__.py
foo/
__init__.py
test_view.py
bar/
__init__.py
test_view.py
测试在应用目录内
测试文件也可以放置在应用目录内:
setup.py
mypkg/
__init__.py
app.py
view.py
test/
__init__.py
test_app.py
test_view.py
...
执行时使用参数--pyargs
pytest --pyargs mypkg
pytest将发现mypkg的安装位置并收集测试。如果要测试已安装版本,采用布局一中的改进方式(用src文件夹)
检测
pytest可以检测单个测试文件,也可以同时检测多个测试文件
pytest vs. python -m pytest
参考:Calling pytest through python -m pytest
# 命令一
$ pytest [...]
# 命令二
$ python -m pytest [...]
上述两种执行方式等价,除了命令二会将当前目录添加在sys.path中
[python]读取XML文件
很多python模块提供了读取XML文件功能,参考用 ElementTree 在 Python 中解析 XM,利用xml.etree.cElementTree实现XML文件读取(操作最简单易懂,符合tree的读取)
XML文件
XML测试文件如下,表示一个图像的标注数据,包含了被标注的图像信息以及标注信息
<annotation>
<filename>000005.jpg</filename>
<source>
<database>The VOC2007 Database</database>
<annotation>PASCAL VOC2007</annotation>
<image>flickr</image>
<flickrid>325991873</flickrid>
</source>
<size>
<width>500</width>
<height>375</height>
<depth>3</depth>
</size>
<object>
<name>chair</name>
<pose>Rear</pose>
<truncated>0</truncated>
<difficult>0</difficult>
<bndbox>
<xmin>263</xmin>
<ymin>211</ymin>
<xmax>324</xmax>
<ymax>339</ymax>
</bndbox>
</object>
<object>
<name>chair</name>
<pose>Unspecified</pose>
<truncated>0</truncated>
<difficult>0</difficult>
<bndbox>
<xmin>165</xmin>
<ymin>264</ymin>
<xmax>253</xmax>
<ymax>372</ymax>
</bndbox>
</object>
<object>
<name>chair</name>
<pose>Unspecified</pose>
<truncated>1</truncated>
<difficult>1</difficult>
<bndbox>
<xmin>5</xmin>
<ymin>244</ymin>
<xmax>67</xmax>
<ymax>374</ymax>
</bndbox>
</object>
</annotation>
其结构如下图所示

解析
加载解析模块,读取xml文件
import xml.etree.cElementTree as ET
tree = ET.ElementTree(file='xml_test.xml')
读取根节点
root = tree.getroot()
每个节点均包含节点名tag和属性attrib
读取根节点名和属性
print(root.tag, root.attrib)
// 输出
annotation {}
类似数组一样按下标读取子节点
读取所有节点
for child in root:
print(child.tag, child.attrib)
// 输出
filename {}
source {}
size {}
segmented {}
object {}
object {}
object {}
读取size节点
>>> size = root[4]
>>> size
<Element 'size' at 0x7efe63ad0a70>
节点值可通过参数text获取
读取size节点下的子节点widht/height/depth的值
>>> for child in size:
... print(child.tag, child.text)
...
width 500
height 375
depth 3
示例
读取图像名(filename),图像宽/高/深度(width/height/depth),以及标注的目标名(name)和边界框坐标(xmin/ymin/xmax/ymax)
# -*- coding: utf-8 -*-
"""
@author: zj
@file: xml.py
@time: 2019-12-07
"""
import xml.etree.cElementTree as ET
if __name__ == '__main__':
tree = ET.ElementTree(file='xml_test.xml')
root = tree.getroot()
node_filename = root[0]
print("文件名:", node_filename.text)
node_size = root[2]
node_width = node_size[0]
node_height = node_size[1]
node_depth = node_size[2]
print('文件大小(宽, 高, 深度):(%s, %s, %s)' % (node_width.text, node_height.text, node_depth.text))
for i in range(3, 6):
node_obj = root[i]
node_name = node_obj[0]
node_bndbox = node_obj[4]
node_xmin = node_bndbox[0]
node_ymin = node_bndbox[1]
node_xmax = node_bndbox[2]
node_ymax = node_bndbox[3]
print('目标:' + node_name.text)
print('边界框坐标:(%s, %s, %s, %s)' % (node_xmin.text, node_ymin.text, node_xmax.text, node_ymax.text))
实现结果如下
文件名: 000005.jpg
文件大小(宽, 高, 深度):(500, 375, 3)
目标:chair
边界框坐标:(263, 211, 324, 339)
目标:chair
边界框坐标:(165, 264, 253, 372)
目标:chair
边界框坐标:(5, 244, 67, 374)
[numpy]提取数组中属于某一条件的数据
import numpy as np
data = np.arange(10)
print(data)
# 取偶数
print(data[data % 2 == 0])
# 取奇数
print(data[data % 2 == 1])
Anaconda
环境查询,安装,卸载,克隆
之前利用 Anaconda 安装完成了 Python3,现在需要重新安装 Python2
找到一篇 Conda 教程 - Managing Python,可以同时存在多个 Python 环境
主要内容:
查看环境列表
参考:Viewing a list of your environments
查看 Python 运行环境,可通过以下命令实现
conda info --envs
或者
conda env list
默认情况下仅有一个环境
zhujian@zhujian-virtual-machine:~$ conda env list
# conda environments:
#
base * /home/zhujian/software/anaconda/anaconda3
Note:在显示的环境列表中,用星号突出显示当前环境
创建新的 Python 环境
参考:
Installing a different version of Python
Creating an environment with commands
比如我已经安装了 Python3.6 的环境,想要安装 Python2.7 的环境
conda create -n py27 python=2.7
- 参数
py27指新创建的环境名 python=2.7指你想要创建的Python版本
执行日志如下:
Solving environment: done
## Package Plan ##
environment location: /home/zhujian/software/anaconda/anaconda3/envs/py27
added / updated specs:
- anaconda
- python=2.7
The following packages will be downloaded:
package | build
---------------------------|-----------------
sortedcontainers-1.5.10 | py27_0 45 KB
pathlib2-2.3.2 | py27_0 31 KB
pyparsing-2.2.0 | py27hf1513f8_1 93 KB
pytz-2018.4 | py27_0 211 KB
...
...
...
tornado-5.0.2 | 620 KB | ################################################################################################################################################################# | 100%
partd-0.3.8 | 30 KB | ################################################################################################################################################################# | 100%
Preparing transaction: done
Verifying transaction: done
Executing transaction: done
#
# To activate this environment, use:
# > source activate py27
#
# To deactivate an active environment, use:
# > source deactivate
#
同理,如果想要创建 Python3.6 的环境,命令如下:
conda create -n py36 python=3.6
激活/停止 Python 环境
参考:
安装完成后,列出 Python 环境列表
zhujian@zhujian-virtual-machine:~$ conda info --envs
# conda environments:
#
base * /home/zhujian/software/anaconda/anaconda3
py27 /home/zhujian/software/anaconda/anaconda3/envs/py27
切换到新创建的环境 py27
source activate py27
切换回基础环境
source deactivate
或者
source deactivate py27
显示环境名
参考:determining-your-current-environment
默认情况下,切换到新的环境后,会在命令行提示符显示该名称,可以通过以下命令去除:
conda config --set changeps1 false
开启命令:
conda config --set changeps1 true
卸载包
已卸载opencv为例
首先查询当前已安装opencv
$ conda list | grep opencv
libopencv 3.4.2 hb342d67_1
py-opencv 3.4.2 py37hb342d67_1
然后卸载相关包
$ conda uninstall libopencv py-opencv
Collecting package metadata: done
Solving environment: done
## Package Plan ##
environment location: /home/zj/software/anaconda/anaconda3
removed specs:
- libopencv
- py-opencv
The following packages will be REMOVED:
libopencv-3.4.2-hb342d67_1
py-opencv-3.4.2-py37hb342d67_1
Proceed ([y]/n)? y
Preparing transaction: done
Verifying transaction: done
Executing transaction: done
进一步清楚缓存
$ conda clean -p
Cache location: /home/zj/software/anaconda/anaconda3/pkgs
Will remove the following packages:
/home/zj/software/anaconda/anaconda3/pkgs
-----------------------------------------
libopencv-3.4.2-hb342d67_1 136.4 MB
py-opencv-3.4.2-py37hb342d67_1 5.1 MB
---------------------------------------------------
Total: 141.5 MB
Proceed ([y]/n)? y
removing libopencv-3.4.2-hb342d67_1
removing py-opencv-3.4.2-py37hb342d67_1
查询、安装指定版本
查询
在线查询
- 登录https://anaconda.org/search查询
- 使用命令
conda search查询
使用命令查询时可以制定源地址,常用源地址为conda-forge
$ conda search -c conda-forge opencv=4.1.0
命令行查询
参考:Anaconda中使用conda install出现PackagesNotFoundError【解决方法】
如果当前配置的源中没有指定包,会抛出如下错误
PackagesNotFoundError: The following packages are not available from current channels:
使用命令行查询存在指定包的源
$ anaconda search -t conda XXX
选择一个源进行安装即可(通常使用conda-forge)
$ conda install -c conda-forge XXX
// 或者
$ conda install -c https://conda.anaconda.org/conda-forge XXX
配置国内镜像源
新安装了Anaconda,发现使用conda下载时很慢,参考Anaconda 镜像使用帮助以加速
新建文件~/.condarc,添加
channels:
- defaults
show_channel_urls: true
default_channels:
- https://mirrors.tuna.tsinghua.edu.cn/anaconda/pkgs/main
- https://mirrors.tuna.tsinghua.edu.cn/anaconda/pkgs/free
- https://mirrors.tuna.tsinghua.edu.cn/anaconda/pkgs/r
custom_channels:
conda-forge: https://mirrors.tuna.tsinghua.edu.cn/anaconda/cloud
msys2: https://mirrors.tuna.tsinghua.edu.cn/anaconda/cloud
bioconda: https://mirrors.tuna.tsinghua.edu.cn/anaconda/cloud
menpo: https://mirrors.tuna.tsinghua.edu.cn/anaconda/cloud
pytorch: https://mirrors.tuna.tsinghua.edu.cn/anaconda/cloud
simpleitk: https://mirrors.tuna.tsinghua.edu.cn/anaconda/cloud
NodeJS
nodeJS安装
hexo框架基于Node.JS实现,经过实践发现同样需要了解一些有关Node的知识,记录一下
安装
参考Installation,使用源码安装Node.js
下载已编译安装包download,当前LTS版本为12.13.0
node-v12.13.0-linux-x64.tar.xz
解压文件,参考:Ubuntu 下解压tar.xz方法
# 首先解压xz压缩包
$ xz -d node-v12.13.0-linux-x64.tar.xz
# 然后解压tar压缩包
$ tar xvf node-v12.13.0-linux-x64.tar
设置环境变量,修改.bashrc文件
# Nodejs
export NODEJS_HOME=/path/to/node-v12.13.0-linux-x64/bin
export PATH=$NODEJS_HOME:$PATH
刷新文件
source ~/.bashrc
测试命令
$ node -v
v12.13.0
$ npm version
{
npm: '6.12.0',
ares: '1.15.0',
brotli: '1.0.7',
cldr: '35.1',
http_parser: '2.8.0',
icu: '64.2',
llhttp: '1.1.4',
modules: '72',
napi: '5',
nghttp2: '1.39.2',
node: '12.13.0',
openssl: '1.1.1d',
tz: '2019a',
unicode: '12.1',
uv: '1.32.0',
v8: '7.7.299.13-node.12',
zlib: '1.2.11'
}
$ npx -v
6.12.0
nodeJS初始化
初始化Node项目使用命令
npm init
创建一个基于
React的工程$ npm init react-app ./my-react-app
使用延迟初始化生成一个普通的
package.json$ mkdir my-npm-pkg && cd my-npm-pkg $ git init $ npm init
静默生成
package.json$ npm init -y
npm和cnpm
参考:
npm vs cnpm
npm(node package management)是node.js的包管理器
cnpm是淘宝提供的npm镜像
这是一个完整 npmjs.org 镜像,你可以用此代替官方版本(只读),同步频率目前为 10分钟 一次以保证尽量与官方服务同步。
查询
$ cnpm -v
cnpm@6.1.0 (/home/zj/software/nodejs/node-v12.13.0-linux-x64/lib/node_modules/cnpm/lib/parse_argv.js)
npm@6.13.0 (/home/zj/software/nodejs/node-v12.13.0-linux-x64/lib/node_modules/cnpm/node_modules/npm/lib/npm.js)
node@12.13.0 (/home/zj/software/nodejs/node-v12.13.0-linux-x64/bin/node)
npminstall@3.23.0 (/home/zj/software/nodejs/node-v12.13.0-linux-x64/lib/node_modules/cnpm/node_modules/npminstall/lib/index.js)
prefix=/home/zj/software/nodejs/node-v12.13.0-linux-x64
linux x64 4.15.0-64-generic
registry=https://r.npm.taobao.org
[npm]查询
本地已安装依赖
参考:
hexo 构建静态文件无法生成 index.html 等文件
查看当前项目已安装依赖
$ npm ls --depth 0
hexo-site@0.0.0 /home/zj/Documents/zjzstu.github.com/blogs
├── eslint@5.12.1
├── hexo@3.8.0
├── hexo-deployer-git@1.0.0
├── hexo-generator-archive@0.1.5
├── hexo-generator-category@0.1.3
├── hexo-generator-index@0.2.1
├── hexo-generator-tag@0.2.0
├── hexo-renderer-ejs@0.3.1
├── hexo-renderer-kramed@0.1.4
├── hexo-renderer-stylus@0.3.3
├── hexo-server@0.3.3
└── mkdirp@0.5.1
全局已安装依赖
$ npm ls -g --depth 0
/home/zj/software/nodejs/node-v10.15.0-linux-x64/lib
├── cnpm@6.0.0
├── hexo-cli@1.1.0
└── npm@6.4.1
[npm]安装
参考:npm安装卸载命令
快捷方式:用i替代install
本地安装
安装并写入package.json的dependencies
npm install xxx –save
安装并写入package.json的devDependencies
npm install xxx –save-dev
安装但不写入package.json
npm install xxx
安装package.json文件中的依赖到本地node_modules文件夹
npm install
全局安装
npm install -g xxx
问题:重新安装一遍后仍然存在err
npm install minipass yallist save-buffer mkdirp wrappy once minimatch inherits string-width ansi-regex number-is-nan strip-ansi is-fullwidth-code-point code-point-at console-control-strings concat-map balanced-match brace-expansion --save
npm WARN optional SKIPPING OPTIONAL DEPENDENCY: fsevents@1.2.7 (node_modules/fsevents):
npm WARN notsup SKIPPING OPTIONAL DEPENDENCY: Unsupported platform for fsevents@1.2.7: wanted {"os":"darwin","arch":"any"} (current: {"os":"linux","arch":"x64"})
+ yallist@3.0.3
+ minipass@2.3.5
+ save-buffer@1.1.0
+ inherits@2.0.3
+ ansi-regex@4.0.0
+ wrappy@1.0.2
+ minimatch@3.0.4
+ string-width@3.0.0
+ once@1.4.0
+ code-point-at@1.1.0
+ console-control-strings@1.1.0
+ brace-expansion@1.1.11
+ concat-map@0.0.1
+ balanced-match@1.0.0
+ is-fullwidth-code-point@2.0.0
+ strip-ansi@5.0.0
+ number-is-nan@1.0.1
+ mkdirp@0.5.1
added 20 packages from 3 contributors, updated 17 packages, moved 3 packages and audited 7176 packages in 6.223s
found 0 vulnerabilities
$ npm ls --depth 0
hexo-site@0.0.0 /home/zj/Documents/zjzstu.github.com/blogs
├── ansi-regex@4.0.0
├── balanced-match@1.0.0
├── brace-expansion@1.1.11
├── code-point-at@1.1.0
├── concat-map@0.0.1
├── console-control-strings@1.1.0
├── eslint@5.12.1
├── hexo@3.8.0
├── hexo-deployer-git@1.0.0
├── hexo-generator-archive@0.1.5
├── hexo-generator-category@0.1.3
├── hexo-generator-index@0.2.1
├── hexo-generator-tag@0.2.0
├── hexo-renderer-ejs@0.3.1
├── hexo-renderer-kramed@0.1.4
├── hexo-renderer-stylus@0.3.3
├── hexo-server@0.3.3
├── inherits@2.0.3
├── is-fullwidth-code-point@2.0.0
├── minimatch@3.0.4
├── minipass@2.3.5
├── mkdirp@0.5.1
├── number-is-nan@1.0.1
├── once@1.4.0
├── save-buffer@1.1.0
├── string-width@3.0.0
├── strip-ansi@5.0.0
├── wrappy@1.0.2
└── yallist@3.0.3
npm ERR! missing: mkdirp@0.5.1, required by node-pre-gyp@0.10.3
npm ERR! missing: minimist@0.0.8, required by mkdirp@0.5.1
npm ERR! missing: minimatch@3.0.4, required by ignore-walk@3.0.1
npm ERR! missing: brace-expansion@1.1.11, required by minimatch@3.0.4
npm ERR! missing: balanced-match@1.0.0, required by brace-expansion@1.1.11
npm ERR! missing: concat-map@0.0.1, required by brace-expansion@1.1.11
npm ERR! missing: console-control-strings@1.1.0, required by npmlog@4.1.2
npm ERR! missing: safe-buffer@5.1.2, required by readable-stream@2.3.6
npm ERR! missing: safe-buffer@5.1.2, required by string_decoder@1.1.1
npm ERR! missing: console-control-strings@1.1.0, required by gauge@2.7.4
npm ERR! missing: strip-ansi@3.0.1, required by gauge@2.7.4
npm ERR! missing: strip-ansi@3.0.1, required by string-width@1.0.2
npm ERR! missing: ansi-regex@2.1.1, required by strip-ansi@3.0.1
npm ERR! missing: minimatch@3.0.4, required by glob@7.1.3
npm ERR! missing: once@1.4.0, required by glob@7.1.3
npm ERR! missing: once@1.4.0, required by inflight@1.0.6
npm ERR! missing: wrappy@1.0.2, required by inflight@1.0.6
npm ERR! missing: wrappy@1.0.2, required by once@1.4.0
npm ERR! missing: minipass@2.3.5, required by tar@4.4.8
npm ERR! missing: mkdirp@0.5.1, required by tar@4.4.8
npm ERR! missing: safe-buffer@5.1.2, required by tar@4.4.8
npm ERR! missing: yallist@3.0.3, required by tar@4.4.8
npm ERR! missing: minipass@2.3.5, required by fs-minipass@1.2.5
npm ERR! missing: safe-buffer@5.1.2, required by minipass@2.3.5
npm ERR! missing: yallist@3.0.3, required by minipass@2.3.5
npm ERR! missing: minipass@2.3.5, required by minizlib@1.2.1
github提了一个bug:Ubuntu 16.04 Node.js Hexo npm ERR! missing
[npm]卸载
快捷方式:用un替代uninstall
本地卸载
卸载并删除dependencies
npm uninstall xxx --save
卸载并删除devDependencies
npm uninstall xxx --save-dev
仅是卸载
npm uninstall xxx
全局卸载
npm uninstall -g xxx
[package.json]脚本运行
参考:npm run
node支持运行linux脚本命令,可以在package.json中进行配置
配置
在package.json文件中预添加脚本,格式如下:
{
"scripts": {
"script-1": "commands",
"script-2": "commands",
"script-3": "commands"
}
}
配置完成后,使用命令npm run运行
$ npm run script-1
测试
比如添加测试脚本如下:
{
...
...
"scripts": {
"test": "echo \"hello nodejs\""
},
...
...
}
使用命令npm run运行
$ npm run test
> nodejs_test@1.0.0 test /home/zj/Downloads/nodejs_test
> echo "hello nodejs"
hello nodejs
CLion
[Ubuntu 16.04]安装
去官网下载CLion的Linux版本
得到一个.tar.gz文件,解压缩
$ tar -zxvf CLion-2018.3.3.tar.gz
进入bin目录下,启动脚本
$ cd clion-2018.3.3/bin/
$ ./clion.sh
参考:pyCharm最新2019激活码输入激活码
K71U8DBPNE-eyJsaWNlbnNlSWQiOiJLNzFVOERCUE5FIiwibGljZW5zZWVOYW1lIjoibGFuIHl1IiwiYXNzaWduZWVOYW1lIjoiIiwiYXNzaWduZWVFbWFpbCI6IiIsImxpY2Vuc2VSZXN0cmljdGlvbiI6IkZvciBlZHVjYXRpb25hbCB1c2Ugb25seSIsImNoZWNrQ29uY3VycmVudFVzZSI6ZmFsc2UsInByb2R1Y3RzIjpbeyJjb2RlIjoiSUkiLCJwYWlkVXBUbyI6IjIwMTktMDUtMDQifSx7ImNvZGUiOiJSUzAiLCJwYWlkVXBUbyI6IjIwMTktMDUtMDQifSx7ImNvZGUiOiJXUyIsInBhaWRVcFRvIjoiMjAxOS0wNS0wNCJ9LHsiY29kZSI6IlJEIiwicGFpZFVwVG8iOiIyMDE5LTA1LTA0In0seyJjb2RlIjoiUkMiLCJwYWlkVXBUbyI6IjIwMTktMDUtMDQifSx7ImNvZGUiOiJEQyIsInBhaWRVcFRvIjoiMjAxOS0wNS0wNCJ9LHsiY29kZSI6IkRCIiwicGFpZFVwVG8iOiIyMDE5LTA1LTA0In0seyJjb2RlIjoiUk0iLCJwYWlkVXBUbyI6IjIwMTktMDUtMDQifSx7ImNvZGUiOiJETSIsInBhaWRVcFRvIjoiMjAxOS0wNS0wNCJ9LHsiY29kZSI6IkFDIiwicGFpZFVwVG8iOiIyMDE5LTA1LTA0In0seyJjb2RlIjoiRFBOIiwicGFpZFVwVG8iOiIyMDE5LTA1LTA0In0seyJjb2RlIjoiR08iLCJwYWlkVXBUbyI6IjIwMTktMDUtMDQifSx7ImNvZGUiOiJQUyIsInBhaWRVcFRvIjoiMjAxOS0wNS0wNCJ9LHsiY29kZSI6IkNMIiwicGFpZFVwVG8iOiIyMDE5LTA1LTA0In0seyJjb2RlIjoiUEMiLCJwYWlkVXBUbyI6IjIwMTktMDUtMDQifSx7ImNvZGUiOiJSU1UiLCJwYWlkVXBUbyI6IjIwMTktMDUtMDQifV0sImhhc2giOiI4OTA4Mjg5LzAiLCJncmFjZVBlcmlvZERheXMiOjAsImF1dG9Qcm9sb25nYXRlZCI6ZmFsc2UsImlzQXV0b1Byb2xvbmdhdGVkIjpmYWxzZX0=-Owt3/+LdCpedvF0eQ8635yYt0+ZLtCfIHOKzSrx5hBtbKGYRPFDrdgQAK6lJjexl2emLBcUq729K1+ukY9Js0nx1NH09l9Rw4c7k9wUksLl6RWx7Hcdcma1AHolfSp79NynSMZzQQLFohNyjD+dXfXM5GYd2OTHya0zYjTNMmAJuuRsapJMP9F1z7UTpMpLMxS/JaCWdyX6qIs+funJdPF7bjzYAQBvtbz+6SANBgN36gG1B2xHhccTn6WE8vagwwSNuM70egpahcTktoHxI7uS1JGN9gKAr6nbp+8DbFz3a2wd+XoF3nSJb/d2f/6zJR8yJF8AOyb30kwg3zf5cWw==-MIIEPjCCAiagAwIBAgIBBTANBgkqhkiG9w0BAQsFADAYMRYwFAYDVQQDDA1KZXRQcm9maWxlIENBMB4XDTE1MTEwMjA4MjE0OFoXDTE4MTEwMTA4MjE0OFowETEPMA0GA1UEAwwGcHJvZDN5MIIBIjANBgkqhkiG9w0BAQEFAAOCAQ8AMIIBCgKCAQEAxcQkq+zdxlR2mmRYBPzGbUNdMN6OaXiXzxIWtMEkrJMO/5oUfQJbLLuMSMK0QHFmaI37WShyxZcfRCidwXjot4zmNBKnlyHodDij/78TmVqFl8nOeD5+07B8VEaIu7c3E1N+e1doC6wht4I4+IEmtsPAdoaj5WCQVQbrI8KeT8M9VcBIWX7fD0fhexfg3ZRt0xqwMcXGNp3DdJHiO0rCdU+Itv7EmtnSVq9jBG1usMSFvMowR25mju2JcPFp1+I4ZI+FqgR8gyG8oiNDyNEoAbsR3lOpI7grUYSvkB/xVy/VoklPCK2h0f0GJxFjnye8NT1PAywoyl7RmiAVRE/EKwIDAQABo4GZMIGWMAkGA1UdEwQCMAAwHQYDVR0OBBYEFGEpG9oZGcfLMGNBkY7SgHiMGgTcMEgGA1UdIwRBMD+AFKOetkhnQhI2Qb1t4Lm0oFKLl/GzoRykGjAYMRYwFAYDVQQDDA1KZXRQcm9maWxlIENBggkA0myxg7KDeeEwEwYDVR0lBAwwCgYIKwYBBQUHAwEwCwYDVR0PBAQDAgWgMA0GCSqGSIb3DQEBCwUAA4ICAQC9WZuYgQedSuOc5TOUSrRigMw4/+wuC5EtZBfvdl4HT/8vzMW/oUlIP4YCvA0XKyBaCJ2iX+ZCDKoPfiYXiaSiH+HxAPV6J79vvouxKrWg2XV6ShFtPLP+0gPdGq3x9R3+kJbmAm8w+FOdlWqAfJrLvpzMGNeDU14YGXiZ9bVzmIQbwrBA+c/F4tlK/DV07dsNExihqFoibnqDiVNTGombaU2dDup2gwKdL81ua8EIcGNExHe82kjF4zwfadHk3bQVvbfdAwxcDy4xBjs3L4raPLU3yenSzr/OEur1+jfOxnQSmEcMXKXgrAQ9U55gwjcOFKrgOxEdek/Sk1VfOjvS+nuM4eyEruFMfaZHzoQiuw4IqgGc45ohFH0UUyjYcuFxxDSU9lMCv8qdHKm+wnPRb0l9l5vXsCBDuhAGYD6ss+Ga+aDY6f/qXZuUCEUOH3QUNbbCUlviSz6+GiRnt1kA9N2Qachl+2yBfaqUqr8h7Z2gsx5LcIf5kYNsqJ0GavXTVyWh7PYiKX4bs354ZQLUwwa/cG++2+wNWP+HtBhVxMRNTdVhSm38AknZlD+PTAsWGu9GyLmhti2EnVwGybSD2Dxmhxk3IPCkhKAK+pl0eWYGZWG3tJ9mZ7SowcXLWDFAk0lRJnKGFMTggrWjV8GYpw5bq23VmIqqDLgkNzuoog==
接下来就是默认安装即可
[Ubuntu 16.04]OpenCV配置
CLion使用cmake作为配置工具,新建工程first,默认CMakeLists.txt如下:
# cmake所需最低版本
cmake_minimum_required(VERSION 3.13)
# 工程名
project(first)
# 设置C++规范
set(CMAKE_CXX_STANDARD 14)
# 可执行文件名以及源文件
add_executable(first main.cpp)
需要添加OpenCV的include地址以及libs地址,修改如下:
cmake_minimum_required(VERSION 3.13)
project(first)
set(CMAKE_CXX_STANDARD 14)
set(CMAKE_PREFIX_PATH /home/zj/opencv/debug-3.4.2--py27-py36)
find_package(OpenCV REQUIRED)
# 打印OpenCV版本
MESSAGE("OpenCV version: ${OpenCV_VERSION}")
# 添加include地址
include_directories(${OpenCV_INCLUDE_DIRS})
add_executable(first main.cpp)
# 添加libs地址
target_link_libraries(first ${OpenCV_LIBS})
源文件main.cpp如下
#include <iostream>
#include <opencv2/opencv.hpp>
using namespace cv;
using namespace std;
int main() {
std::cout << "Hello, World!" << std::endl;
Mat img = imread("../lena.jpg");
if (img.empty()) {
cout << "Error" << endl;
exit(1);
}
imshow("img", img);
waitKey(0);
return 0;
}
注意:生成的可执行文件在cmake-build-debug文件夹内,所以引用文件时注意路径
.
├── cmake-build-debug
│ ├── CMakeCache.txt
│ ├── CMakeFiles
│ ├── cmake_install.cmake
│ ├── first
│ ├── first.cbp
│ └── Makefile
├── CMakeLists.txt
├── lena.jpg
└── main.cpp
PyTorch
引言
之前操作过torch,是一个lua编写的深度学习训练框架,后来facebook发布了pytorch,使用python语言进行开发
pytorch是在torch的基础上发展而来的,它继承了许多内容,包括各种包的命名和类的定义,比如张量(tensor)
参考:pytorch
目标
- 替代
NumPY进行GPU的运算 - 提供最大灵活性和速度的深度学习平台
安装
指定版本/操作系统/安装方式/python语言/cuda版本
当前配置:
- PyTorch Stable(1.0)
- Ubuntu 16.04
- Anacodna3
- Python 3.6
- CUDA 10.0
安装命令如下:
$ conda install pytorch torchvision cudatoolkit=9.0 -c pytorch
加载torch
命令行方式
$ python
Python 3.6.8 |Anaconda, Inc.| (default, Dec 30 2018, 01:22:34)
[GCC 7.3.0] on linux
Type "help", "copyright", "credits" or "license" for more information.
>>> import torch
>>> torch.__version__
'1.0.1.post2'
>>>
文件方式
from __future__ import print_function
import torch
Tensor
Tensor(张量)是pytorch最重要的数据结构,类似与numpy库中的ndarray,能够实现多维数据的加/减/乘/除以及更加复杂的操作
- 创建
tensor - 重置大小
- 加/减/乘/除
- 矩阵运算
- 访问单个元素
in_place操作numpy格式转换cuda tensor
函数查询:
创建tensor
创建一个5行3列的tensor
# 赋值为0
torch.zeros(5, 3)
# 赋值为1
x = torch.ones(5, 3)
y = x.new_ones(5)
z = torch.ones_like(x)
# 未初始化
torch.empty(5, 3)
# 赋值均匀分布的随机数,大小在[0,1)
torch.rand(5, 3)
torch.randn_like(5, 3)
也可以转换列表为tensor
torch.tensor([[i+j for i in range(3)] for j in range(5)])
# 结果
tensor([[0, 1, 2],
[1, 2, 3],
[2, 3, 4],
[3, 4, 5],
[4, 5, 6]])
或者使用函数arange
# 创建一个连续列表
torch.arange(2, 10)
# 结果
tensor([3, 4, 5, 6, 7, 8, 9])
或者复制其他tensor
# 复制张量的大小一致
w=torch.ones(3,2)
w.copy_(x)
设置数据类型
在创建tensor的同时设置数据类型,比如
torch.zeros(5, 3, dtype=torch.float)
# 或
torch.tensor([[1 for i in range(3)] for j in range(5)], dtype=torch.float)
常用数据类型包括
torch.floattorch.double
重置大小
使用函数torch.Tensor.view可以重置大小
# 重建4x4数组
x = torch.randn(4, 4)
# 重置大小为16
y = x.view(16)
# 重置大小为2x8
z = x.view(-1, 8) # 输入-1值,那么该维度大小会参考其他维度
# 输出
$ print(x.size(), y.size(), z.size())
torch.Size([4, 4]) torch.Size([16]) torch.Size([2, 8])
或者使用函数torch.Tensor.reshape
加/减/乘/除
进行加/减/乘/除的张量大小相同,在对应位置上进行操作
x = torch.ones(2, 3)
y = torch.randn(2, 3)
# 加
re = torch.add(x, y)
# 减 x - y
re = torch.sub(x, y)
# 乘
re = torch.mul(x, y)
# 除 x / y
re = torch.div(x,y)
也可以使用参数out来复制结果
# 设置同样大小数组
re = torch.empty(2, 3)
# 加法
torch.add(x, y, out=re)
矩阵运算
# 转置
x = torch.ones(2,3) # 生成一个2行3列
y = x.t() # 得到一个3行2列
访问单个元素
可以执行类似Numpy数组的取值操作
x = torch.tensor([x for x in range(6)])
print(x)
# 取值
print(x[0])
# 切片
print(x[:3])
# 结果
tensor([0, 1, 2, 3, 4, 5])
tensor(0)
tensor([0, 1, 2])
使用函数item()将单个tensor转换成数值(标量,scalar)
print(x[3].item())
3
numpy格式转换
torch支持tensor和numpy数组的转换
tensor转换为numpy
a = torch.ones(5)
b = a.numpy()
numpy转换成tensor
import numpy as np
a = np.ones(5)
b = torch.from_numpy(a)
除了CharTensor以外,CPU上的其他Tensor都支持和Numpy的转换
注意:转换前后的数组共享底层内存,改变会同时发生
cuda tensor
利用CUDA调用GPU进行tensor运算,需要使用函数to进行GPU和CPU的转换
x = torch.tensor(5)
if torch.cuda.is_available(): # 测试cuda是否有效
device = torch.device("cuda") # 生成一个cuda对象
y = torch.ones_like(x, device=device) # 直接在GPU中创建y
x = x.to(device) # 转换CPU数据到GPU中,也可直接使用函数`.to("cuda")`
z = x + y # GPU运算
print(x)
print(y)
print(z)
print(z.to('cpu', torch.double)) # 转换数据到CPU,同时转换类型
[torchvision]加载数据集、批量以及转换操作
torchvision代码库包含了流行的数据集、模型结构和用于计算机视觉的常见图像转换。参考torchvision
组织结构
torchvision提供了简单有效的图像处理模式,其包含3个主要对象:
- 数据集(
DataSet) - 转换器(
Transform) - 加载器(
DataLoader)
数据集对象实现了数据加载功能,转换器对象实现了图像预处理功能,加载器对象实现了批量加载数据功能
数据集
参考torchvision.datasets,torchvision已实现了许多常用数据集对象。比如,加载CIFAR10数据集实现如下:
class torchvision.datasets.CIFAR10(root, train=True, transform=None, target_transform=None, download=False)
root:指定本地数据集的根目录train:指定是否是加载训练集transform:转换器对象(可选),指定图像加载后进行的预处理target_transform:转换器对象(可选),指定输出加载的图像前对其进行的预处理download:是否需要下载
实现如下:
trainset = torchvision.datasets.CIFAR10(root='./data', train=True, download=True, transform=transform)
testset = torchvision.datasets.CIFAR10(root='./data', train=False, download=True, transform=transform)
上述语句将数据集CIFAR10保存在data文件夹内,需要下载并提供了转换器对象
转换器
模块torchvision.transforms提供了常见的图像操作,包括
- 裁剪(随机裁剪/中央裁剪)
- 缩放
- 翻转(水平/垂直)
- 标准化
- 边界填充
所有实现的函数如下:
__all__ = ["Compose", "ToTensor", "ToPILImage", "Normalize", "Resize", "Scale", "CenterCrop", "Pad",
"Lambda", "RandomApply", "RandomChoice", "RandomOrder", "RandomCrop", "RandomHorizontalFlip",
"RandomVerticalFlip", "RandomResizedCrop", "RandomSizedCrop", "FiveCrop", "TenCrop", "LinearTransformation",
"ColorJitter", "RandomRotation", "RandomAffine", "Grayscale", "RandomGrayscale",
"RandomPerspective", "RandomErasing"]
如果要对图像进行多种预处理,可以使用类Compose组合在一起实现
class torchvision.transforms.Compose(transforms)
参数transforms是一个Transforms对象列表。比如,创建一个Compose类,组合了转换Tensor结构以及标准化功能,实现如下:
transform = transforms.Compose(
[transforms.ToTensor(),
transforms.Normalize((0.5, 0.5, 0.5), (0.5, 0.5, 0.5))])
加载器
类torch.util.data.DataLoader组合了数据集对象和转换器对象,并在给定数据集上提供iterable,实现批量输出图像数据的功能
实现如下:
trainloader = torch.utils.data.DataLoader(trainset, batch_size=4, shuffle=True, num_workers=2)
testloader = torch.utils.data.DataLoader(testset, batch_size=4, shuffle=False, num_workers=2)
其中trainset和testset是之前定义的数据集对象,上述操作中将批量大小设置为4,确定每轮打乱数据后输出,使用2个子进程来加载数据
定义加载器后,可以调用迭代器进行批量输出
# get some random training images
dataiter = iter(trainloader)
images, labels = dataiter.next()
每次迭代得到4个图像以及标签
示例
利用torchvision实现Cifar-10数据集的加载和显示
import torch
import torch.utils.data as data
import torchvision
import torchvision.transforms as transforms
import matplotlib.pyplot as plt
import numpy as np
transform = transforms.Compose(
[transforms.ToTensor(),
transforms.Normalize((0.5, 0.5, 0.5), (0.5, 0.5, 0.5))])
trainset = torchvision.datasets.CIFAR10(root='./data', train=True, download=False, transform=transform)
trainloader = torch.utils.data.DataLoader(trainset, batch_size=4, shuffle=True, num_workers=2)
testset = torchvision.datasets.CIFAR10(root='./data', train=False, download=False, transform=transform)
testloader = torch.utils.data.DataLoader(testset, batch_size=4, shuffle=False, num_workers=2)
classes = ('plane', 'car', 'bird', 'cat', 'deer', 'dog', 'frog', 'horse', 'ship', 'truck')
def imshow(img):
img = img / 2 + 0.5 # unnormalize
npimg = img.numpy()
plt.imshow(np.transpose(npimg, (1, 2, 0)))
plt.show()
if __name__ == '__main__':
# get some random training images
dataiter = iter(trainloader)
images, labels = dataiter.next()
print(images.size(), labels.size())
# show images
imshow(torchvision.utils.make_grid(images))
# print labels
print(' '.join('%5s' % classes[labels[j]] for j in range(4)))
之前已完成CIFAR10数据集下载,解压后放置在./data目录下
/data$ tree
.
└── cifar-10-batches-py
├── batches.meta
├── data_batch_1
├── data_batch_2
├── data_batch_3
├── data_batch_4
├── data_batch_5
├── readme.html
└── test_batch
1 directory, 8 files
获取第一批图像数据(Tensor结构,需要先转换成numpy数组)并显示

[torchvision]自定义数据集和预处理操作
除了torchvision提供的数据集之外,经常需要自定义数据集进行训练。torchvision也提供了相应的接口,通过自定义数据集类以及预处理操作,实现批量加载数据功能
原文教程:Writing Custom Datasets, DataLoaders and Transforms
翻译地址:[译]Writing Custom Datasets, DataLoaders and Transforms
通过torchvision操作自定义数据集,需要重新实现数据集类以及与预处理方法
数据
使用人脸标记点数据集https://download.pytorch.org/tutorial/faces.zip,加压后包含如下文件:
...
...
create_landmark_dataset.py
face_landmarks.csv
其中face_landmarks.csv包含了图像名以及对应的人脸标记点坐标,其格式如下:
image_name,part_0_x,part_0_y,part_1_x,part_1_y,part_2_x,part_2_y,part_3_x,...
0805personali01.jpg,27,83,27,98,29,113,33,127,39,139,49,150,60,159,73,166,87,...
1084239450_e76e00b7e7.jpg,70,236,71,257,75,278,82,299,90,320,100,340,111,359,...
第一行指定了每列的内容,从第二行开始就是图像名和对应标记点坐标。可以通过库pandas解析csv文件,示例如下:
from __future__ import print_function, division
import os
import pandas as pd
from skimage import io, transform
import matplotlib.pyplot as plt
# Ignore warnings
import warnings
warnings.filterwarnings("ignore")
landmarks_frame = pd.read_csv('./faces/face_landmarks.csv')
n = 65
img_name = landmarks_frame.iloc[n, 0]
landmarks = landmarks_frame.iloc[n, 1:].as_matrix()
landmarks = landmarks.astype('float').reshape(-1, 2)
print('Image name: {}'.format(img_name))
print('Landmarks shape: {}'.format(landmarks.shape))
print('First 4 Landmarks: {}'.format(landmarks[:4]))
def show_landmarks(image, landmarks):
"""Show image with landmarks"""
plt.imshow(image)
plt.scatter(landmarks[:, 0], landmarks[:, 1], s=10, marker='.', c='r')
plt.figure()
show_landmarks(io.imread(os.path.join('faces/', img_name)), landmarks)
plt.show()

自定义数据集
torchvision的数据集类继承自torch.utils.data.Dataset,必须重写方法__init__和__getitem__,还可以重写方法__len__
对于人脸标记点数据集,新建类FaceLandmarksDataset,在方法__init__中读取csv文件,在__getitem__中读取图像以及标记点信息,在__len__中计算图像个数
假定每个样本是一个dict类型,包含了图像数据和标记点数据,格式为{'image': image, 'landmarks': landmarks}
class FaceLandmarksDataset(Dataset):
"""Face Landmarks dataset."""
def __init__(self, csv_file, root_dir, transform=None):
"""
Args:
csv_file (string): Path to the csv file with annotations.
root_dir (string): Directory with all the images.
transform (callable, optional): Optional transform to be applied
on a sample.
"""
self.landmarks_frame = pd.read_csv(csv_file)
self.root_dir = root_dir
self.transform = transform
def __len__(self):
return len(self.landmarks_frame)
def __getitem__(self, idx):
if torch.is_tensor(idx):
idx = idx.tolist()
img_name = os.path.join(self.root_dir,
self.landmarks_frame.iloc[idx, 0])
image = io.imread(img_name)
landmarks = self.landmarks_frame.iloc[idx, 1:]
landmarks = np.array([landmarks])
landmarks = landmarks.astype('float').reshape(-1, 2)
sample = {'image': image, 'landmarks': landmarks}
if self.transform:
sample = self.transform(sample)
return sample
初始函数指定了3个参数:
csv_file:文件路径root_dir:图像保存根目录transform:可选,转换器,在读取样本时使用
转换器
由于自定义数据集的样本格式不一定与torchvision提供的数据集一致,所以需要重写预处理函数,然后通过类Compose组合在一起。当前实现缩放(Rescale)、随机裁剪(RandomCrop)以及转换Tensor结构功能(ToTensor)`
对于人脸标记点数据集而言,每个样本包含了图像数据以及标记点坐标集,所以
- 缩放操作:缩放图像,同时缩放坐标集
- 随机裁剪:在图像上随机提取区域图像后,需要修改坐标集的坐标大小
- 转换
Tensor:修改排列的顺序,对于numpy数组:H x W x C;对于Tensor数组:C x H x W
class Rescale(object):
"""Rescale the image in a sample to a given size.
Args:
output_size (tuple or int): Desired output size. If tuple, output is
matched to output_size. If int, smaller of image edges is matched
to output_size keeping aspect ratio the same.
"""
def __init__(self, output_size):
assert isinstance(output_size, (int, tuple))
self.output_size = output_size
def __call__(self, sample):
image, landmarks = sample['image'], sample['landmarks']
h, w = image.shape[:2]
if isinstance(self.output_size, int):
if h > w:
new_h, new_w = self.output_size * h / w, self.output_size
else:
new_h, new_w = self.output_size, self.output_size * w / h
else:
new_h, new_w = self.output_size
new_h, new_w = int(new_h), int(new_w)
img = transform.resize(image, (new_h, new_w))
# h and w are swapped for landmarks because for images,
# x and y axes are axis 1 and 0 respectively
landmarks = landmarks * [new_w / w, new_h / h]
return {'image': img, 'landmarks': landmarks}
class RandomCrop(object):
"""Crop randomly the image in a sample.
Args:
output_size (tuple or int): Desired output size. If int, square crop
is made.
"""
def __init__(self, output_size):
assert isinstance(output_size, (int, tuple))
if isinstance(output_size, int):
self.output_size = (output_size, output_size)
else:
assert len(output_size) == 2
self.output_size = output_size
def __call__(self, sample):
image, landmarks = sample['image'], sample['landmarks']
h, w = image.shape[:2]
new_h, new_w = self.output_size
top = np.random.randint(0, h - new_h)
left = np.random.randint(0, w - new_w)
image = image[top: top + new_h,
left: left + new_w]
landmarks = landmarks - [left, top]
return {'image': image, 'landmarks': landmarks}
class ToTensor(object):
"""Convert ndarrays in sample to Tensors."""
def __call__(self, sample):
image, landmarks = sample['image'], sample['landmarks']
# swap color axis because
# numpy image: H x W x C
# torch image: C X H X W
image = image.transpose((2, 0, 1))
return {'image': torch.from_numpy(image),
'landmarks': torch.from_numpy(landmarks)}
完成各个预处理功能的实现后,通过torchvision.transforms.Compose组成在一起
transforms.Compose([
Rescale(256),
RandomCrop(224),
ToTensor()
])
示例
完成自定义数据集和预处理函数后,就可以调用torch.utils.data.DataLoader方法进行批量处理
# -*- coding: utf-8 -*-
from __future__ import print_function, division
import os
import torch
import pandas as pd
from skimage import io, transform
import numpy as np
import matplotlib.pyplot as plt
from torch.utils.data import Dataset, DataLoader
from torchvision import transforms, utils
# Ignore warnings
import warnings
warnings.filterwarnings("ignore")
class FaceLandmarksDataset(Dataset):
"""Face Landmarks dataset."""
def __init__(self, csv_file, root_dir, transform=None):
"""
Args:
csv_file (string): Path to the csv file with annotations.
root_dir (string): Directory with all the images.
transform (callable, optional): Optional transform to be applied
on a sample.
"""
self.landmarks_frame = pd.read_csv(csv_file)
self.root_dir = root_dir
self.transform = transform
def __len__(self):
return len(self.landmarks_frame)
def __getitem__(self, idx):
if torch.is_tensor(idx):
idx = idx.tolist()
img_name = os.path.join(self.root_dir,
self.landmarks_frame.iloc[idx, 0])
image = io.imread(img_name)
landmarks = self.landmarks_frame.iloc[idx, 1:]
landmarks = np.array([landmarks])
landmarks = landmarks.astype('float').reshape(-1, 2)
sample = {'image': image, 'landmarks': landmarks}
if self.transform:
sample = self.transform(sample)
return sample
class Rescale(object):
"""Rescale the image in a sample to a given size.
Args:
output_size (tuple or int): Desired output size. If tuple, output is
matched to output_size. If int, smaller of image edges is matched
to output_size keeping aspect ratio the same.
"""
def __init__(self, output_size):
assert isinstance(output_size, (int, tuple))
self.output_size = output_size
def __call__(self, sample):
image, landmarks = sample['image'], sample['landmarks']
h, w = image.shape[:2]
if isinstance(self.output_size, int):
if h > w:
new_h, new_w = self.output_size * h / w, self.output_size
else:
new_h, new_w = self.output_size, self.output_size * w / h
else:
new_h, new_w = self.output_size
new_h, new_w = int(new_h), int(new_w)
img = transform.resize(image, (new_h, new_w))
# h and w are swapped for landmarks because for images,
# x and y axes are axis 1 and 0 respectively
landmarks = landmarks * [new_w / w, new_h / h]
return {'image': img, 'landmarks': landmarks}
class RandomCrop(object):
"""Crop randomly the image in a sample.
Args:
output_size (tuple or int): Desired output size. If int, square crop
is made.
"""
def __init__(self, output_size):
assert isinstance(output_size, (int, tuple))
if isinstance(output_size, int):
self.output_size = (output_size, output_size)
else:
assert len(output_size) == 2
self.output_size = output_size
def __call__(self, sample):
image, landmarks = sample['image'], sample['landmarks']
h, w = image.shape[:2]
new_h, new_w = self.output_size
top = np.random.randint(0, h - new_h)
left = np.random.randint(0, w - new_w)
image = image[top: top + new_h,
left: left + new_w]
landmarks = landmarks - [left, top]
return {'image': image, 'landmarks': landmarks}
class ToTensor(object):
"""Convert ndarrays in sample to Tensors."""
def __call__(self, sample):
image, landmarks = sample['image'], sample['landmarks']
# swap color axis because
# numpy image: H x W x C
# torch image: C X H X W
image = image.transpose((2, 0, 1))
return {'image': torch.from_numpy(image),
'landmarks': torch.from_numpy(landmarks)}
transformed_dataset = FaceLandmarksDataset(csv_file='faces/face_landmarks.csv',
root_dir='faces/',
transform=transforms.Compose([
Rescale(256),
RandomCrop(224),
ToTensor()
]))
for i in range(len(transformed_dataset)):
sample = transformed_dataset[i]
print(i, sample['image'].size(), sample['landmarks'].size())
if i == 3:
break
dataloader = DataLoader(transformed_dataset, batch_size=4,
shuffle=True, num_workers=4)
# Helper function to show a batch
def show_landmarks_batch(sample_batched):
"""Show image with landmarks for a batch of samples."""
images_batch, landmarks_batch = \
sample_batched['image'], sample_batched['landmarks']
batch_size = len(images_batch)
im_size = images_batch.size(2)
grid_border_size = 2
grid = utils.make_grid(images_batch)
plt.imshow(grid.numpy().transpose((1, 2, 0)))
for i in range(batch_size):
plt.scatter(landmarks_batch[i, :, 0].numpy() + i * im_size + (i + 1) * grid_border_size,
landmarks_batch[i, :, 1].numpy() + grid_border_size,
s=10, marker='.', c='r')
plt.title('Batch from dataloader')
for i_batch, sample_batched in enumerate(dataloader):
print(i_batch, sample_batched['image'].size(),
sample_batched['landmarks'].size())
# observe 4th batch and stop.
if i_batch == 3:
plt.figure()
show_landmarks_batch(sample_batched)
plt.axis('off')
plt.ioff()
plt.show()
break

[torchvision]ImageFolder使用
如果自定义数据集仅包含图像,那么可以使用torchvision.datasets.ImageFolder实现数据集加载
ImageFolder
ImageFolder是一个通用的数据加载器,假定图像按以下方式排列:
root/dog/xxx.png
root/dog/xxy.png
root/dog/xxz.png
root/cat/123.png
root/cat/nsdf3.png
root/cat/asd932_.png
类声明如下:
torchvision.datasets.ImageFolder(root, transform=None, target_transform=None, loader=<function default_loader>, is_valid_file=None)
root:根路径transform:(可选)回调函数/类,作用于图像处理target_transform:(可选)回调函数/类,作用于图像处理loader:(可选)具体加载图像函数(给定图像路径)is_valid_file:函数,给定图像路径,判断是否有效
示例
加载PASCAL VOC检测数据集,在voc文件夹内包含train和test训练集,其文件路径如下:
├── test
│ ├── aeroplane
│ ├── bicycle
│ ├── ...
│ ├── ...
└── train
├── aeroplane
├── bicycle
├── bird
├── ...
├── ...
# -*- coding: utf-8 -*-
"""
@author: zj
@file: voc.py
@time: 2019-12-09
"""
import torch
import torch.utils.data as data
import torchvision
import torchvision.transforms as transforms
import matplotlib.pyplot as plt
import numpy as np
transform = transforms.Compose(
[transforms.Resize((214, 214)), transforms.ToTensor()])
# transforms.Normalize((0.5, 0.5, 0.5), (0.5, 0.5, 0.5))
trainset = torchvision.datasets.ImageFolder('./voc/train', transform=transform)
trainloader = torch.utils.data.DataLoader(trainset, batch_size=4, shuffle=True, num_workers=2)
testset = torchvision.datasets.ImageFolder('./voc/test', transform=transform)
testloader = torch.utils.data.DataLoader(testset, batch_size=4, shuffle=False, num_workers=2)
if __name__ == '__main__':
# 打印训练集长度
print('trainset lens: ', trainset.__len__())
print('testset lens: ', testset.__len__())
# 打印类别以及标签
classes, class_to_idx = trainset._find_classes('./voc/train')
print(classes)
print(class_to_idx)
# 从数据集中提取图像并显示
img = trainset.__getitem__(1)[0]
numpy_img = img.numpy().transpose((1, 2, 0))
plt.figure()
plt.imshow(numpy_img)
plt.show()
# 通过迭代器提取批量图片并显示
# get some random training images
dataiter = iter(trainloader)
images, labels = dataiter.__next__()
plt.figure()
for i in range(4):
plt.subplot(2, 2, i + 1)
npimg = images[i].numpy()
plt.imshow(np.transpose(npimg, (1, 2, 0)))
plt.title(''.join([classes[labels[i]], ' ', str(class_to_idx[classes[labels[i]]])]))
plt.show()
通过ImageFolder对象加载一张图像,通过迭代器DataLoader批量加载


LeNet-5定义
LeNet-5模型结构图所下所示:

- 输入层
INPUT:32x32大小 - 卷积层
C1:6x28x28大小,卷积核5x5 - 池化层
S2:6x14x14大小,滤波器2x2 - 卷积层
C3:16x10x10大小,卷积核5x5 - 池化层
S4:16x5x5大小,滤波器2x2 - 卷积层
C5:120大小,滤波器5x5 - 全连接层
F6:84大小 - 输出层
OUTPUT:10大小
类定义
# -*- coding: utf-8 -*-
import torch
import torch.nn as nn
import torch.nn.functional as F
class LeNet(nn.Module):
"""
LeNet-5网络模型
输入图像大小为1x32x32
"""
def __init__(self):
super(LeNet, self).__init__()
# 卷积层
# 1 input image channel, 6 output channels, 5x5 square convolution
self.conv1 = nn.Conv2d(1, 6, (5, 5))
# 池化层
# Max pooling over a (2, 2) window
self.pool2 = nn.MaxPool2d(2, 2)
# If the size is a square you can only specify a single number
# 如果滤波器是正方形,可以只输入一个数值
self.conv3 = nn.Conv2d(6, 16, 5)
# If the size is a square you can only specify a single number
self.pool4 = nn.MaxPool2d(2)
# 全连接层
# an affine operation: y = Wx + b
self.fc5 = nn.Linear(16 * 5 * 5, 120)
self.fc6 = nn.Linear(120, 84)
self.fc7 = nn.Linear(84, 10)
def forward(self, x):
x = self.pool2(F.relu(self.conv1(x)))
x = self.pool4(F.relu(self.conv3(x)))
x = x.view(-1, self.num_flat_features(x))
x = F.relu(self.fc5(x))
x = F.relu(self.fc6(x))
x = self.fc7(x)
return x
def num_flat_features(self, x):
size = x.size()[1:] # all dimensions except the batch dimension
num_features = 1
for s in size:
num_features *= s
return num_features
if __name__ == '__main__':
net = LeNet()
print(net)
结果如下:
LeNet(
(conv1): Conv2d(1, 6, kernel_size=(5, 5), stride=(1, 1))
(pool2): MaxPool2d(kernel_size=2, stride=2, padding=0, dilation=1, ceil_mode=False)
(conv3): Conv2d(6, 16, kernel_size=(5, 5), stride=(1, 1))
(pool4): MaxPool2d(kernel_size=2, stride=2, padding=0, dilation=1, ceil_mode=False)
(fc5): Linear(in_features=400, out_features=120, bias=True)
(fc6): Linear(in_features=120, out_features=84, bias=True)
(fc7): Linear(in_features=84, out_features=10, bias=True)
)
调用
输入是一个4维向量,分别表示样本数量、通道数、高和宽
$$\left(N, C_{i n}, H_{i n}, W_{i n}\right)$$
输出是一个2维向量,分别表示样本数量和分类结果
$$ \left(N, C_{o u t}\right) $$
if __name__ == '__main__':
net = LeNet()
# print(net)
inp = torch.randn(2, 1, 32, 32)
print(inp.size())
out = net.forward(inp)
print(out)
print(out.size())
torch.Size([2, 1, 32, 32])
tensor([[ 0.0248, -0.0205, 0.0697, 0.0797, 0.0734, -0.0455, -0.0684, -0.0488,
0.1245, -0.1140],
[ 0.0130, -0.0355, 0.0659, 0.0751, 0.0736, -0.0455, -0.0391, -0.0383,
0.1408, -0.1173]], grad_fn=<AddmmBackward>)
torch.Size([2, 10])
AlexNet定义
AlexNet使用5层卷积层和3层全连接层
定义网络
pytorch已经定义好了AlexNet模型
import torchvision.models as models
alexnet = models.alexnet()
其实现和原文有差别
AlexNet(
(features): Sequential(
(0): Conv2d(3, 64, kernel_size=(11, 11), stride=(4, 4), padding=(2, 2))
(1): ReLU(inplace)
(2): MaxPool2d(kernel_size=3, stride=2, padding=0, dilation=1, ceil_mode=False)
(3): Conv2d(64, 192, kernel_size=(5, 5), stride=(1, 1), padding=(2, 2))
(4): ReLU(inplace)
(5): MaxPool2d(kernel_size=3, stride=2, padding=0, dilation=1, ceil_mode=False)
(6): Conv2d(192, 384, kernel_size=(3, 3), stride=(1, 1), padding=(1, 1))
(7): ReLU(inplace)
(8): Conv2d(384, 256, kernel_size=(3, 3), stride=(1, 1), padding=(1, 1))
(9): ReLU(inplace)
(10): Conv2d(256, 256, kernel_size=(3, 3), stride=(1, 1), padding=(1, 1))
(11): ReLU(inplace)
(12): MaxPool2d(kernel_size=3, stride=2, padding=0, dilation=1, ceil_mode=False)
)
(classifier): Sequential(
(0): Dropout(p=0.5)
(1): Linear(in_features=9216, out_features=4096, bias=True)
(2): ReLU(inplace)
(3): Dropout(p=0.5)
(4): Linear(in_features=4096, out_features=4096, bias=True)
(5): ReLU(inplace)
(6): Linear(in_features=4096, out_features=1000, bias=True)
)
)
原文实现如下:
import torch.nn as nn
__all__ = ['AlexNet', 'alexnet']
class AlexNet(nn.Module):
def __init__(self, num_classes=1000):
super(AlexNet, self).__init__()
self.conv1 = nn.Sequential(
nn.Conv2d(3, 96, kernel_size=11, stride=4),
nn.ReLU(inplace=True),
nn.MaxPool2d(kernel_size=3, stride=2)
)
self.conv2 = nn.Sequential(
nn.Conv2d(96, 256, kernel_size=5, padding=2),
nn.ReLU(inplace=True),
nn.MaxPool2d(kernel_size=3, stride=2)
)
self.conv3 = nn.Sequential(
nn.Conv2d(256, 384, kernel_size=3, padding=1),
nn.ReLU(inplace=True)
)
self.conv4 = nn.Sequential(
nn.Conv2d(384, 384, kernel_size=3, padding=1),
nn.ReLU(inplace=True)
)
self.conv5 = nn.Sequential(
nn.Conv2d(384, 256, kernel_size=3, padding=1),
nn.ReLU(inplace=True),
nn.MaxPool2d(kernel_size=3, stride=2)
)
self.dense = nn.Sequential(
nn.Dropout(),
nn.Linear(6 * 6 * 256, 4096),
nn.ReLU(inplace=True),
nn.Dropout(),
nn.Linear(4096, 4096),
nn.ReLU(inplace=True),
nn.Linear(4096, num_classes),
)
def forward(self, x):
x = self.conv1(x)
x = self.conv2(x)
x = self.conv3(x)
x = self.conv4(x)
x = self.conv5(x)
x = x.view(x.size(0), 256 * 6 * 6)
x = self.dense(x)
return x
def alexnet(**kwargs):
model = AlexNet(**kwargs)
return model
if __name__ == '__main__':
net = alexnet()
print(net)
网络结构如下:
AlexNet(
(conv1): Sequential(
(0): Conv2d(3, 96, kernel_size=(11, 11), stride=(4, 4))
(1): ReLU(inplace)
(2): MaxPool2d(kernel_size=3, stride=2, padding=0, dilation=1, ceil_mode=False)
)
(conv2): Sequential(
(0): Conv2d(96, 256, kernel_size=(5, 5), stride=(1, 1), padding=(2, 2))
(1): ReLU(inplace)
(2): MaxPool2d(kernel_size=3, stride=2, padding=0, dilation=1, ceil_mode=False)
)
(conv3): Sequential(
(0): Conv2d(256, 384, kernel_size=(3, 3), stride=(1, 1), padding=(1, 1))
(1): ReLU(inplace)
)
(conv4): Sequential(
(0): Conv2d(384, 384, kernel_size=(3, 3), stride=(1, 1), padding=(1, 1))
(1): ReLU(inplace)
)
(conv5): Sequential(
(0): Conv2d(384, 256, kernel_size=(3, 3), stride=(1, 1), padding=(1, 1))
(1): ReLU(inplace)
(2): MaxPool2d(kernel_size=3, stride=2, padding=0, dilation=1, ceil_mode=False)
)
(dense): Sequential(
(0): Dropout(p=0.5)
(1): Linear(in_features=9216, out_features=4096, bias=True)
(2): ReLU(inplace)
(3): Dropout(p=0.5)
(4): Linear(in_features=4096, out_features=4096, bias=True)
(5): ReLU(inplace)
(6): Linear(in_features=4096, out_features=1000, bias=True)
)
)
训练网络
使用cifar-10进行测试,输入图像缩放为227x227大小,使用SGD进行反向更新,每次批量训练100张图像,学习率为0.001,momentum为0.9
500次训练精度如下:
# -*- coding: utf-8 -*-
# @Time : 19-4-6 上午9:54
# @Author : zj
import matplotlib.pyplot as plt
accuracy_list = [10.59, 12.52, 11.36, 29.54, 36.71, 39.91, 42.3, 46.82, 48.18, 52.17, 54.7, 56.12, 59.33, 58.36, 62.33,
63.08, 65.91, 65.22, 68.47, 69.99, 69.78, 72.05, 72.17, 73.18, 74.03, 75.09, 74.81, 75.36, 76.54,
75.88, 78.21, 77.23, 77.51, 77.84, 78.59, 78.83, 78.76, 78.11, 79.1, 79.52, 79.92, 79.78, 79.72, 79.96,
80.2, 80.62, 80.52, 80.65, 80.68, 80.28, 80.54, 80.41, 81.25, 81.21, 81.4, 81.27, 81.1, 80.69, 80.77,
81.33, 81.52, 80.73, 80.99, 81.65, 80.92, 81.9, 81.51, 81.35, 81.57, 80.92, 81.9, 82.14, 81.52, 81.7,
82.2, 81.84, 81.88, 82.05, 81.96, 81.63, 82.3, 81.84, 81.95, 81.91, 82.05, 82.32, 81.53, 81.55, 81.83,
82.28, 81.65, 82.6, 82.11, 81.84, 82.59, 82.48, 82.0, 82.13, 82.58, 82.87, 82.5, 82.58, 81.59, 82.48,
82.49, 82.41, 82.71, 82.26, 82.55, 82.74, 82.49, 82.2, 82.48, 82.67, 82.7, 82.31, 82.55, 82.8, 83.04,
82.78, 82.34, 83.3, 82.58, 82.33, 82.94, 82.58, 82.98, 82.82, 82.57, 83.18, 82.91, 82.92, 82.56, 83.4,
83.49, 83.0, 82.89, 82.82, 83.39, 82.69, 82.99, 82.65, 82.6, 83.15, 82.96, 82.83, 83.03, 83.42, 82.6,
82.98, 83.05, 83.27, 82.98, 82.98, 83.09, 82.85, 82.91, 83.04, 83.22, 83.25, 83.1, 82.91, 82.72, 82.86,
83.3, 83.42, 83.36, 82.47, 83.09, 82.92, 83.62, 83.42, 82.97, 82.92, 82.7, 83.02, 83.15, 83.35, 82.98,
83.28, 83.2, 82.84, 83.19, 82.9, 83.12, 83.21, 83.31, 83.14, 83.79, 83.03, 83.31, 83.72, 83.61, 83.34,
83.25, 83.05, 83.29, 83.44, 83.41, 83.35, 83.33, 83.48, 83.69, 82.88, 83.52, 83.63, 83.64, 83.18,
83.09, 83.44, 83.03, 83.44, 83.25, 83.04, 83.97, 83.5, 82.94, 83.37, 83.05, 83.34, 82.95, 83.41, 83.3,
83.56, 83.09, 83.26, 83.49, 82.61, 83.07, 83.7, 83.64, 82.87, 83.24, 83.35, 83.54, 83.38, 82.93, 83.56,
83.63, 83.35, 83.42, 83.16, 83.51, 83.54, 83.82, 83.49, 83.83, 83.18, 83.57, 83.07, 82.61, 83.95,
83.48, 83.48, 83.59, 83.79, 83.45, 83.46, 83.28, 83.55, 83.39, 84.02, 83.57, 83.88, 83.65, 83.6, 83.53,
83.63, 83.37, 83.63, 83.82, 84.03, 83.75, 83.27, 83.42, 83.85, 83.59, 83.56, 83.09, 83.08, 83.33,
83.73, 83.82, 83.25, 83.4, 83.24, 83.27, 83.56, 83.91, 83.34, 84.06, 83.04, 83.63, 83.64, 83.79, 83.91,
84.11, 83.47, 83.37, 83.93, 83.94, 83.58, 83.59, 83.71, 83.46, 83.94, 83.59, 83.51, 84.03, 83.56,
83.47, 82.81, 83.39, 83.97, 83.32, 83.64, 83.77, 83.71, 83.89, 83.76, 83.7, 83.42, 83.54, 83.3, 83.51,
83.28, 83.85, 83.72, 83.28, 83.67, 83.77, 83.69, 83.58, 83.65, 84.01, 83.6, 83.79, 83.99, 84.13, 83.47,
83.8, 84.11, 83.71, 83.61, 83.77, 83.69, 83.47, 83.69, 83.78, 84.09, 84.08, 84.22, 83.94, 84.33, 83.72,
83.91, 84.23, 83.6, 83.93, 83.93, 84.06, 83.96, 84.03, 83.45, 83.54, 83.52, 83.44, 83.86, 83.68, 83.6,
83.83, 84.04, 83.87, 83.46, 84.41, 84.06, 84.17, 83.69, 83.57, 83.49, 84.09, 83.52, 83.68, 84.17,
83.66, 83.98, 84.33, 83.92, 83.84, 83.99, 83.55, 83.31, 83.97, 83.88, 83.52, 83.61, 83.74, 83.63,
83.72, 83.85, 83.89, 84.02, 83.91, 83.98, 83.8, 84.03, 83.96, 83.39, 83.94, 84.29, 84.23, 84.13, 84.14,
83.7, 84.16, 84.19, 84.03, 83.89, 84.14, 83.75, 83.97, 83.81, 83.6, 83.95, 84.32, 83.96, 83.64, 83.9,
84.08, 83.46, 83.77, 83.86, 83.98, 84.2, 83.86, 83.84, 84.16, 83.97, 84.19, 83.66, 83.8, 83.13, 84.09,
83.97, 84.33, 84.05, 83.97, 84.4, 84.12, 83.14, 83.83, 84.2, 84.09, 83.85, 83.51, 83.63, 83.63, 83.87,
83.64, 83.39, 83.89, 83.35, 83.88, 84.0, 84.27, 83.85, 83.95, 83.46, 83.87, 83.54, 84.0, 84.07, 84.01,
84.04, 84.62, 83.79, 84.04, 84.34, 84.42, 83.88, 83.78, 83.61, 83.95, 83.93, 84.17, 84.11, 84.11,
84.08, 83.96, 84.16, 83.93, 83.93, 83.92, 83.93, 84.28, 84.11, 84.32, 83.61, 83.69, 83.77]
if __name__ == '__main__':
max_accuracy = max(accuracy_list)
index = accuracy_list.index(max_accuracy)
print(max_accuracy)
print(index)
y = accuracy_list
fig = plt.figure(1)
plt.xlabel('迭代次数')
plt.ylabel('精度')
plt.plot(y)
plt.text(400, 20, 'max: %.2f %%' % (max_accuracy), fontsize=12)
plt.text(400, 24, 'epoch: %d' % (index + 1), fontsize=12)
plt.show()

500次迭代平均损失如下:
import matplotlib.pyplot as plt
loss_list = [2.3023554348945616, 2.301481910228729, 2.297154522895813, 2.1280875062942504, 1.8379582653045654,
1.669295969247818, 1.5810251920223235, 1.5055523529052734, 1.4295441448688506, 1.3665236794948579,
1.3059324505329133, 1.2510101475715638, 1.1981551232337952, 1.1395108386278152, 1.0867853610515594,
1.0324375677108764, 0.979730964064598, 0.9378578369617462, 0.8985381683111191, 0.850989138007164,
0.8172901912927627, 0.7802419648766518, 0.7401535509228706, 0.711376772403717, 0.6795852983593941,
0.6541237514615059, 0.631098689198494, 0.6107631900906563, 0.5851399653553963, 0.5635620189905166,
0.5435092575252056, 0.5184067181944847, 0.5014592601656914, 0.4858271193504333, 0.46333419311046603,
0.4532018289864063, 0.42763098707795144, 0.4132226316332817, 0.396316266566515, 0.37738977929949763,
0.3628608306646347, 0.3496949945986271, 0.3305501665472984, 0.31730471420288087, 0.30102346366643906,
0.2896851798892021, 0.27939001682400705, 0.25949965964257715, 0.246481137663126, 0.23442410534620284,
0.22163819167017937, 0.21265612183511257, 0.20047365176677703, 0.18742387757450343, 0.17855865625292064,
0.1677149810567498, 0.154177688293159, 0.15042978563904763, 0.14268546827882528, 0.1368310364112258,
0.12530359837412836, 0.12169317781552673, 0.11370081383734941, 0.11167965089157224, 0.10163202315941453,
0.09595007120072842, 0.09459267865866422, 0.08645266618207097, 0.0842693310007453, 0.08304678938165307,
0.07992156226374209, 0.07701870370097458, 0.0695659006871283, 0.0664693288076669, 0.06642133915517479,
0.06265601583383977, 0.056990278281271456, 0.05502620827779174, 0.0563024969175458, 0.05179337090905756,
0.05390102145634591, 0.05013217957224697, 0.047894780240021646, 0.04979440573137253, 0.044015709917992356,
0.04271620447095484, 0.04101199016859755, 0.04031469342298806, 0.03884203802514821, 0.039219345845282076,
0.036577904852572826, 0.03907706611114554, 0.0361761428124737, 0.03163229085784405, 0.035862435116432605,
0.03195161422342062, 0.03404081508750096, 0.02858095672307536, 0.030052931246813387, 0.029494990379782395,
0.030383618766674773, 0.026562911146320402, 0.028536910780705513, 0.029512147314613685,
0.02555940634361468, 0.02630987067054957, 0.0258638685264159, 0.0254664005425293, 0.02428429182409309,
0.02438895021006465, 0.0245781307623256, 0.025463432995486073, 0.0235929683544673, 0.021498547429335303,
0.020774107778212057, 0.021545217675971798, 0.021813443814986386, 0.020541449017007836,
0.01820706488052383, 0.017649245951964987, 0.020058365898672492, 0.018405225903261452,
0.018621295122196898, 0.019838776429649443, 0.016380658557754942, 0.017164871873974336,
0.018028026151354425, 0.019356709198094905, 0.018231124180485496, 0.018395765487803147,
0.016105072998383548, 0.015179727331269533, 0.016299875374126714, 0.015085068691696506,
0.018948303679964737, 0.01599038930342067, 0.016047433278290554, 0.01707094766572118, 0.013952232679934241,
0.015925398912862876, 0.012253207897534594, 0.014249857271206565, 0.015343778268026654,
0.014050648485252167, 0.015497341806883924, 0.012989436029689386, 0.012973057323062675,
0.013189709749247413, 0.013074487987963948, 0.012896031438343926, 0.01463514385704184,
0.013017207039461937, 0.01260304382641334, 0.012487518818728859, 0.01148568089932087, 0.012231810154946288,
0.012639161194616463, 0.011949124958191533, 0.011104230772500159, 0.01110897874494549, 0.01184638007718604,
0.01075845922465669, 0.011803323366504628, 0.011189079596078955, 0.011852088407526025,
0.010032479642424732, 0.010075568100990496, 0.010237885579757858, 0.008160053584695562,
0.009685541810453287, 0.010290937676269095, 0.009738948807906126, 0.01077272217007703,
0.010204139888635836, 0.011878722621462657, 0.008791215230114176, 0.008618170866539003,
0.009619524309106054, 0.00923018698162923, 0.009359515312491566, 0.01019535560134682, 0.009724539561197162,
0.008917307243973483, 0.008755299040363752, 0.008749160619627218, 0.007563632056306233,
0.009125921483704587, 0.00912057917418133, 0.009024953503962024, 0.008593017021441484,
0.008539001743411063, 0.0077288789020894914, 0.008505882150682736, 0.007793880528508453,
0.007137073770660208, 0.00864036325881898, 0.0087442821629229, 0.007532394663678133, 0.007475989064536406,
0.0062249136378814, 0.008133284956733405, 0.008150202800359694, 0.005886500506603625, 0.00830879307322175,
0.008004190551320789, 0.006817936822524643, 0.006619828666072863, 0.00744507709206664,
0.007966567792122077, 0.007723686921515764, 0.006946094763217843, 0.00655201717777527, 0.00745878563990118,
0.007332688589391182, 0.007243902755100862, 0.005995059856693842, 0.006384705826276331,
0.0069106193994812205, 0.006785604962366051, 0.00694520105241827, 0.008086832001950825,
0.0065483458100570715, 0.00792971807471622, 0.007389939010681701, 0.006622238218173152,
0.006093346083187498, 0.005943470242331387, 0.005790347196394577, 0.006015991518841474,
0.0074585179452078595, 0.005914302180586674, 0.007327967083630938, 0.007622692054537765, 0.005457709966322,
0.0057864018495092755, 0.006227527946834016, 0.007227311020178604, 0.00683375024101042,
0.004717794655451144, 0.005139781115089136, 0.0056734568019310245, 0.006533810636596172,
0.0052957619339504165, 0.005330230964573275, 0.005613558418022876, 0.005501012120941596,
0.006865234048174898, 0.006563224710196664, 0.00627450886004226, 0.005407856598678336,
0.005728048359418608, 0.005075275451592461, 0.005367957471496993, 0.005456057647457783,
0.0056746067753410895, 0.005759298367818701, 0.004937522290230845, 0.005049937578958634,
0.006823564438858739, 0.004957691795454593, 0.005144693393685884, 0.005125566905051528,
0.005815664825386193, 0.005322718743409496, 0.005094432396690536, 0.004885511080985452,
0.005312768693431281, 0.006140519934186159, 0.0048707172306822035, 0.004247224950406235,
0.0051013962283323055, 0.004468768008857296, 0.005501184091990581, 0.004599527215941634,
0.0045569707741997265, 0.005558889166590234, 0.004966879600829998, 0.004787083343144332,
0.00496453921108332, 0.005512439356112737, 0.005889432853036851, 0.00498907085038445, 0.004651913378082099,
0.0055129615632140486, 0.00573011300509097, 0.006860683583414357, 0.004279622266254592,
0.0036286795757587242, 0.0035307615625142716, 0.00426168008716013, 0.0039056383911411103,
0.004471666975871812, 0.005761601122409047, 0.0035444638527471852, 0.0038365176247170895,
0.003935816614528449, 0.003915699019386011, 0.004289903153183332, 0.0038422099298004468,
0.004423364245320045, 0.004405206257657482, 0.004962780888163252, 0.00435256673652475, 0.00428818148874052,
0.005623357491938805, 0.004397057161098928, 0.00392995552477987, 0.004305356504777592,
0.004687286893247801, 0.004298550893849096, 0.003405862651194184, 0.00463604515465704,
0.004302220894551283, 0.005082934656844372, 0.00411365927217048, 0.004677866500594974,
0.0030459499043499817, 0.004210107209069974, 0.0040547001432214526, 0.0027381580519413545,
0.004050856333527917, 0.004227770007093568, 0.004030774714838117, 0.005018345095577388,
0.0032719418783381114, 0.003351006104937369, 0.0029817384950601993, 0.0026302031217583133,
0.003280571735338526, 0.0035558689786448668, 0.004205360252928585, 0.0029079487627477647,
0.004098905124343219, 0.003542495353076447, 0.003081703792425287, 0.003492205733211449,
0.0033371069174281728, 0.003593680324382149, 0.003512297643450438, 0.004104051453726242,
0.00461652236810005, 0.0031558901785047055, 0.003720683491674208, 0.0031628684751849505,
0.0025320905454191234, 0.003412458815282662, 0.0032652928177208194, 0.003979588574427907,
0.003915366819605879, 0.004165092138446198, 0.002962712936239768, 0.003078945228170596,
0.004269886271751602, 0.0023429454169800012, 0.002621246657876327, 0.003383844038224197,
0.003323895074718166, 0.002794730183606589, 0.002823568507492382, 0.0018732382681214404,
0.002550507807689428, 0.003280275447173608, 0.002401557149488326, 0.0034376542055897514,
0.003757636667556653, 0.0026018071434755255, 0.0032089097497628245, 0.00335968538358793,
0.004228235929987932, 0.004070185016989854, 0.003165467161104971, 0.0035640277471848092,
0.0024565769155396994, 0.0030684826836295544, 0.0030653736470831064, 0.003396674034166608,
0.0021161214580388333, 0.002852054690710702, 0.002869594355293884, 0.004164764517185176,
0.003189116159160221, 0.004200297322493498, 0.0031529699833081396, 0.0034960765357650416,
0.002963131217591581, 0.0028773406478139803, 0.002103390648655477, 0.0035559125550744283,
0.0024437471075243592, 0.0021850995379818416, 0.002296971422431852, 0.004163998917976642,
0.003475776674127701, 0.0024353930988509093, 0.003708705186381849, 0.002780251746758495,
0.0030948908307345847, 0.003008290999260225, 0.0021980666043837117, 0.0023672687506368674,
0.0027605360975821894, 0.0026993031426595735, 0.0032048289706222022, 0.0034214606724572148,
0.002842112348722367, 0.002955962325241671, 0.003008353360388355, 0.0024773763059311024,
0.002961317035250886, 0.0028743630094741094, 0.0024097423300872833, 0.0024652174803904926,
0.0018506375783881594, 0.0022462038803000724, 0.003346956914236216, 0.0021976059937178433,
0.0029280172989274433, 0.002607957666596576, 0.002810332587963785, 0.002713494183808052,
0.0027457057695228285, 0.0032415839553614203, 0.004271236735775346, 0.0026016717752654584,
0.0023875766469286645, 0.0035489254711665126, 0.003277309690398397, 0.0020115319863025435,
0.0025063152911679936, 0.0020001863198795037, 0.0029542504124628974, 0.0031980360606094107,
0.0030625714106918165, 0.0027177858417526293, 0.0030698941718919743, 0.002241708401068536,
0.0023102308236407224, 0.0022258592657872214, 0.0016790062781474261, 0.0020348402045951845,
0.001961215630854895, 0.0020603480465456415, 0.0031117380592795597, 0.0030579218903358197,
0.002440217039597883, 0.0024463933404208545, 0.001912145499700273, 0.002578561692433823,
0.0028966538803206275, 0.00321378026445791, 0.0029051831211327228, 0.002659289992749109,
0.0017522510473449984, 0.003473874756688019, 0.0020188003195462443, 0.0023216185468463665,
0.0026489692931831997, 0.0030489806673467683, 0.0021244396962101747, 0.0021834194289094737,
0.0029166554677804014, 0.0028895056043338626, 0.002109997985330665, 0.002988235169001655,
0.0023148214752466176, 0.0019483039500555607, 0.0021936858971598667, 0.0034709255742900497,
0.0022301809673817845, 0.002972933062378161, 0.0025700031402448075, 0.002376834989747749,
0.00237939503787311, 0.0028678781160015204, 0.003280452137994871, 0.002239143894951667,
0.002054123923860061, 0.0025146206840045123, 0.0021704534681653057, 0.002199003494405588,
0.002492286330088973, 0.002027095573491806, 0.0022916206999834686, 0.0032376010041498377,
0.002148027115779769, 0.002000001475722456, 0.002498166879457358, 0.0015826331357438903,
0.0017522124237525532, 0.002566311738254626, 0.002768004638581715, 0.0017476825052754066,
0.002260754235856666, 0.0012499641668447339, 0.0018814508131381445, 0.0033585303547201874,
0.0019435347456155795, 0.002161104112448811, 0.0018020590772130163, 0.001353069934423729]
if __name__ == '__main__':
min_loss = min(loss_list)
index = loss_list.index(min_loss)
print(min_loss)
print(index)
y = loss_list
fig = plt.figure(1)
plt.xlabel('迭代次数')
plt.ylabel('损失值')
plt.plot(y)
plt.text(400, 0.5, 'min: %f' % (min_loss), fontsize=12)
plt.text(400, 0.6, 'epoch: %d' % (index + 1), fontsize=12)
plt.show()

从实验结果来看,在第100次迭代后就开始慢慢收敛,10000张测试图像最大准确率为84.62%
JupyterLab
[conda]JupyterLab安装
JupyterLab是Jupyter Notebook的升级版本,安装JupyterLab替代Jupyter Notebook
启动
$ jupyter lab
远程访问配置
参考:
配置Jupyter Lab,实现远程登录
生成密码
$ jupyter notebook password
配置登录密码,得到的密码保存在~/.jupyter/jupyter_notebook_config.json
$ cat jupyter_notebook_config.json
{
"NotebookApp": {
"password": "sha1:08e08xxx7976:f6xxxx8293eed64011ecf6xxxx6fb9ed1a8ef"
}
参数配置
打开配置文件,加入如下设置:
# coding=UTF-8
c = get_config()
# Kernel config
c.NotebookApp.ip = '*' # 就是设置所有ip皆可访问
c.NotebookApp.open_browser = False # 禁止自动打开浏览器
c.NotebookApp.password = 'sha1:117e0cc9673e:5ca67b637e0e2180027d36f8830c5711b7cf8e2f' # 使用之前设置的密码
c.NotebookApp.port = 7788 # 访问端口
c.NotebookApp.allow_remote_access = True
基本功能介绍
参考:利器|JupyterLab 数据分析必备IDE完全指南
本章介绍JupyterLab常用的基本命令和配置
- 自动补全
- 文档查询
- 快捷键
- 插件配置
自动补全
点击TAB键即可
文档查询
输入函数或者变量,之后加上?即可查询该函数或变量的相关文档


[PEP8]代码格式化
安装插件,实现PEP8风格编程(主要作用于python)
手动安装
参考:Prerequisites and Installation Steps
conda安装如下:
$ conda install autopep8
$ jupyter labextension install @ryantam626/jupyterlab_code_formatter
$ conda install -c conda-forge jupyterlab_code_formatter
$ jupyter serverextension enable --py jupyterlab_code_formatter
安装完成后重启JupyterLab
配置
配置Autopep8,以及设置格式化快捷键
点击菜单栏Settings -> Advanced Settings Editor
- 选择
Jupyterlab Code Formatter,添加如下配置
{
"preferences": {
"default_formatter": {
"python": "autopep8",
}
}
}
- 选择
Keyboard Shortcuts,添加如下配置
{
"shortcuts": [
{
"command": "jupyterlab_code_formatter:autopep8",
"keys": [
"Ctrl L"
],
"selector": ".jp-Notebook.jp-mod-editMode"
}
]
}
使用Ctrl + L作为格式化代码的快捷键
目录生成插件
参考:提升 Jupyter Notebook 使用体验的五个隐藏功能
点击右侧侧边栏的插件管理器图标,查询toc插件并安装
安装完成后在右侧侧边栏会出现Table of Contents图标

在目录列表中会显示每个cell,点击即可快速跳转